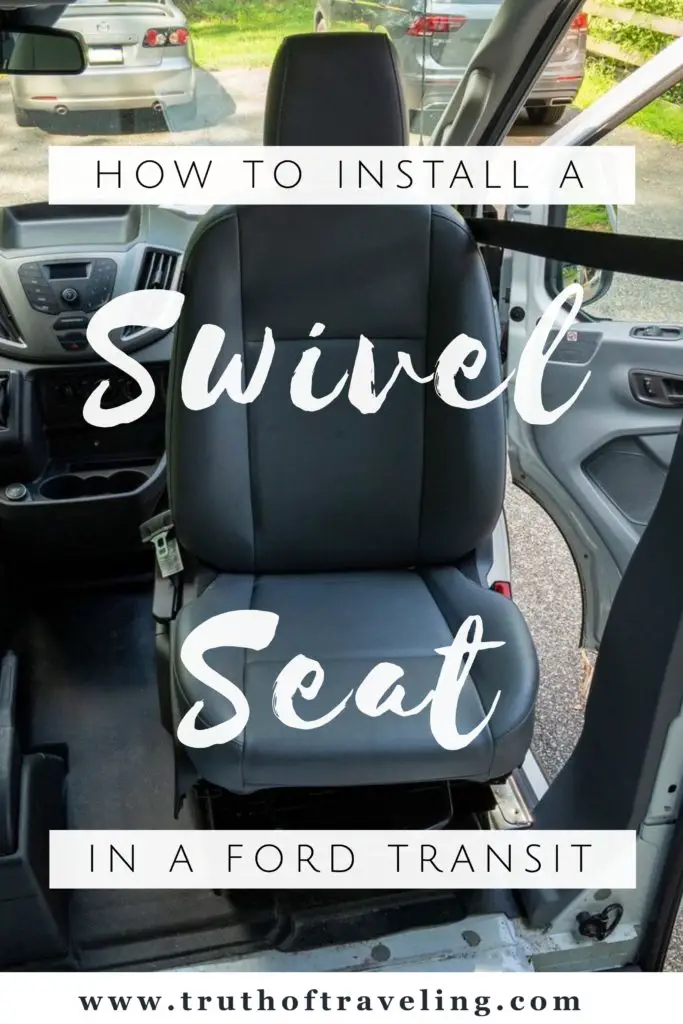
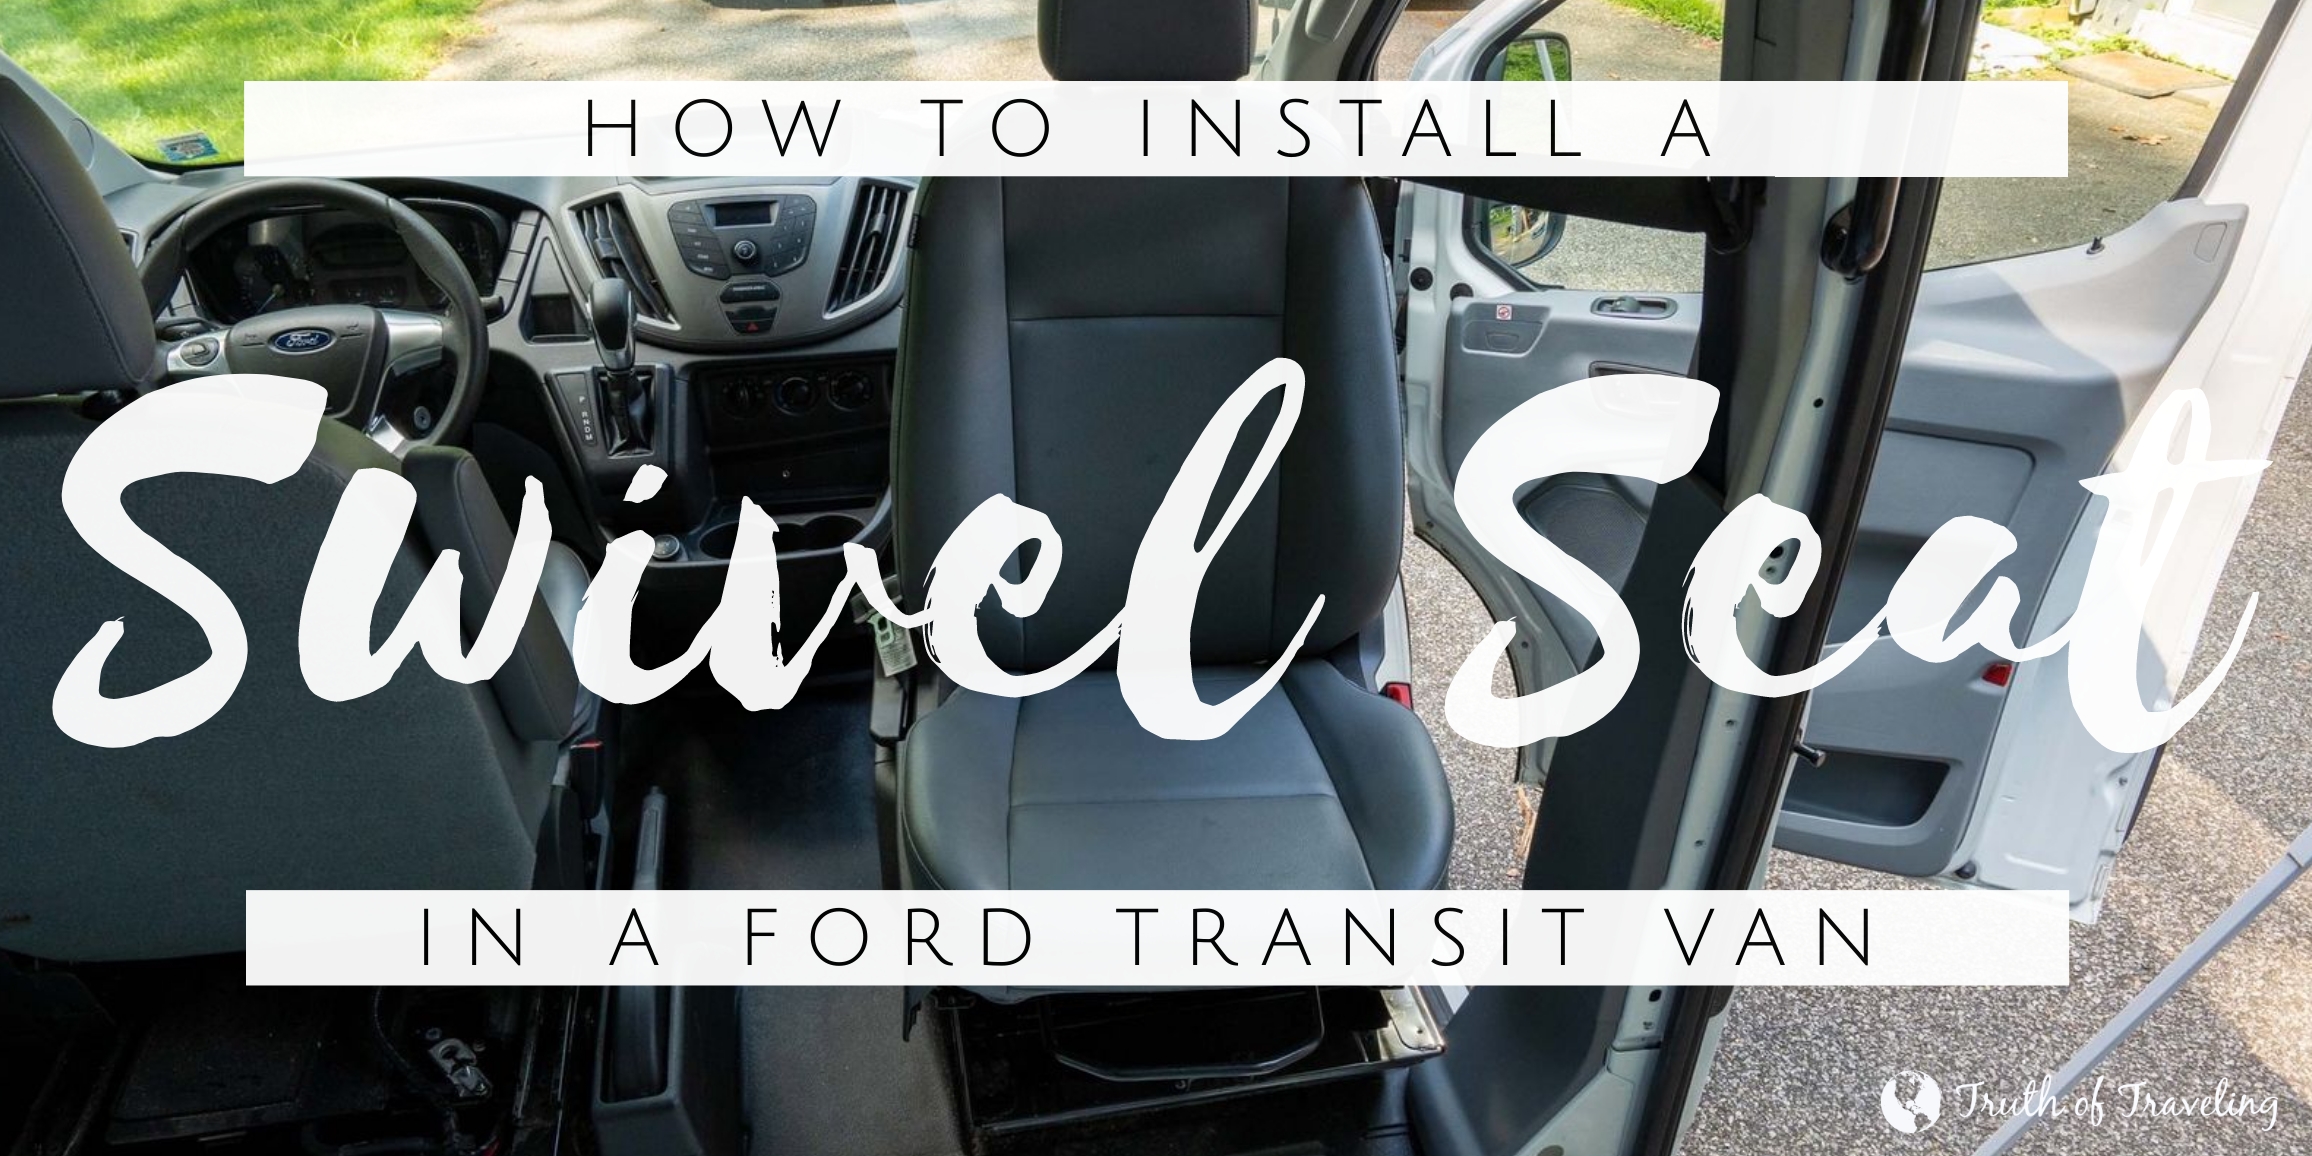
Our Ford Transit van conversion is officially underway! Our first project in our 2019 Ford Transit was installing a swivel seat to the passenger seat. A swivel seat is basically a really heavy metal plate that allows the seat (driver or passenger) to swivel 180 degrees so it’s facing the back of the van. Here is how to install a swivel seat in a Ford Transit van including all the tools you will need to install it and how long it took!
*Disclosure: This post contains Amazon affiliate links. As an Amazon Associate we earn from qualifying purchases. This means at no additional cost to you, we will earn a commission if you click through a link and make a purchase. This post may also contain other affiliate links and non-affiliate links to products and websites.
Is a Swivel Seat Necessary?
First, let’s talk about the actual swivel seat. It basically allows the seat to face the back of the van in order for it to be used while the van is parked. In such a small space you want to take advantage of all the extra space and seating that you can. So when things can work for multiple purposes it can save space and also make the cab area more functional.
A swivel seat ultimately depends a lot on your layout. If you put walls behind both cab seats then a swivel seat will be of no use to you. If you have no walls behind the seats then you could put swivel seats on both the driver’s and passenger’s seats to make use of them both. It gives you an extra seat in the van to sit, to work in or just to toss random stuff you want to get out of the way.
Where to Buy a Swivel Seat?
There are a few makers of swivel seats for Ford Transits as well as Sprinter vans and Ram Promaster vans. They vary in a few ways such as:
- Price
- How much it makes the seat wobble- because you’re adding something underneath the seat it can make the seat a little more wobbly than without the swivel seat.
- How much height it adds to the seat- the overall thickness of the swivel plate varies a lot depending on where you get it from. We can barely tell the height difference between the driver and passenger seat in our van now that one of them has a swivel seat. But if you have a low clearance in the cab of your van this might be more important to you.
- How easy it is to swivel or turn from facing forwards to facing backwards- some of them have a lot more friction and stick more than others.
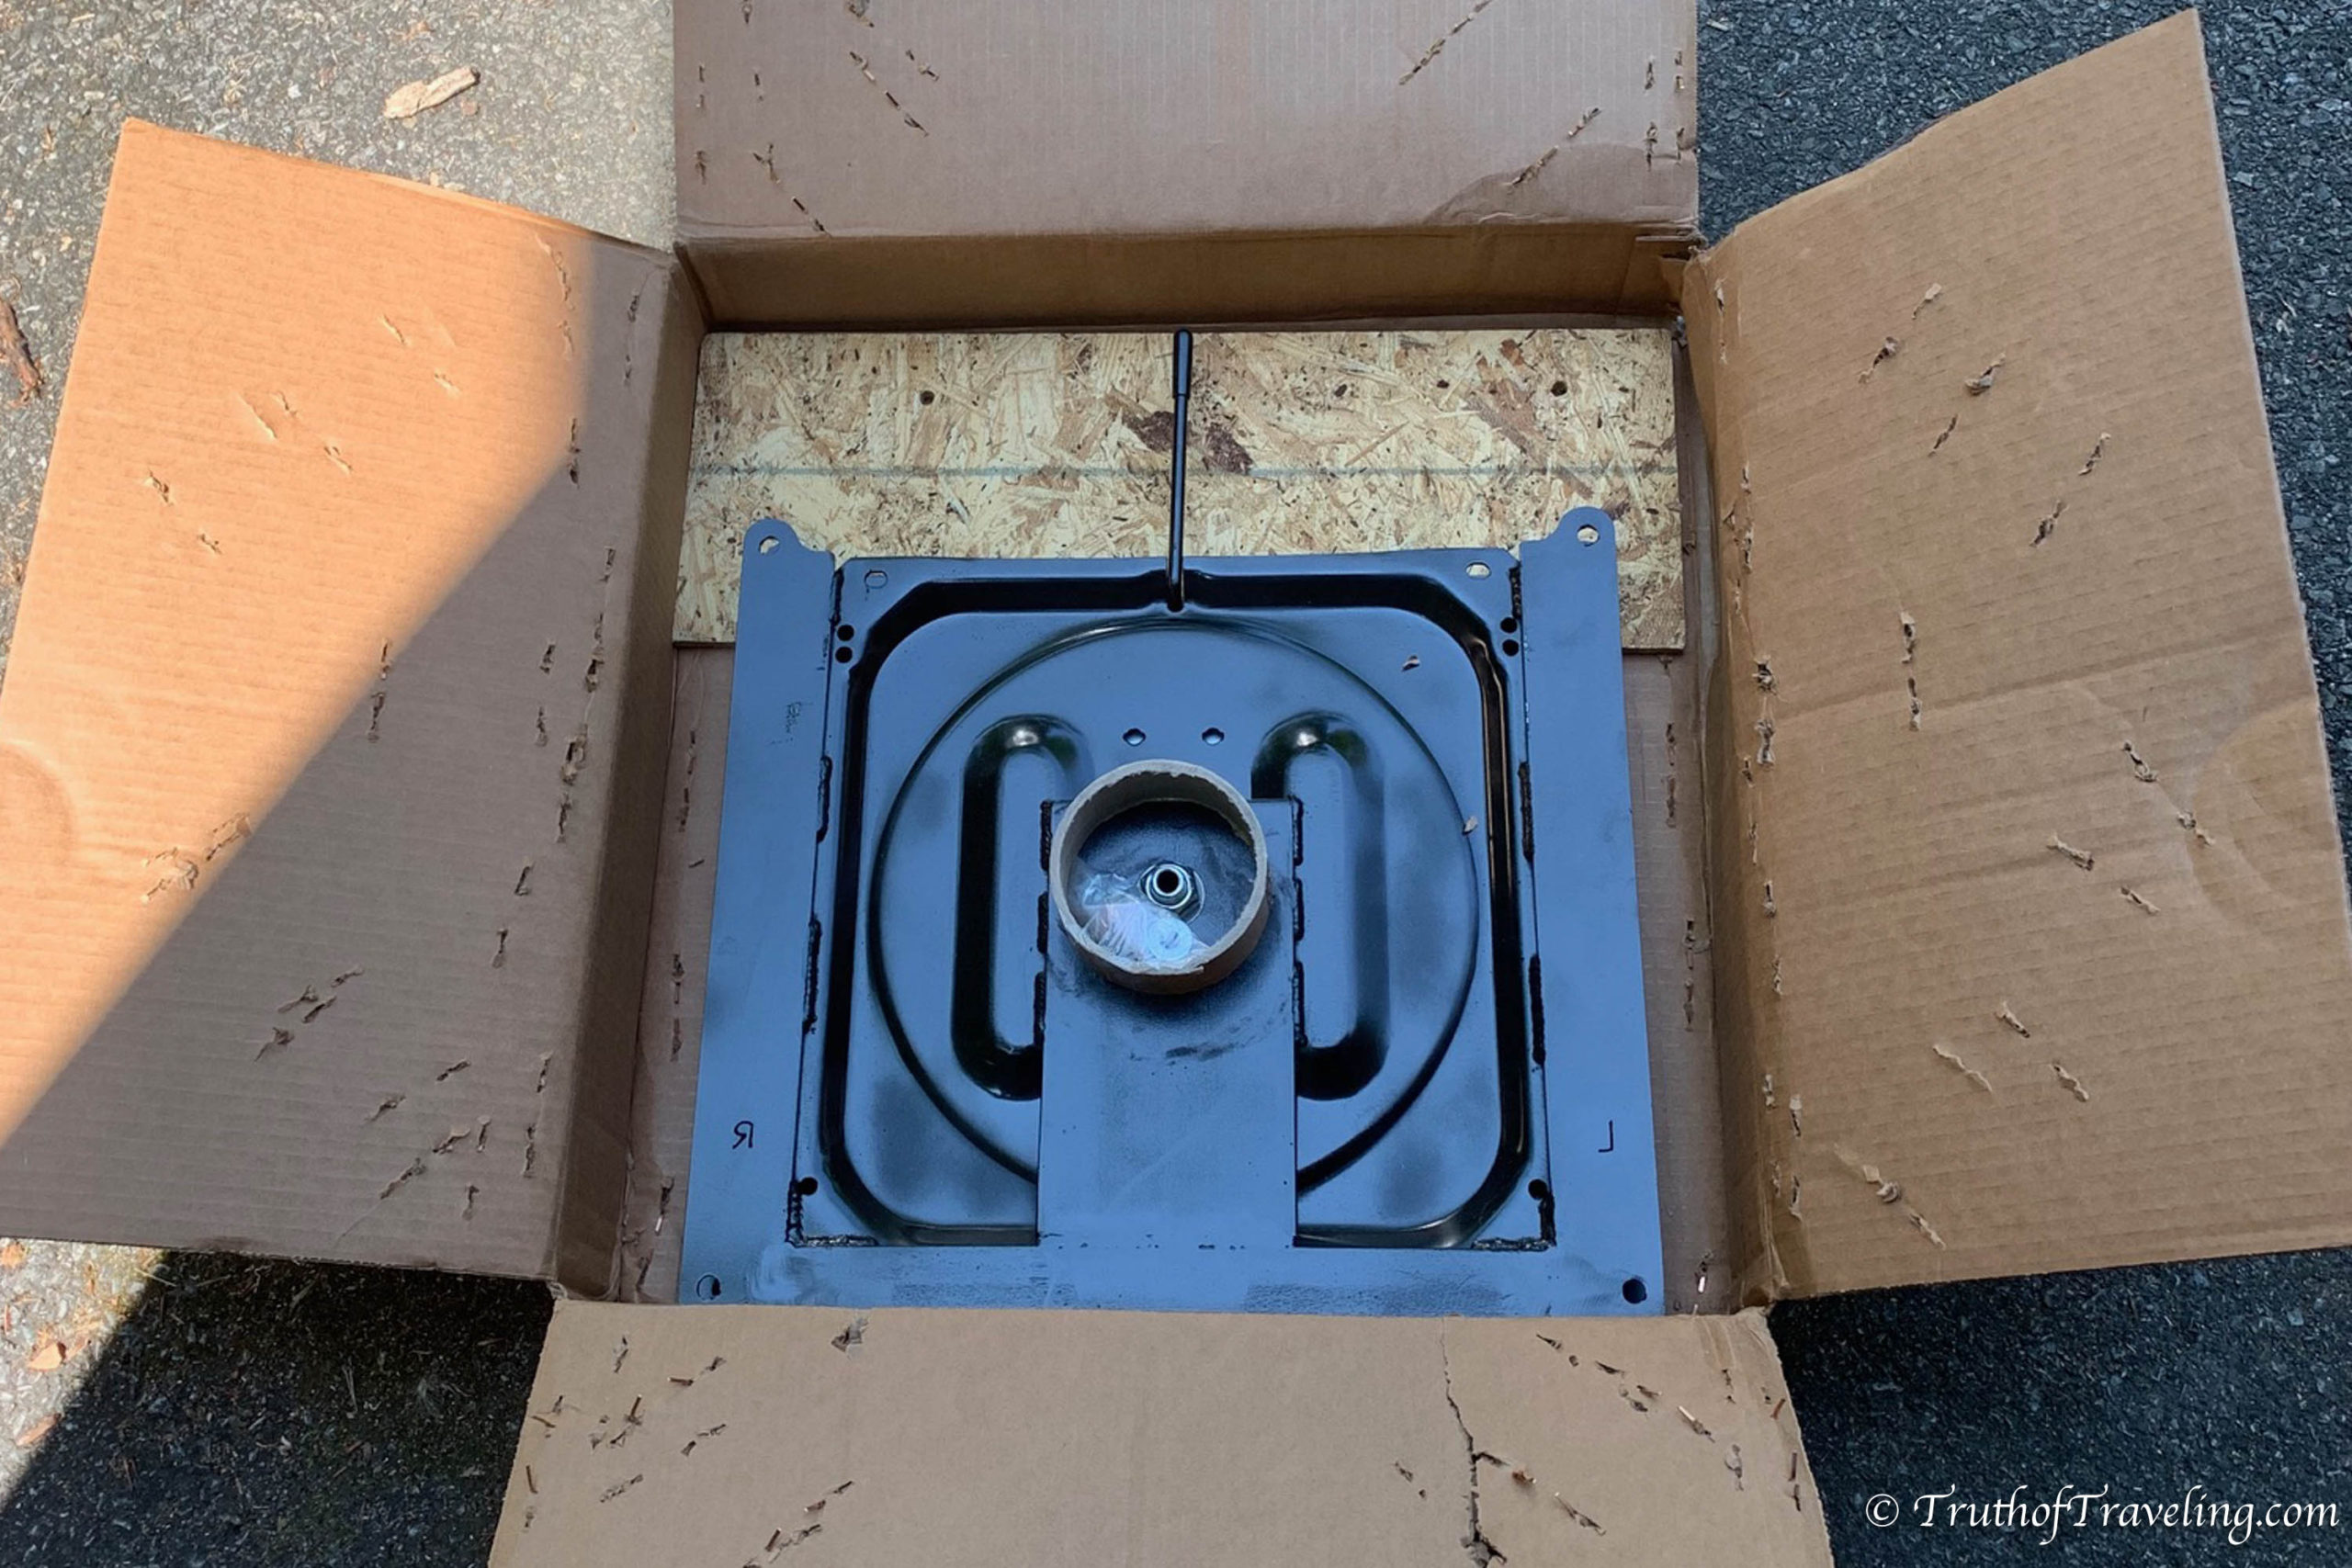
We bought a swivel seat from DiscountVanTruckSUV and it cost $199 USD + shipping. It took about 7 days from when we ordered it to when it was delivered to us. It is definitely one of the cheapest options for a swivel seat, however, it does come with its challenges.
- Pros: cheap, almost no wobble once installed, cheap (seriously swivel seats are expensive and so is everything else you need to buy for a van so an opportunity to save money is nice)
- Cons: requires an extra step to install because of how it’s built, doesn’t swivel very smooth so you need to put some muscle into it
The two other popular options are the Scopema swivel seat but it costs $400 plus shipping which is a lot of money just to make a seat turn around. It’s also the thinnest option in terms of added height and turns the smoothest. The other option is the SwivelsRus swivel seat which costs $329 plus shipping. But it’s the thickest swivel seat plate which means it’s going to add the most height once it’s installed. However, it is the lightest in weight which is important to keep in mind and also pretty smooth to turn. It depends on what’s most important to you but for us budget made us choose the DiscountVanTruck swivel seat.
Read More: Why We Bought a Ford Transit Instead of a Mercedes Sprinter Van
What Do I Need to Install a Swivel Seat?
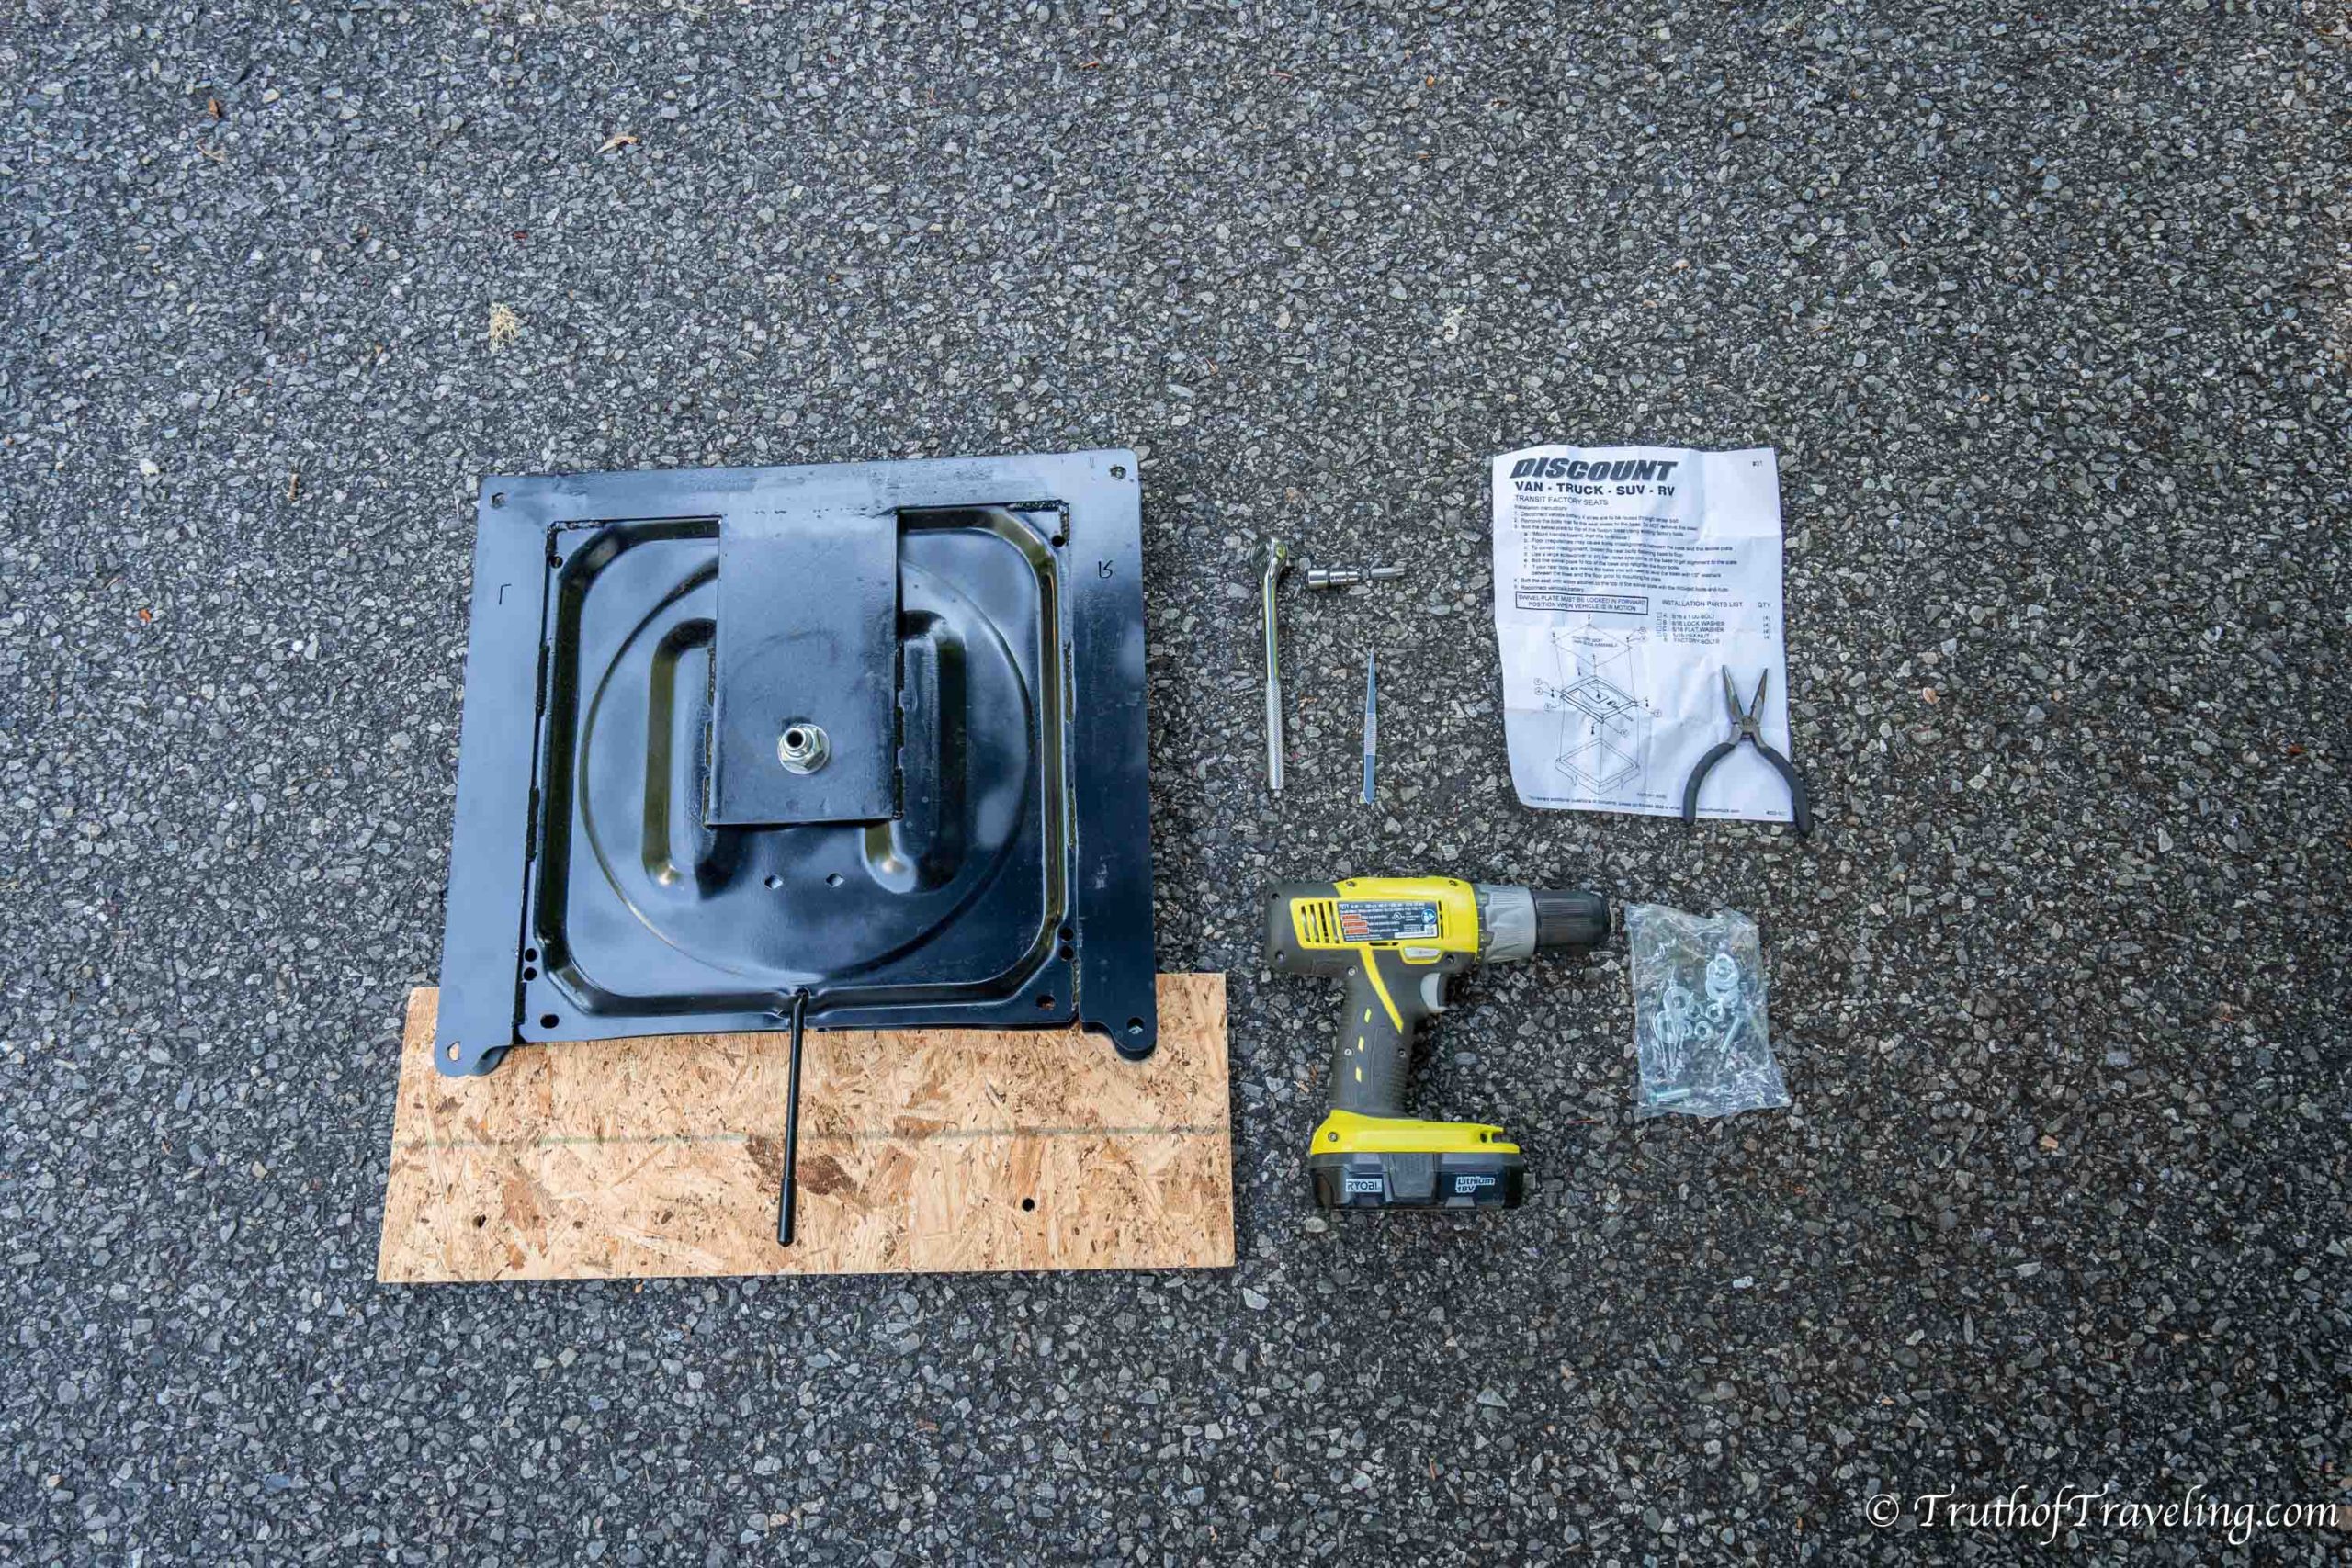
Here are the tools you will need to install a swivel seat:
- A swivel seat
- Ours came with 4 screws, 4 washers, 4 locking washers, and 4 bolts to attach the swivel seat to the seat framing
- Drill
- Wrench
- Ratchet wrench
- Needle nose pliers
- Tweezers
- Headlamp– seriously if you don’t already have a headlamp you need to get one! We have used them so much more than we ever thought we would!
Step 1: Disconnect the Battery (under the driver’s seat)
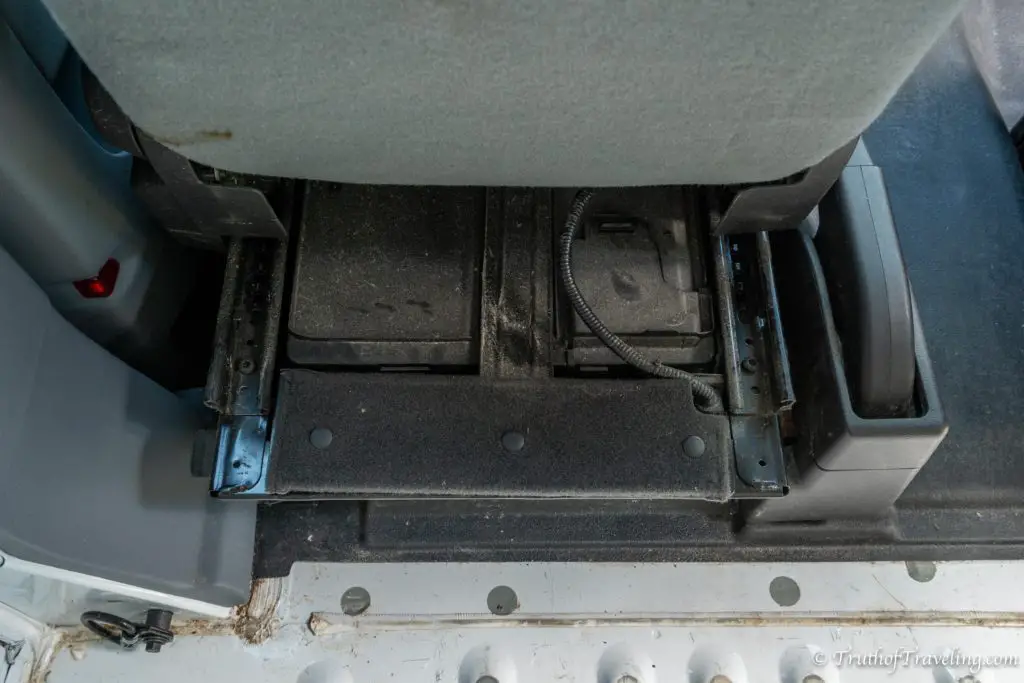
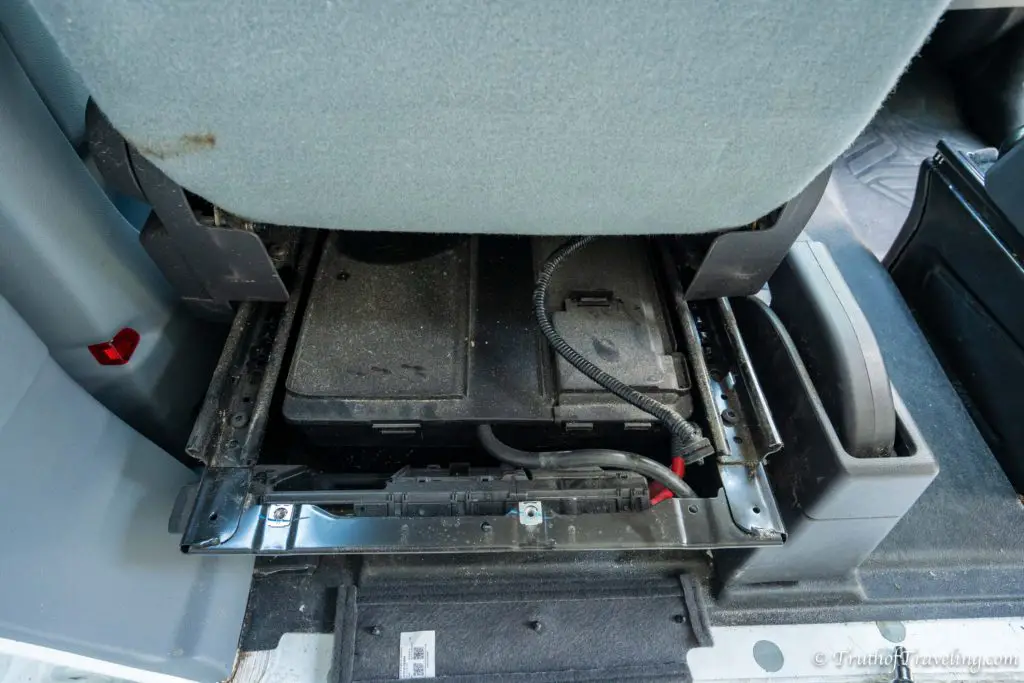
You only need to do this if you are installing the DiscountVanTruck swivel seat because of how it’s designed. There is a plastic box that is attached to the bottom of the seat that has wires for the seat. The box is physically too big to fix through the center hole of the swivel seat. For that reason you need to unplug and then replug in the wires during the swivel seat installation. Don’t worry we will go through exactly what to do below!
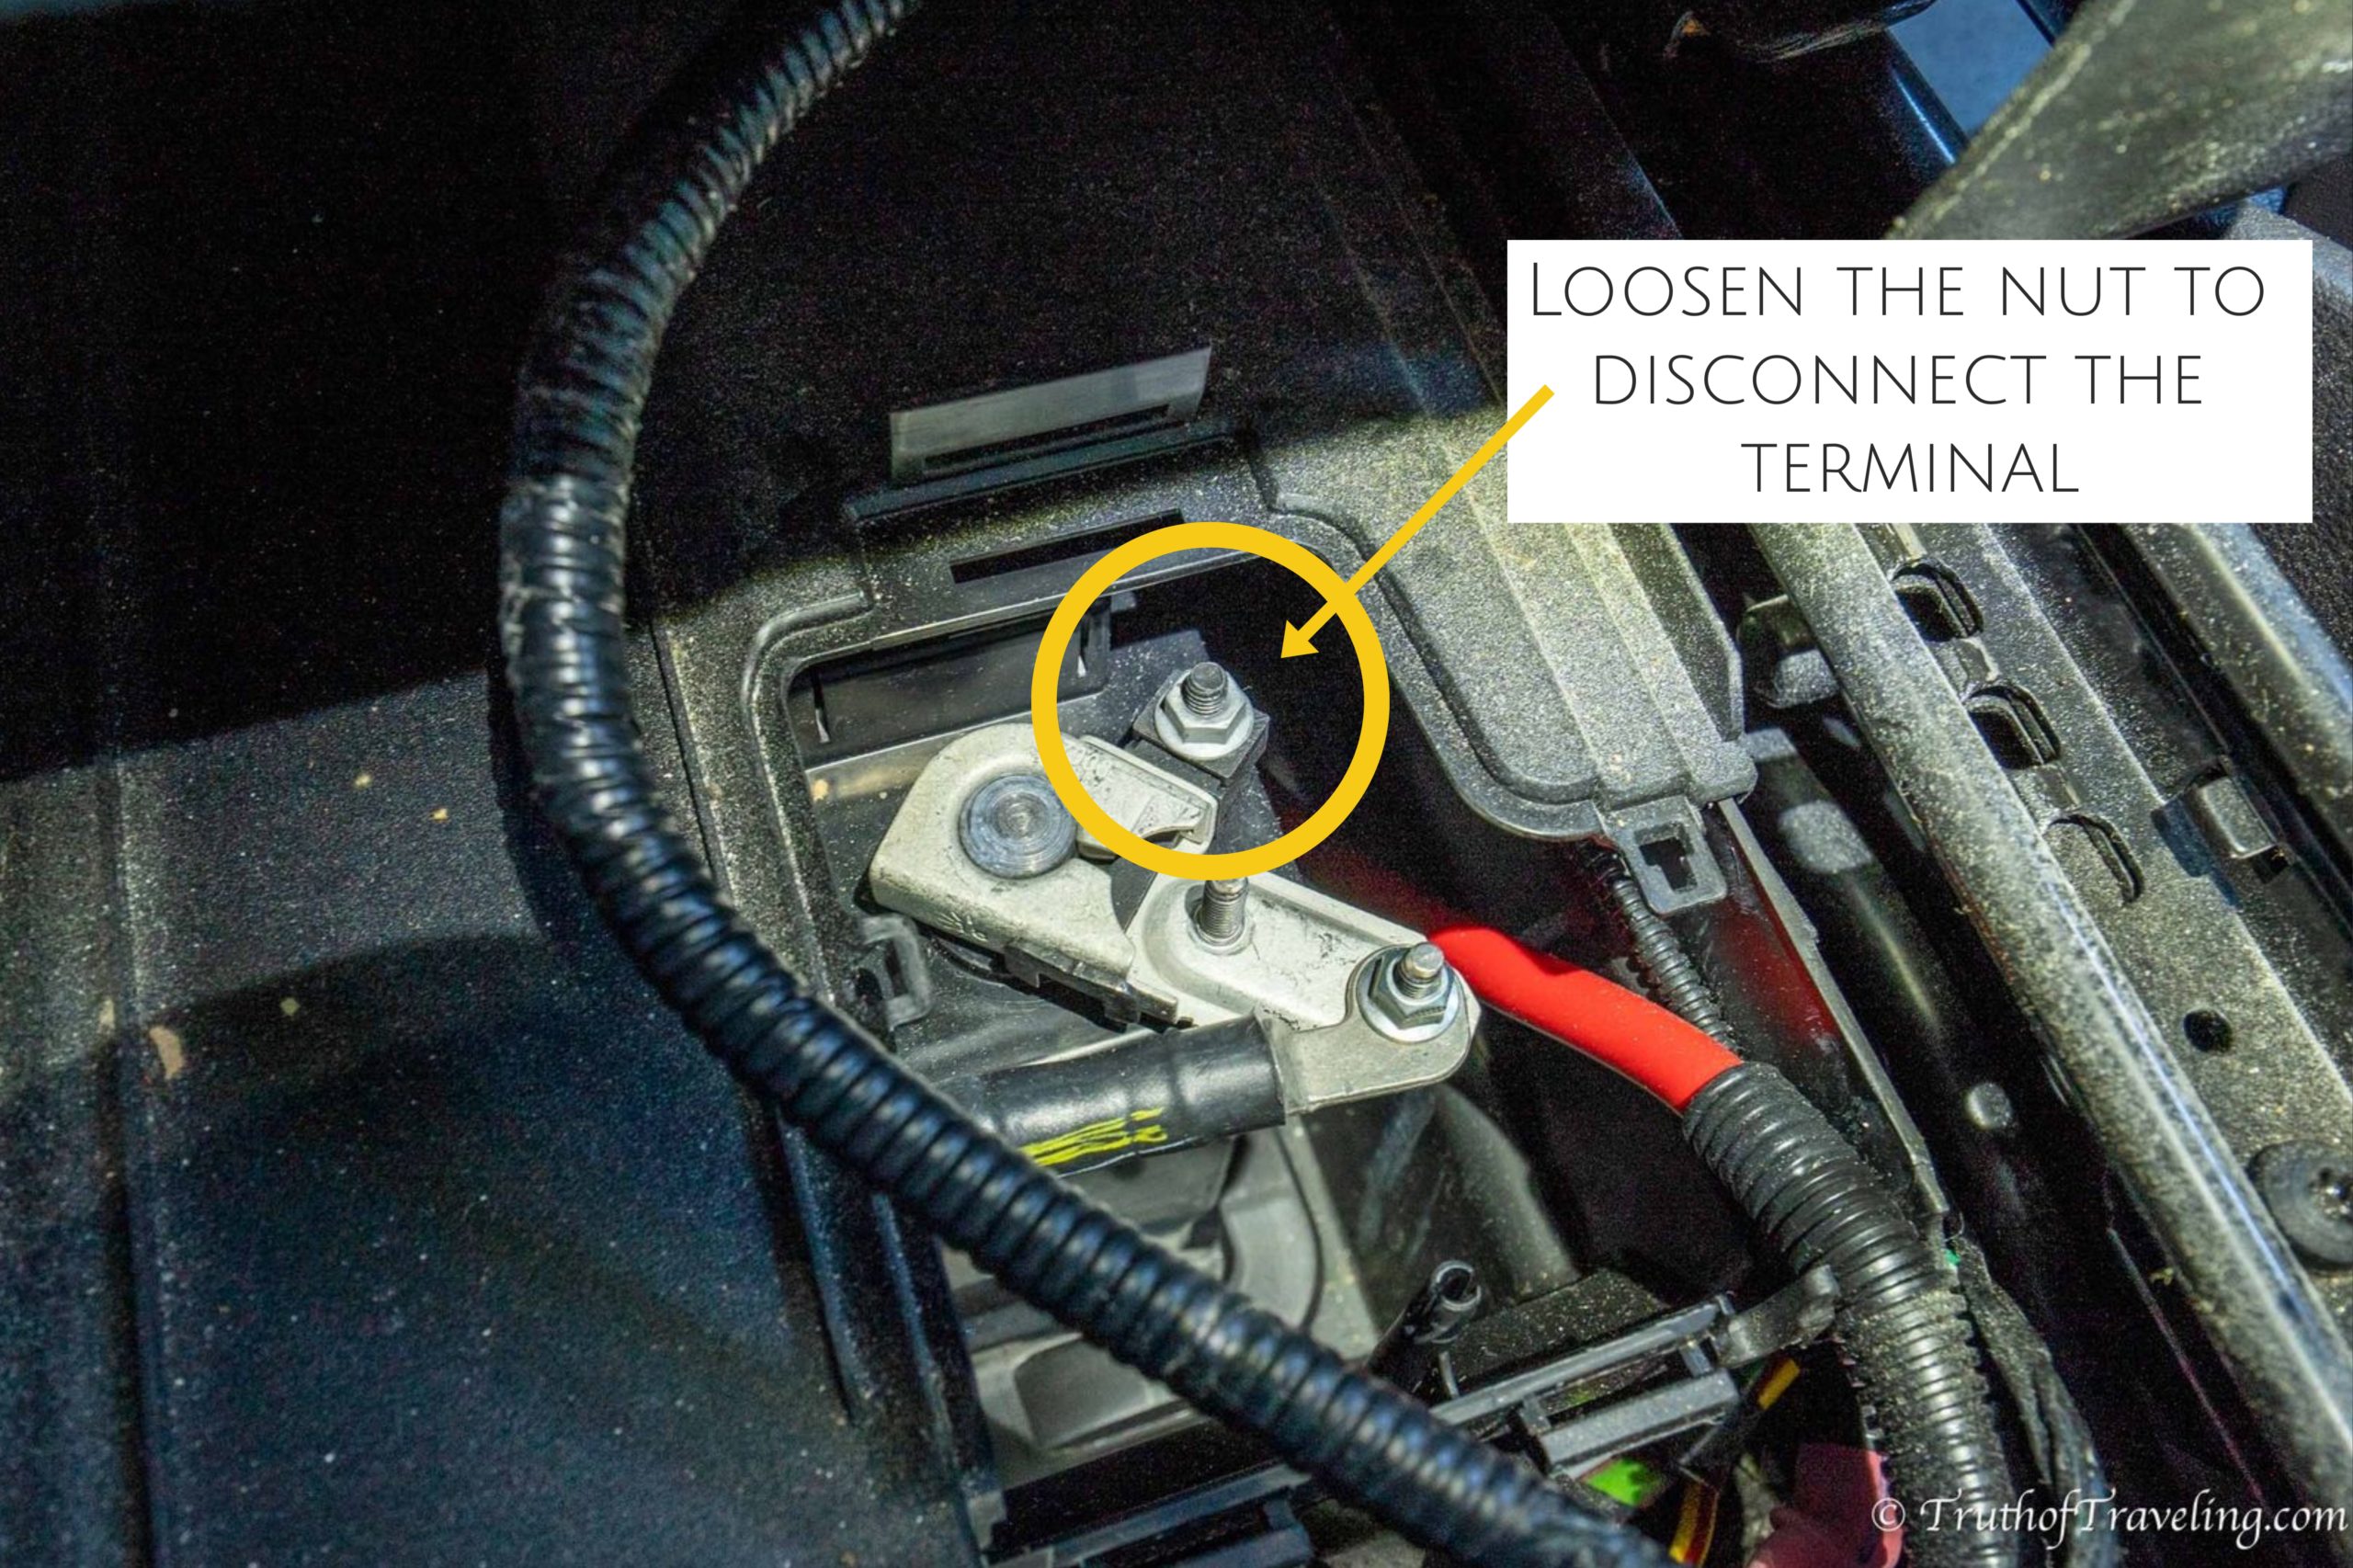
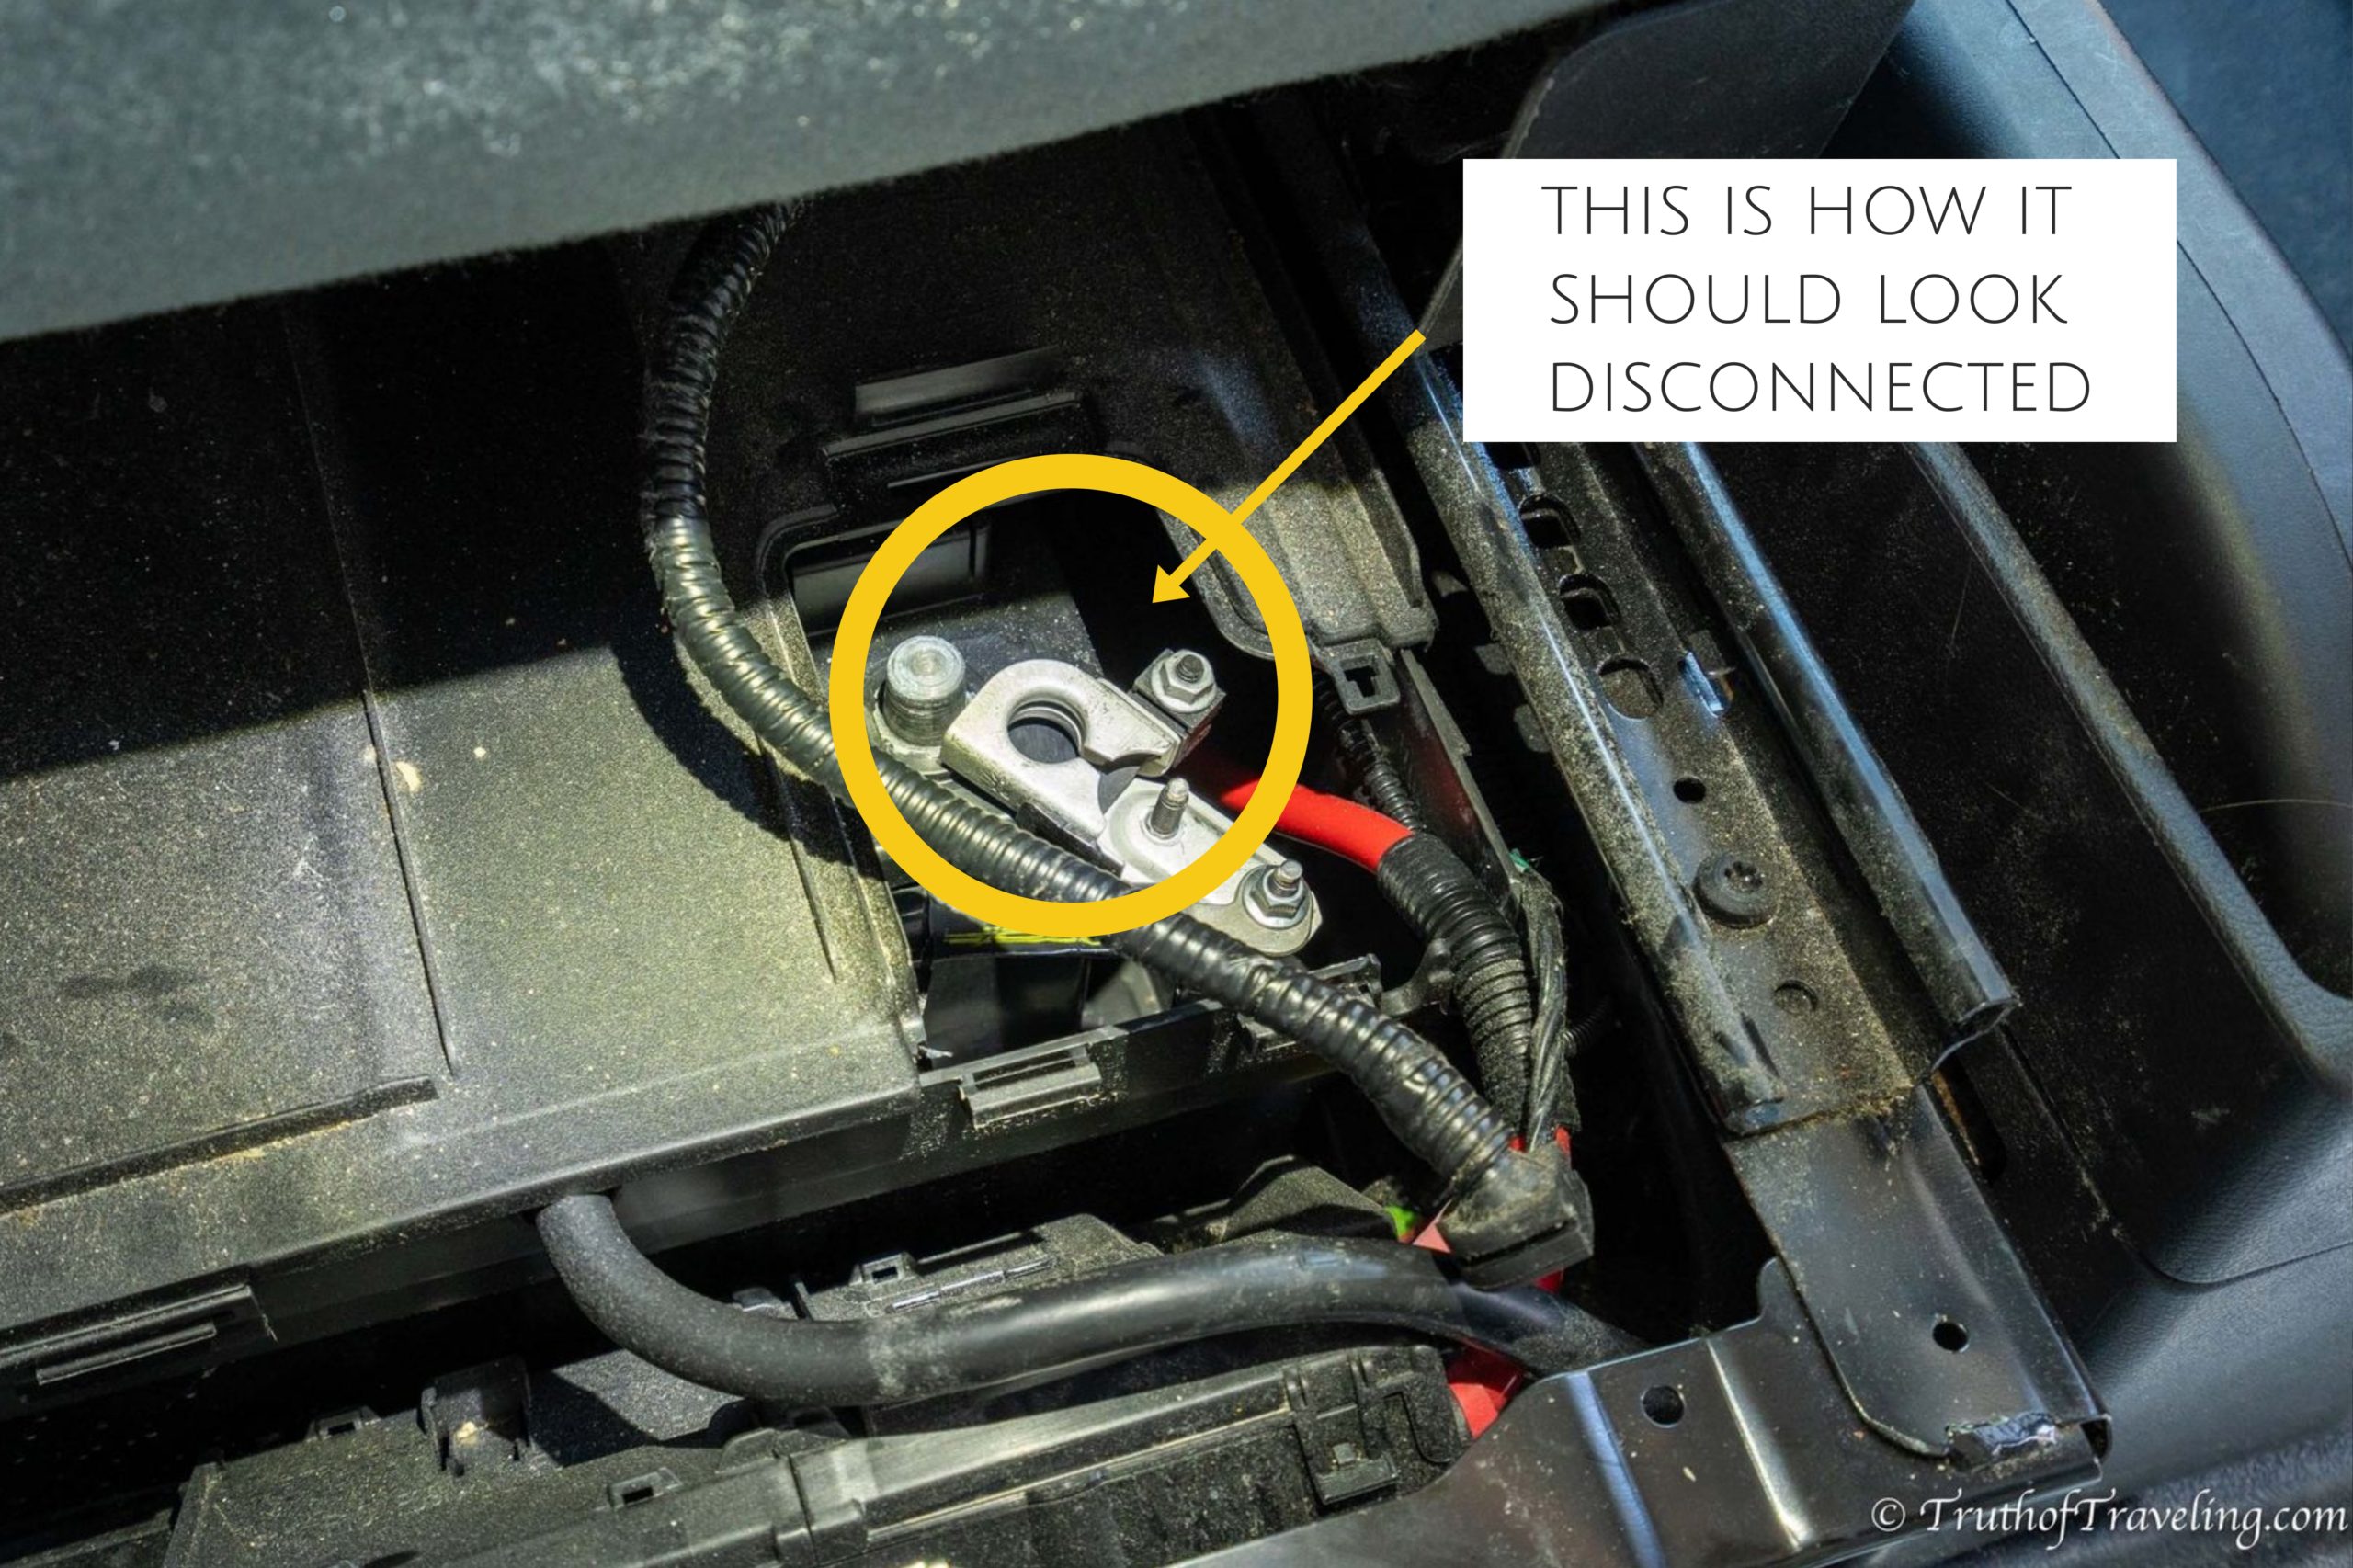
Before you touch any wires make sure to disconnect the battery! In our 2019 Ford Transit the battery is underneath the drivers seat. There is a small piece of fabric with 3 plastic fasteners. Pull (really hard) and the fabric cover will come off. You might have to cut zip ties off the black tubing in order to get the metal cover off because the wires are zip tied to the metal cover for stability. Then you will see the battery terminal which you need to loosen the nut to disconnect the battery. You can check the lights inside the van to double check that you have disconnected it correctly.
Step 2: Disconnect Wires Underneath Passenger’s Seat
Attached on the under side of the passenger seat is a black plastic box. It has wires connected to it for the seats airbags. Loosen the bolt on the front and the front of the box will come off. Once you pull it off it will be disconnected from the bottom of the seat so you can take the seat off.
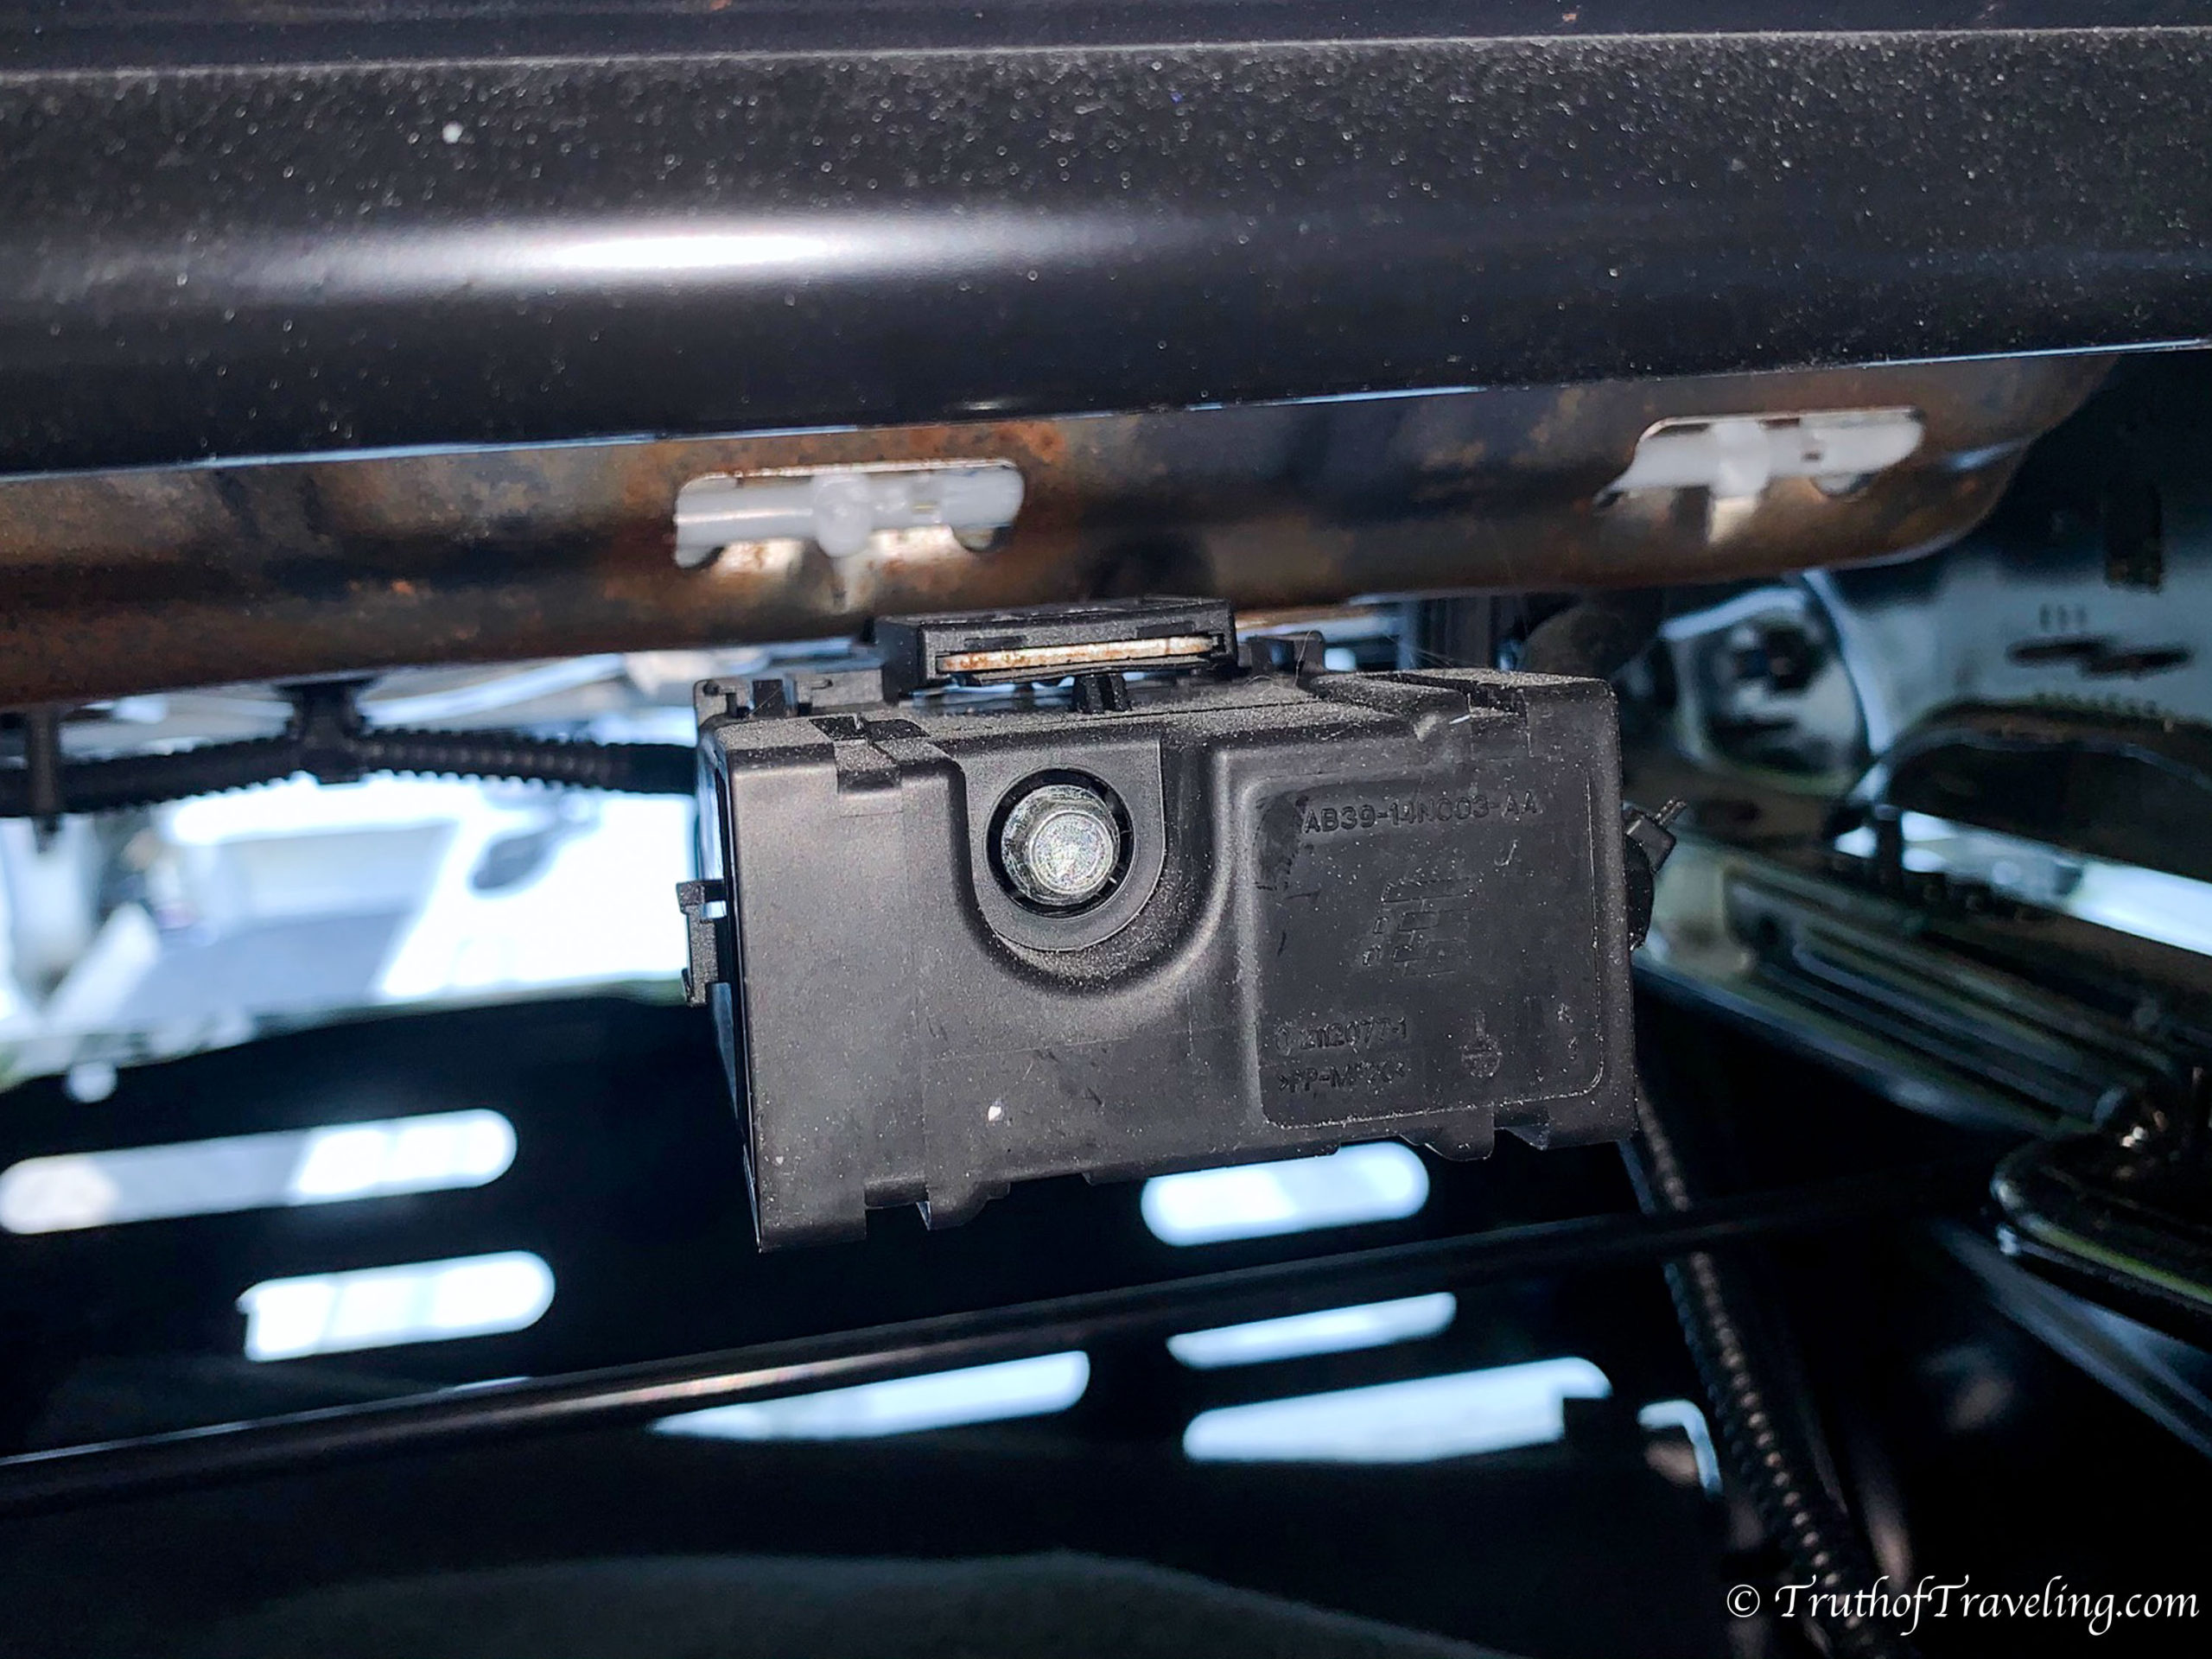
- If you try to take the seat off without disconnecting the box first you might damage the wires or the box!
Step 3: Take Seat Off
There are 2 screws in the front of the seat and 2 screws at the back of the seat. They are on black tracks. Unscrew all 4 of the screws in order to take the seat off the platform. Because the screws are set in the tracks you need a ratchet wrench in order to unscrew them.
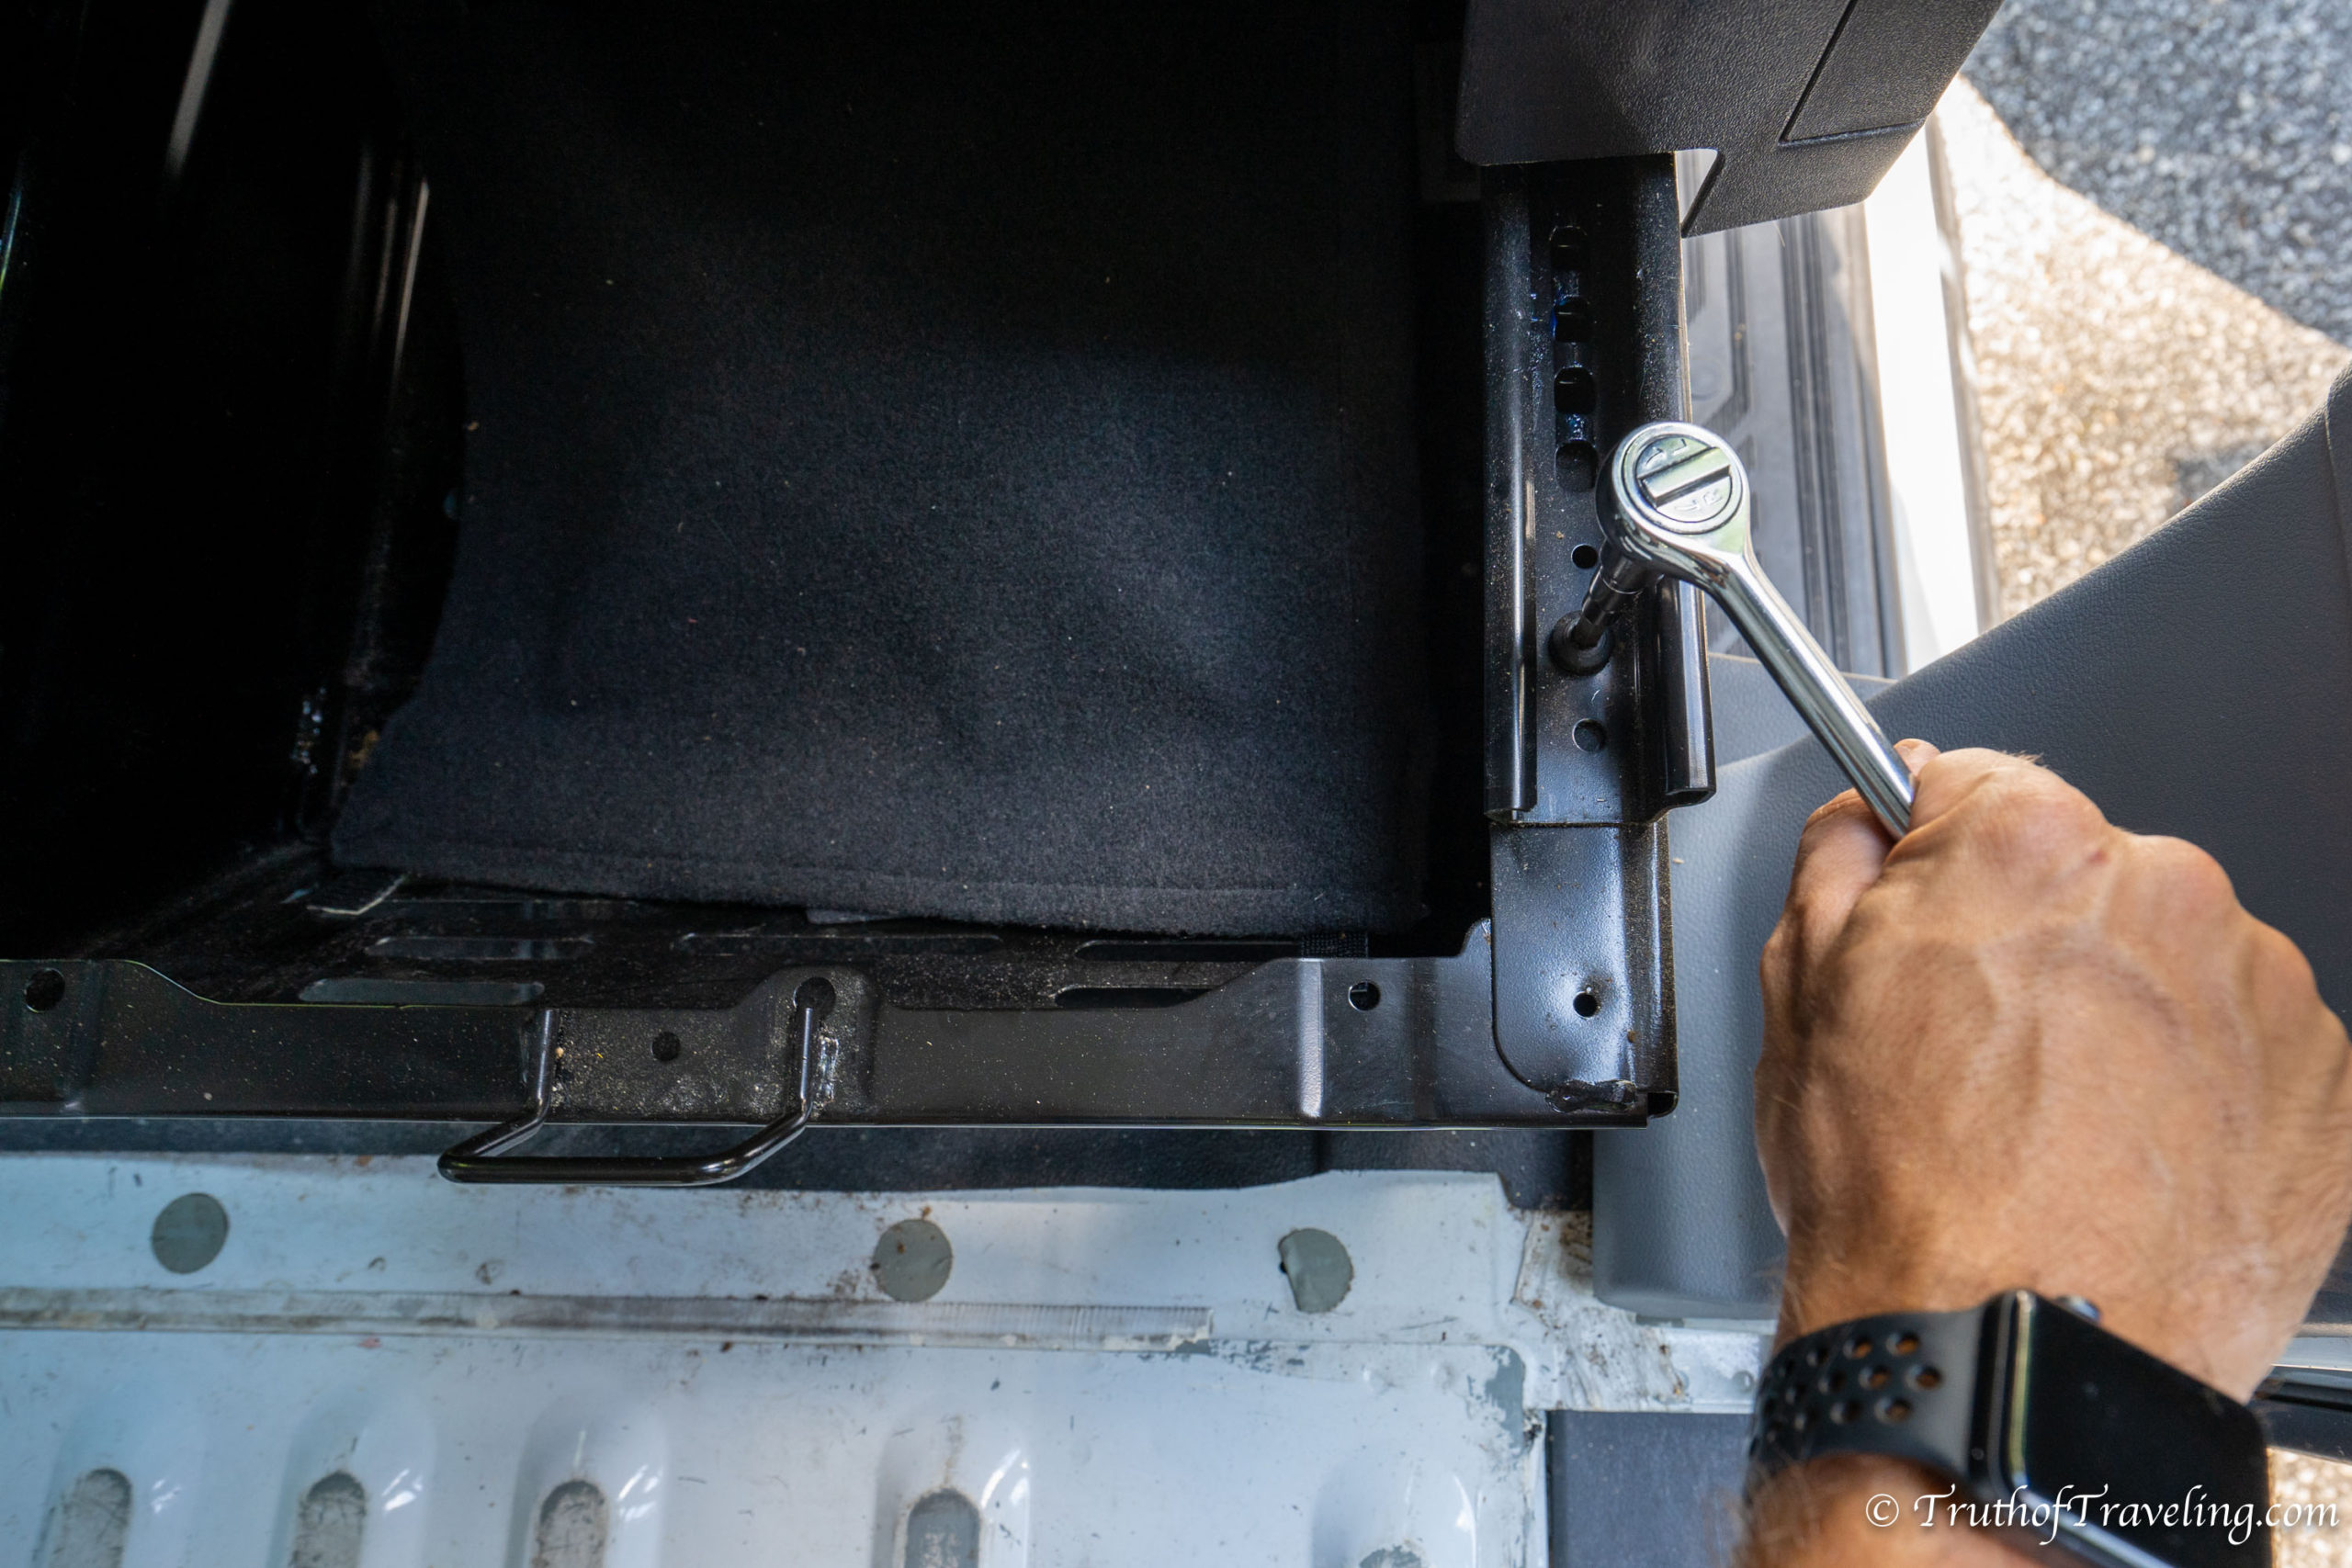
Once all 4 screws are off you should be able to lift the seat off the platform. Be careful because the seat belt will still be attached! So you can’t take it too far without possibly ripping the seatbelt out which you definitely don’t want to do. We just put it behind the seat platform and had plenty of room to put the swivel seat in.
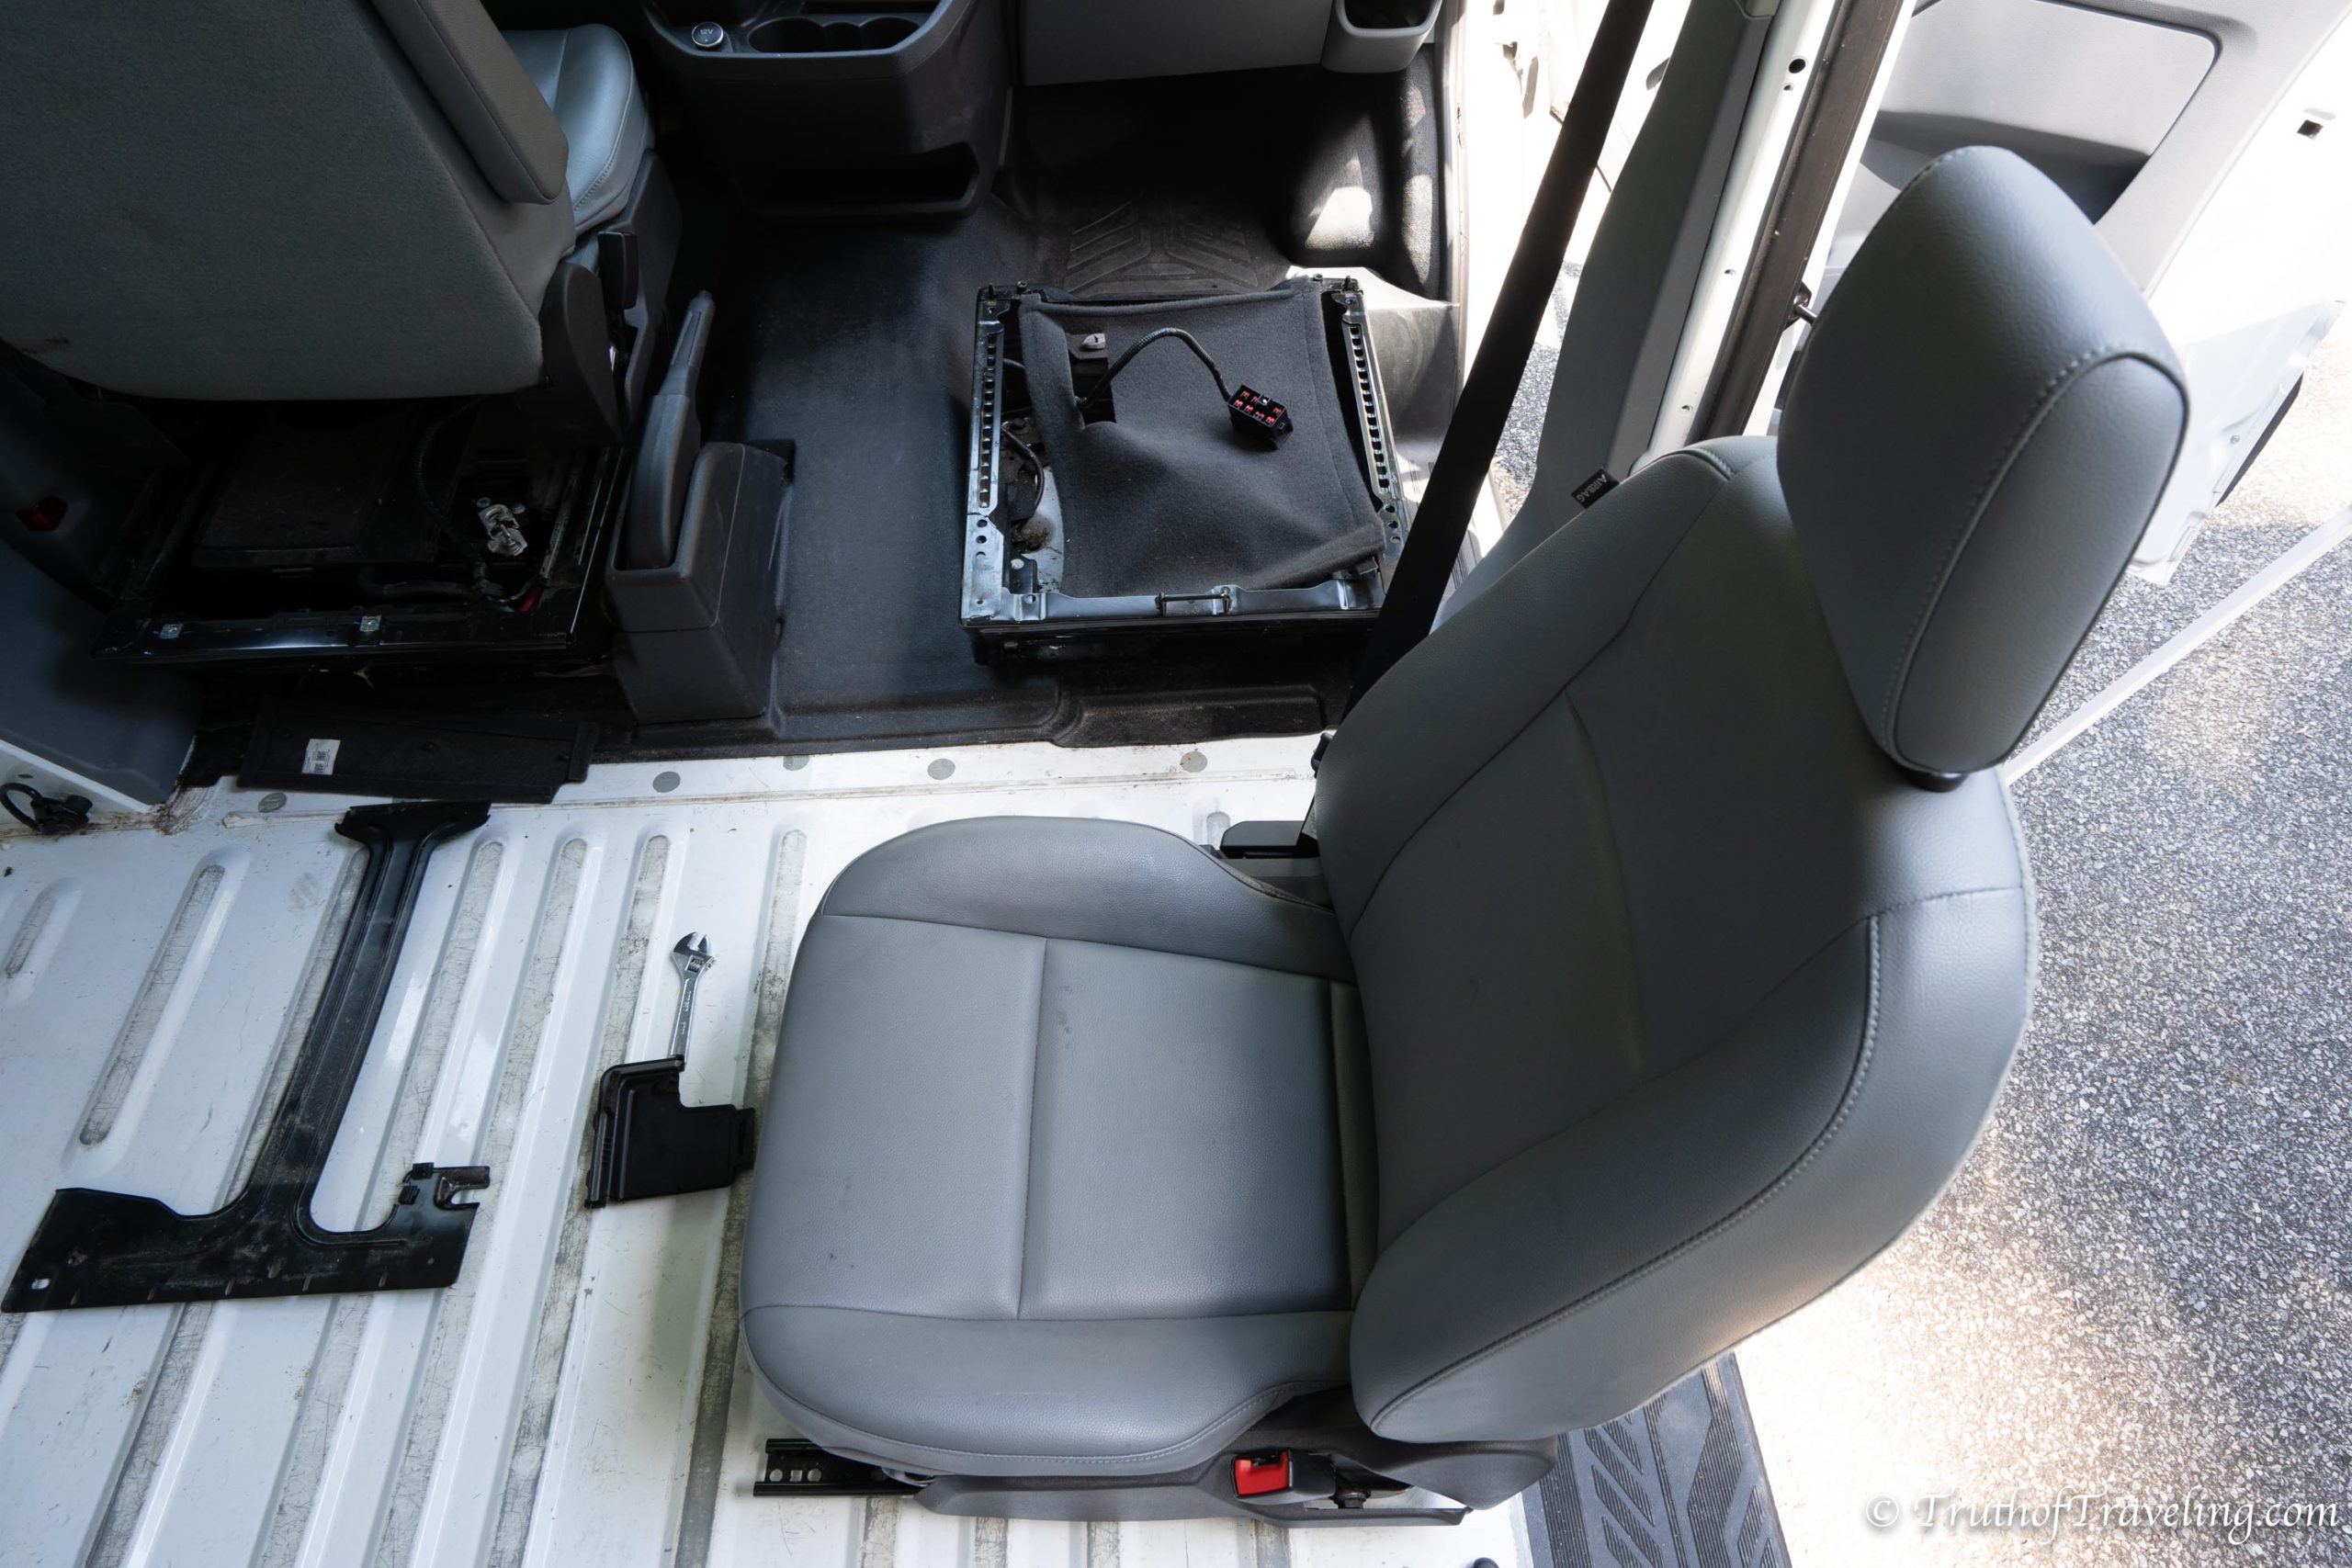
Step 4: Unplug Wires (**Only DiscountVanTruck Seat**)
This step is only necessary if you buy the DiscountVanTruck swivel seat. It’s necessary because the hole in the middle of the DiscountVanTruck swivel seat plate is very small. It’s possible to thread the wires through the seat plate, however, the black plastic box will not fit through that center hole. So you need to unplug the wires, thread just the wires through the seat plate and then plug the wires back into the black plastic box.
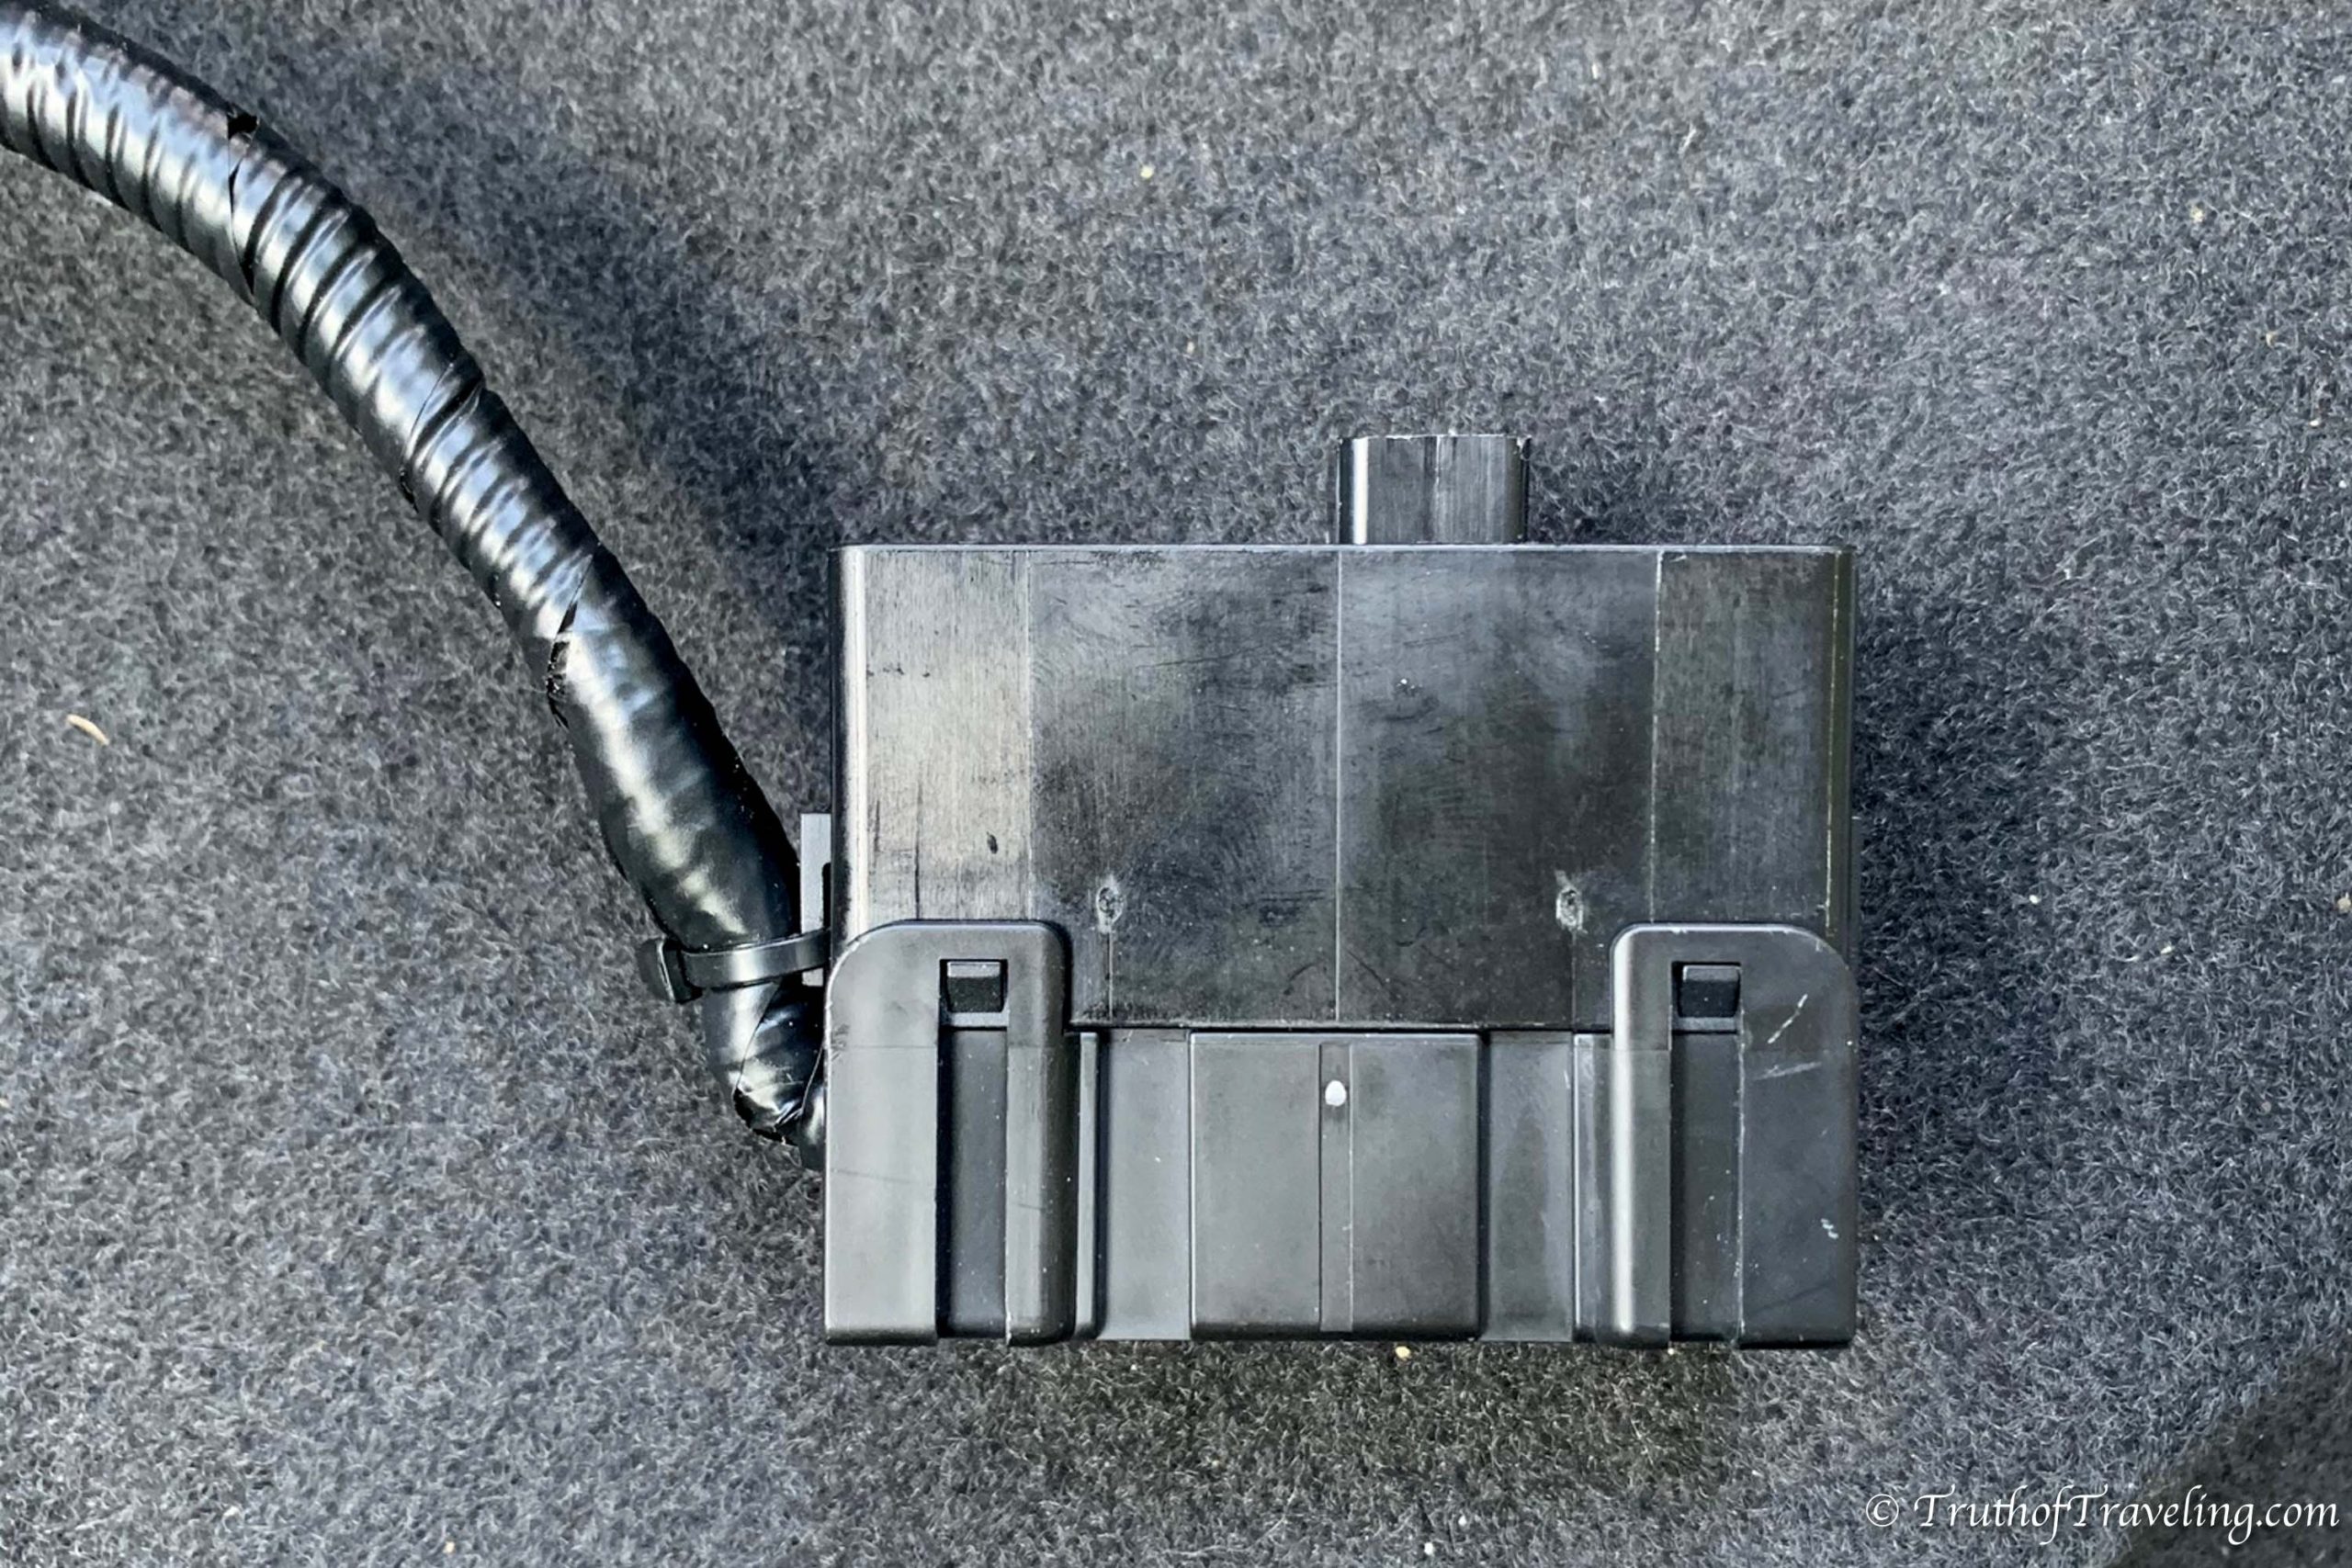
This was definitely the most annoying part of getting this particular swivel seat. If you buy the Scopema or SwivelsRus seat you don’t have to do this because the center hole is big enough to thread the entire black plastic box through with the wires still attached.
Pull the top off the box. There are 2 clips on either side that clip it on. We really had to try to pull it off because it’s attached pretty well. Then you will see 7 wire terminals with red clips. The wires are only plugged into one of the terminals.
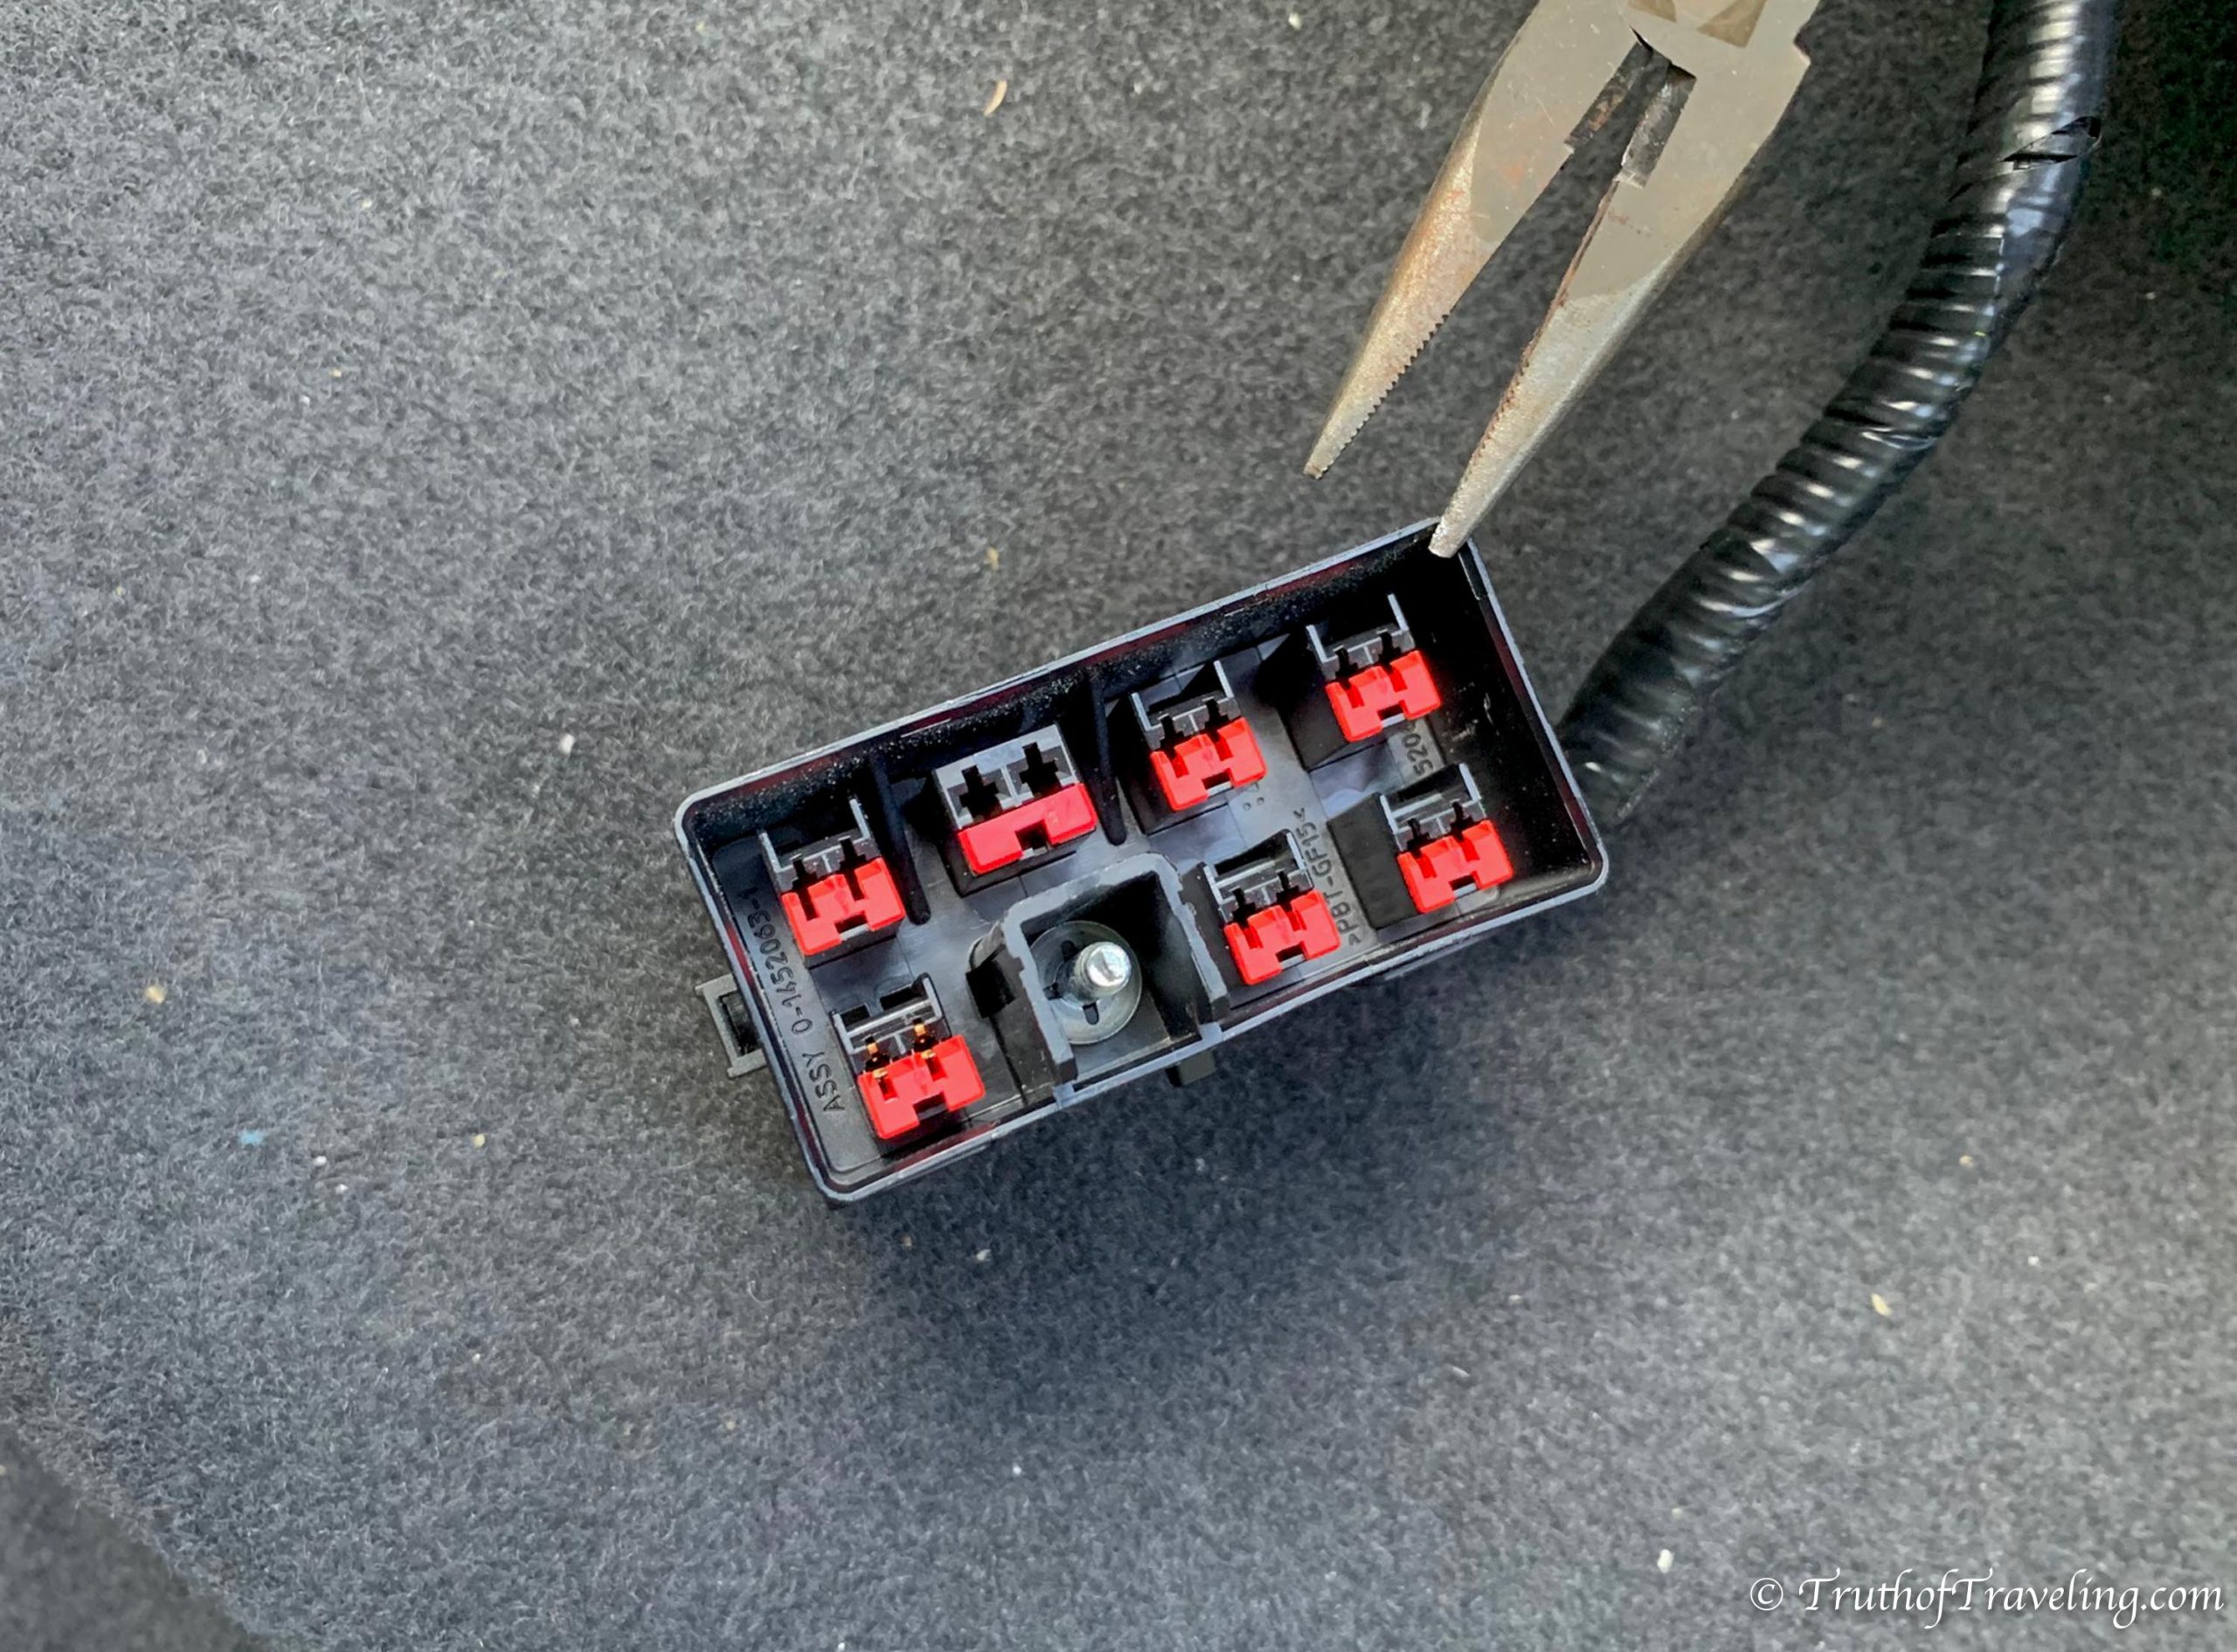
First, you need to pull the red part off. Simply pull it off with needle nose pliers or tweezers. Once off, you need to disconnect the wires from the box. There is a purple wire and a yellow wire. You need small tweezers in order to hold down a piece of plastic that is keeping the wires attached to the box. It’s really small which means you can’t actually see what you’re doing.
Before you disconnect the wires, take note (or just take a picture) of how the wires are plugged in to the box so that when reassembling it later you can make sure everything is in the right place.
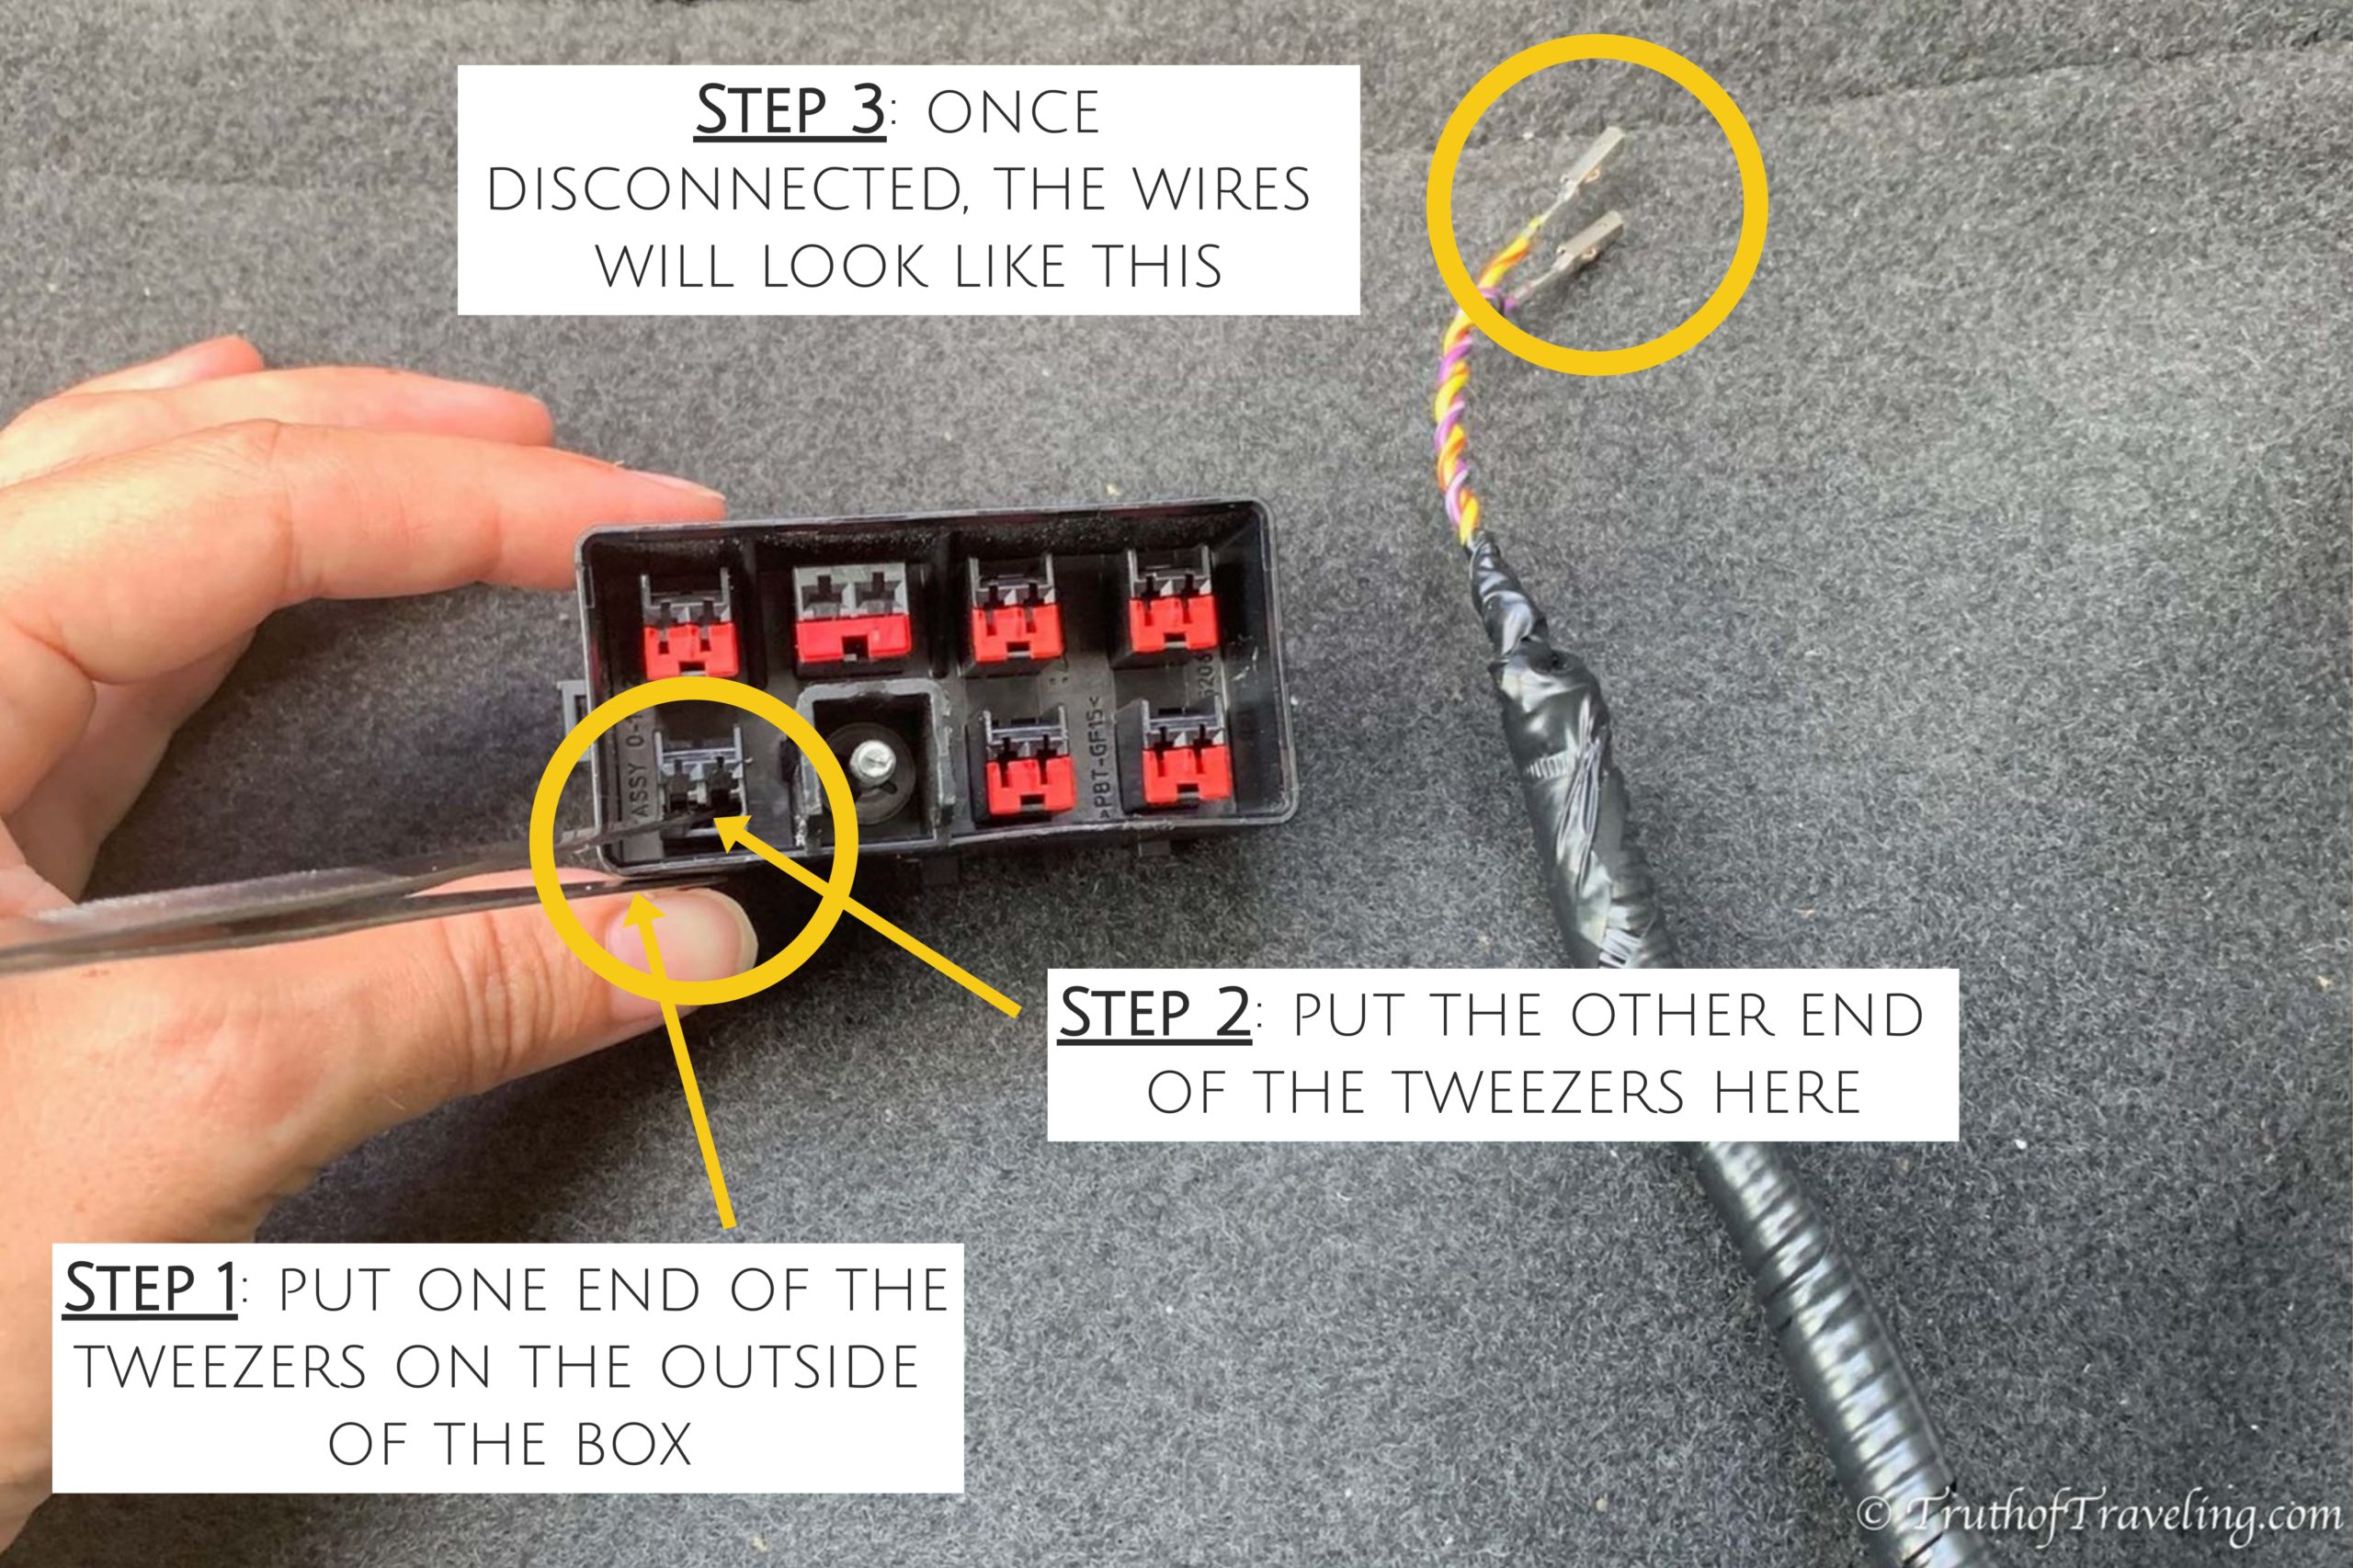
Put one end of the tweezers on the outside of the box and put the other side in the black part where the wires are attached. Pull the tweezers together with pressure and gently tug at one of the wires at the bottom. It took a bunch of tries to get the tweezers on the right spot to release the wire. Don’t pull the wire hard! If you’re holding the right place with the tweezers the wire will detach easily. Then do the same thing for the second wire until both wires are detached from the black plastic box.
Step 5: Put Swivel Seat on Seat Platform- Line Up Screw Holes
In the box our DiscountVanTruck swivel seat plate came attached to a piece of wood. You need to unscrew the piece of wood first in order to install the swivel seat. Once the seat is off and the wires are ready to be threading through the swivel seat plate, put the swivel seat on the seat platform. Line up the 4 screw holes on the swivel seat platform with the screw holes on the seat tracks. That is how the swivel seat is attached to the platform so it’s important that those line up. A tip to make it easier to attach the seat is to swivel the seat to a 45 degree angle that way you can access all 4 screws at once.
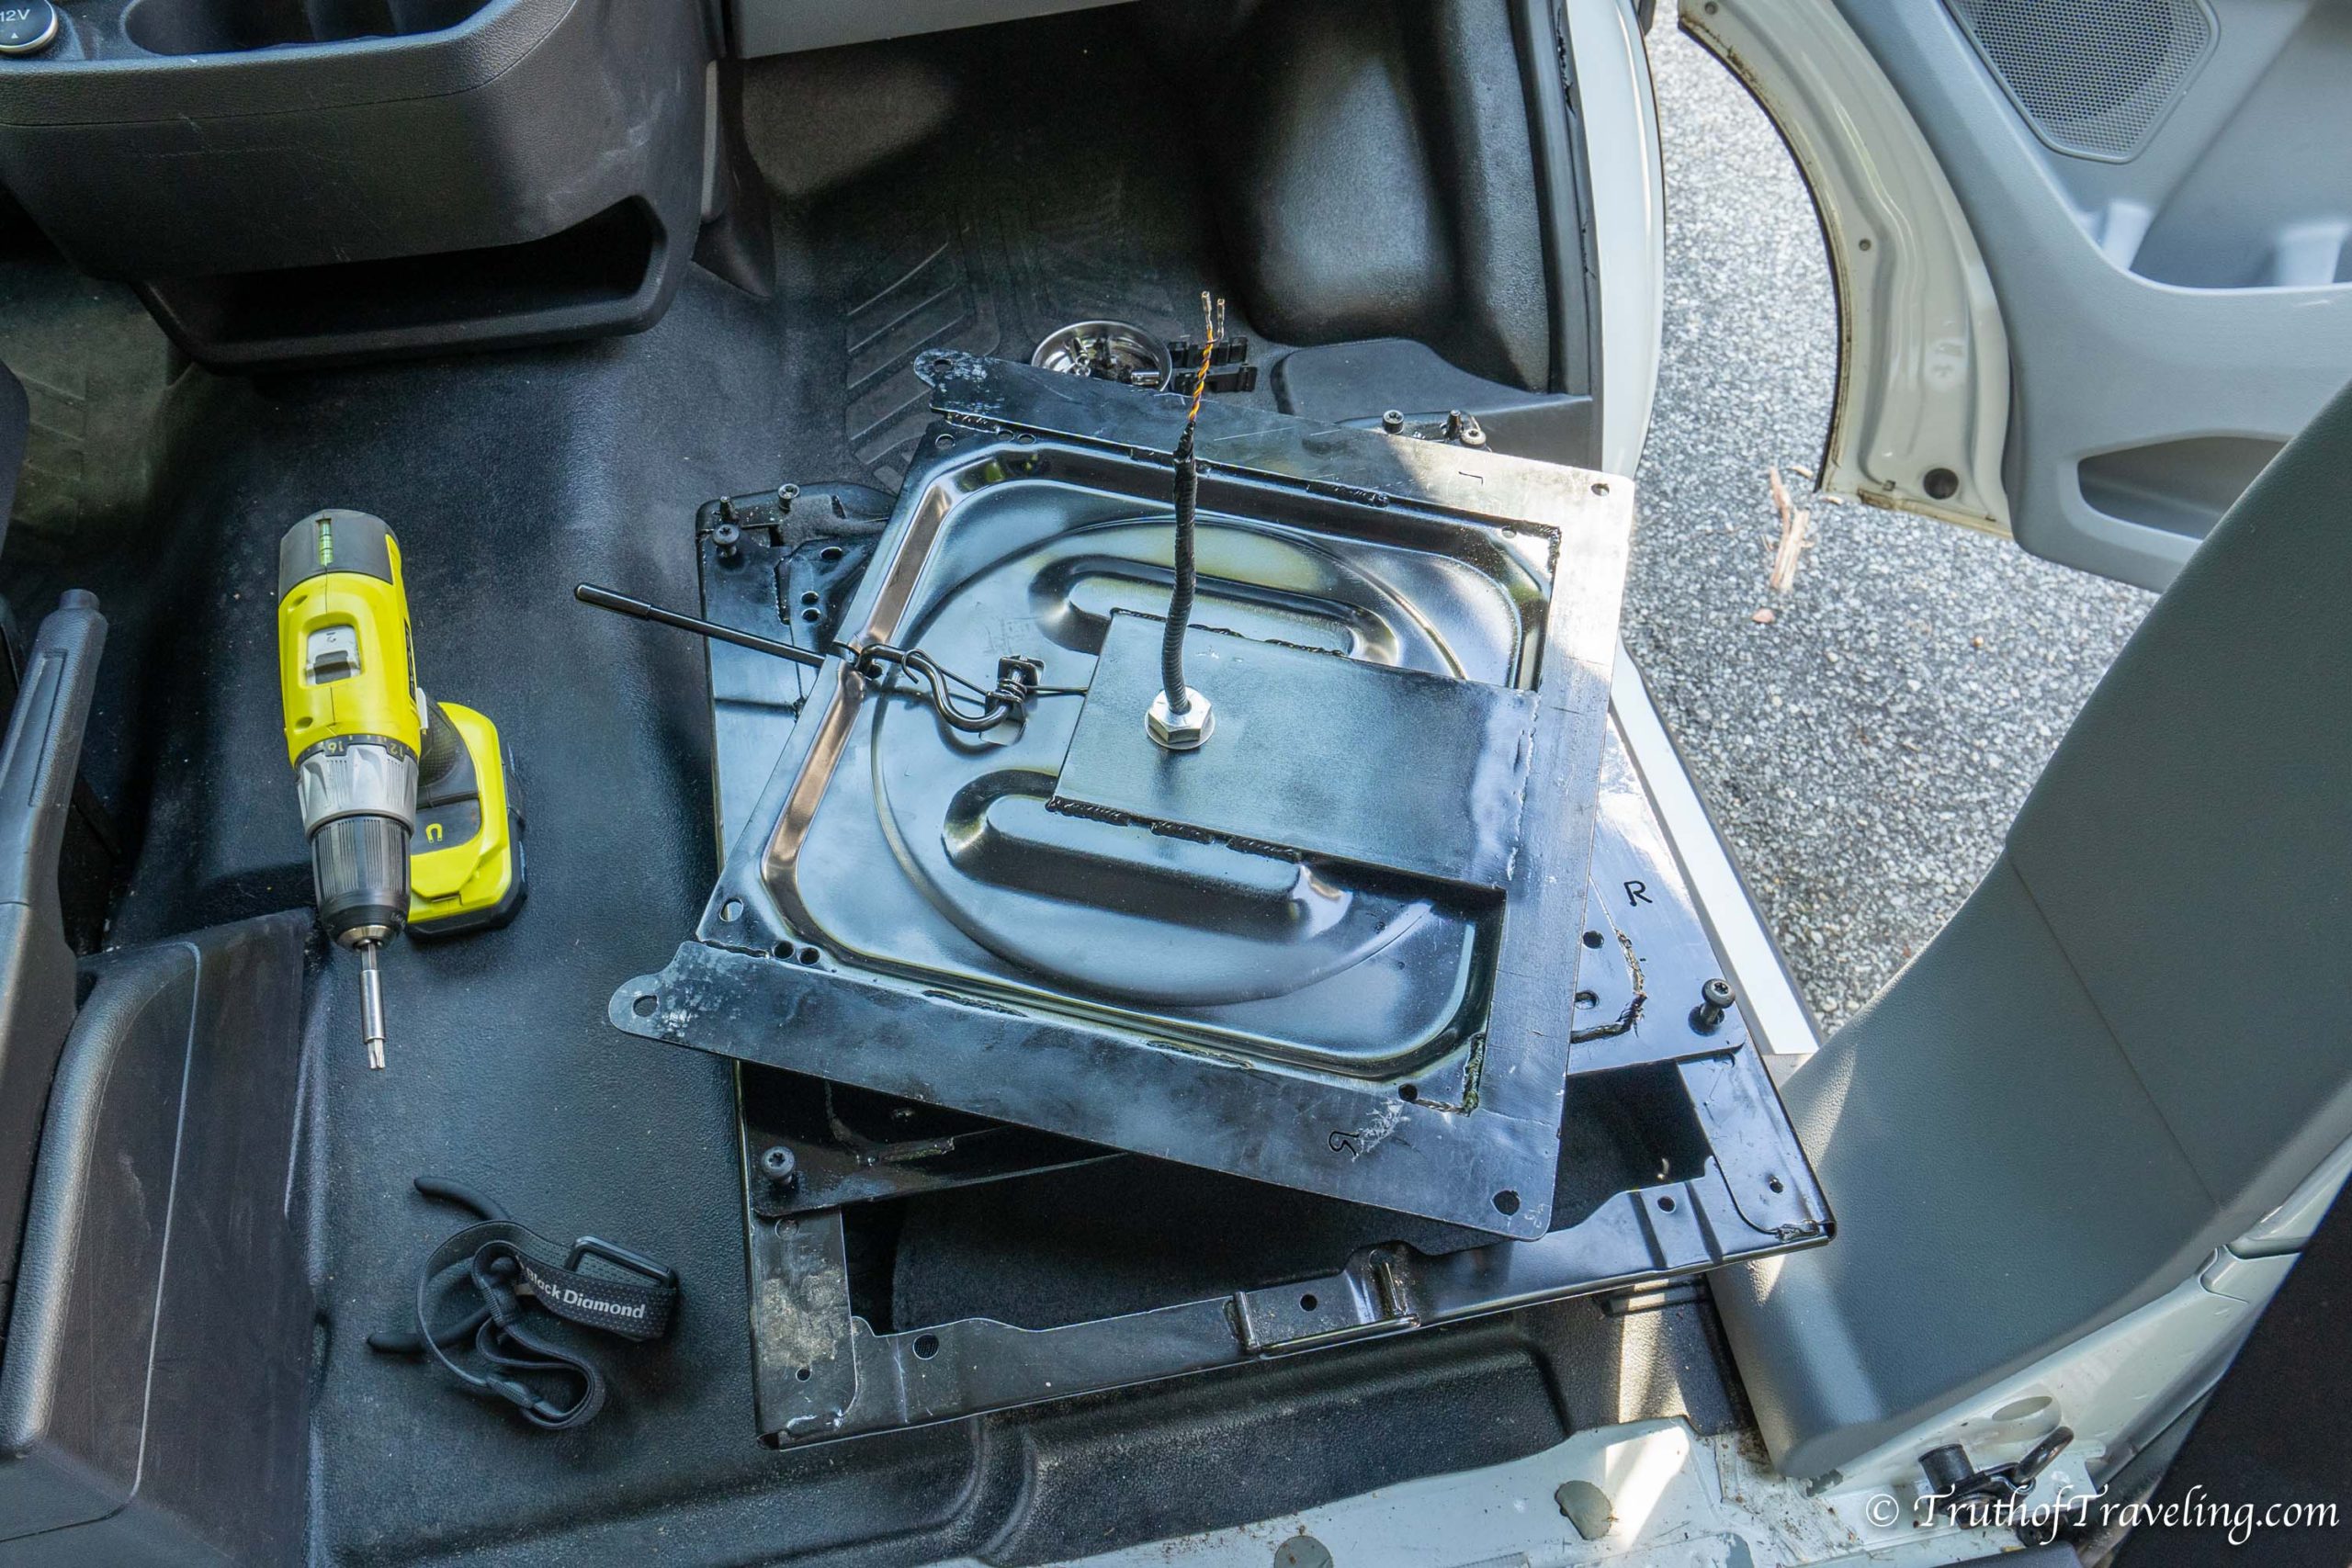
If the screw holes on your swivel seat do not line up with the screw holes for the seat you will need to fix the screw holes so you are able to put the screws in. A lot of people experience this with the DiscountVanTruck swivel seats. It could be due to a variety of things such as the floor of your van being slightly not level which changes how the holes line up. The solution is to widen the screw holes so the screws can fit. You can do this with a drill press, metal drill bit, or other tools.
- We got SO lucky that all 4 of the screw holes on our swivel seat lined up! This can be a really frustrating part of the installation if you have to widen the holes on your seat to fit. It’s not impossible but definitely annoying!
Step 6: Thread Wires Through Swivel Seat
Once you’ve put the swivel seat on top of the seat platform, thread the wires through the center hole of the swivel seat. It’s very, very small on the DiscountVanTruck swivel seat so nothing else besides those wires could possibly fit.
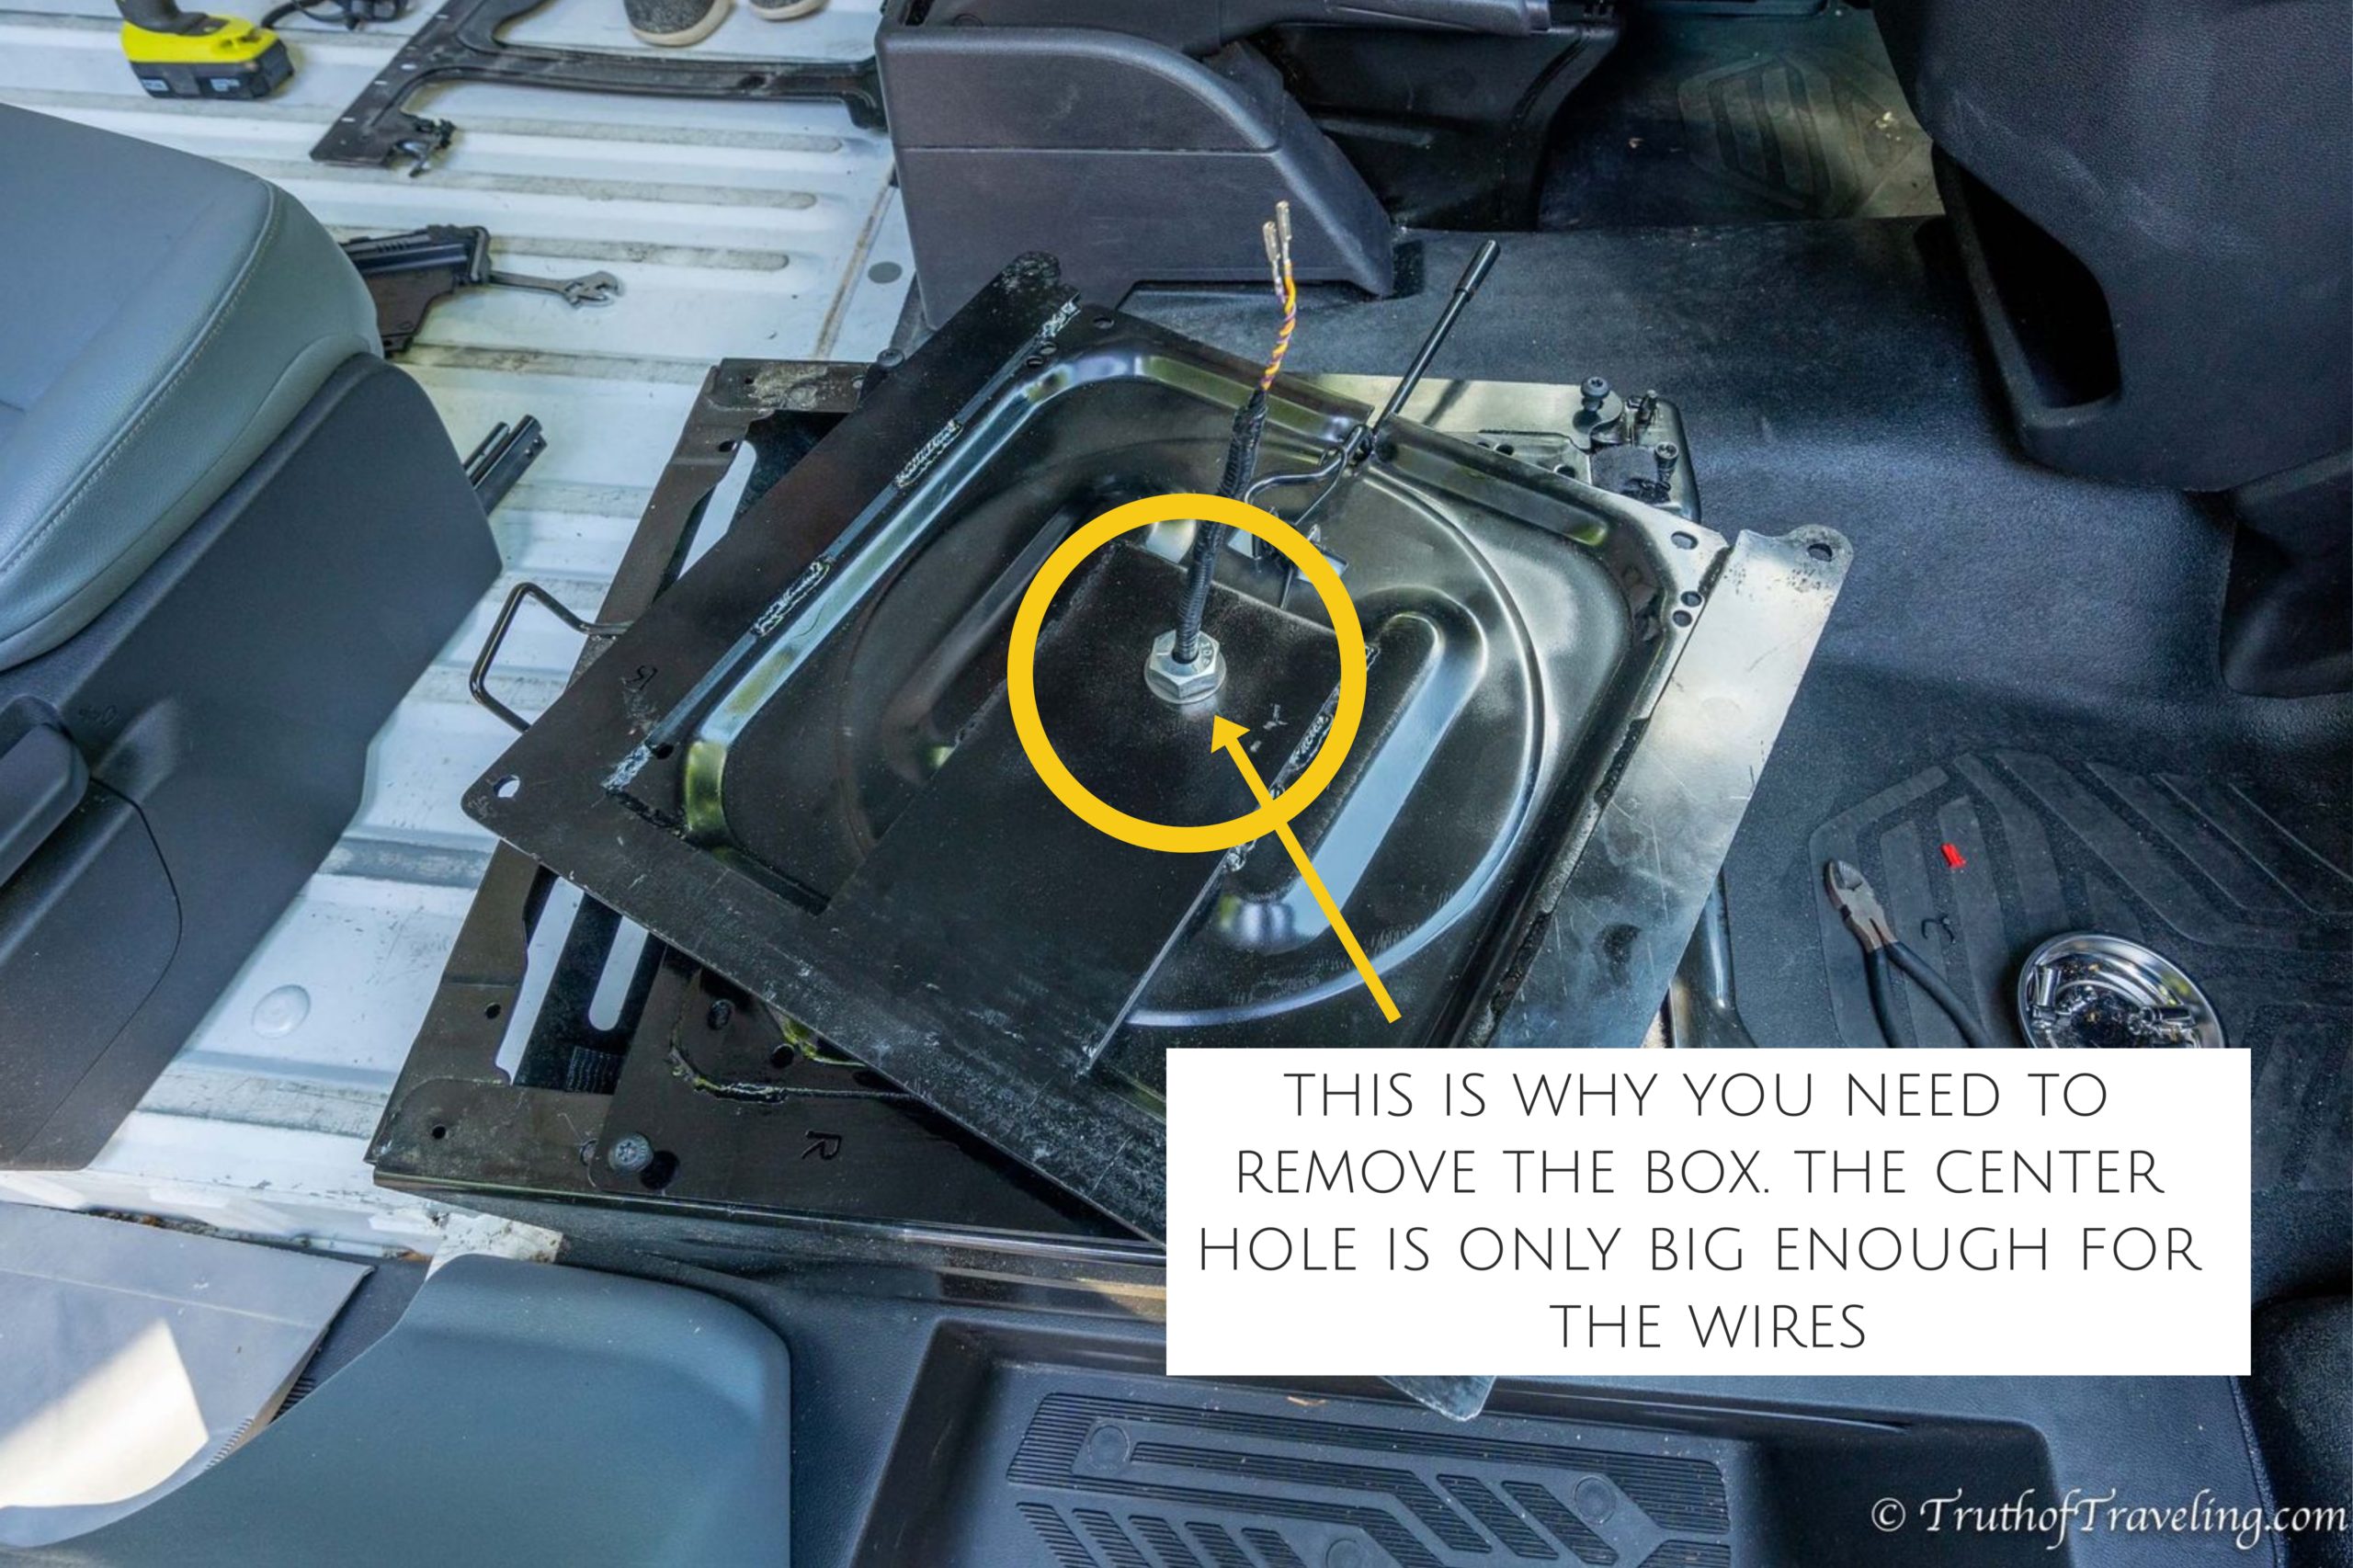
If you have a swivel seat from a different company skip step 4 and put the hole box through the center hole and be grateful you don’t have to deal with unplugging wires!
Step 7: Screw Swivel Seat to Seat Platform
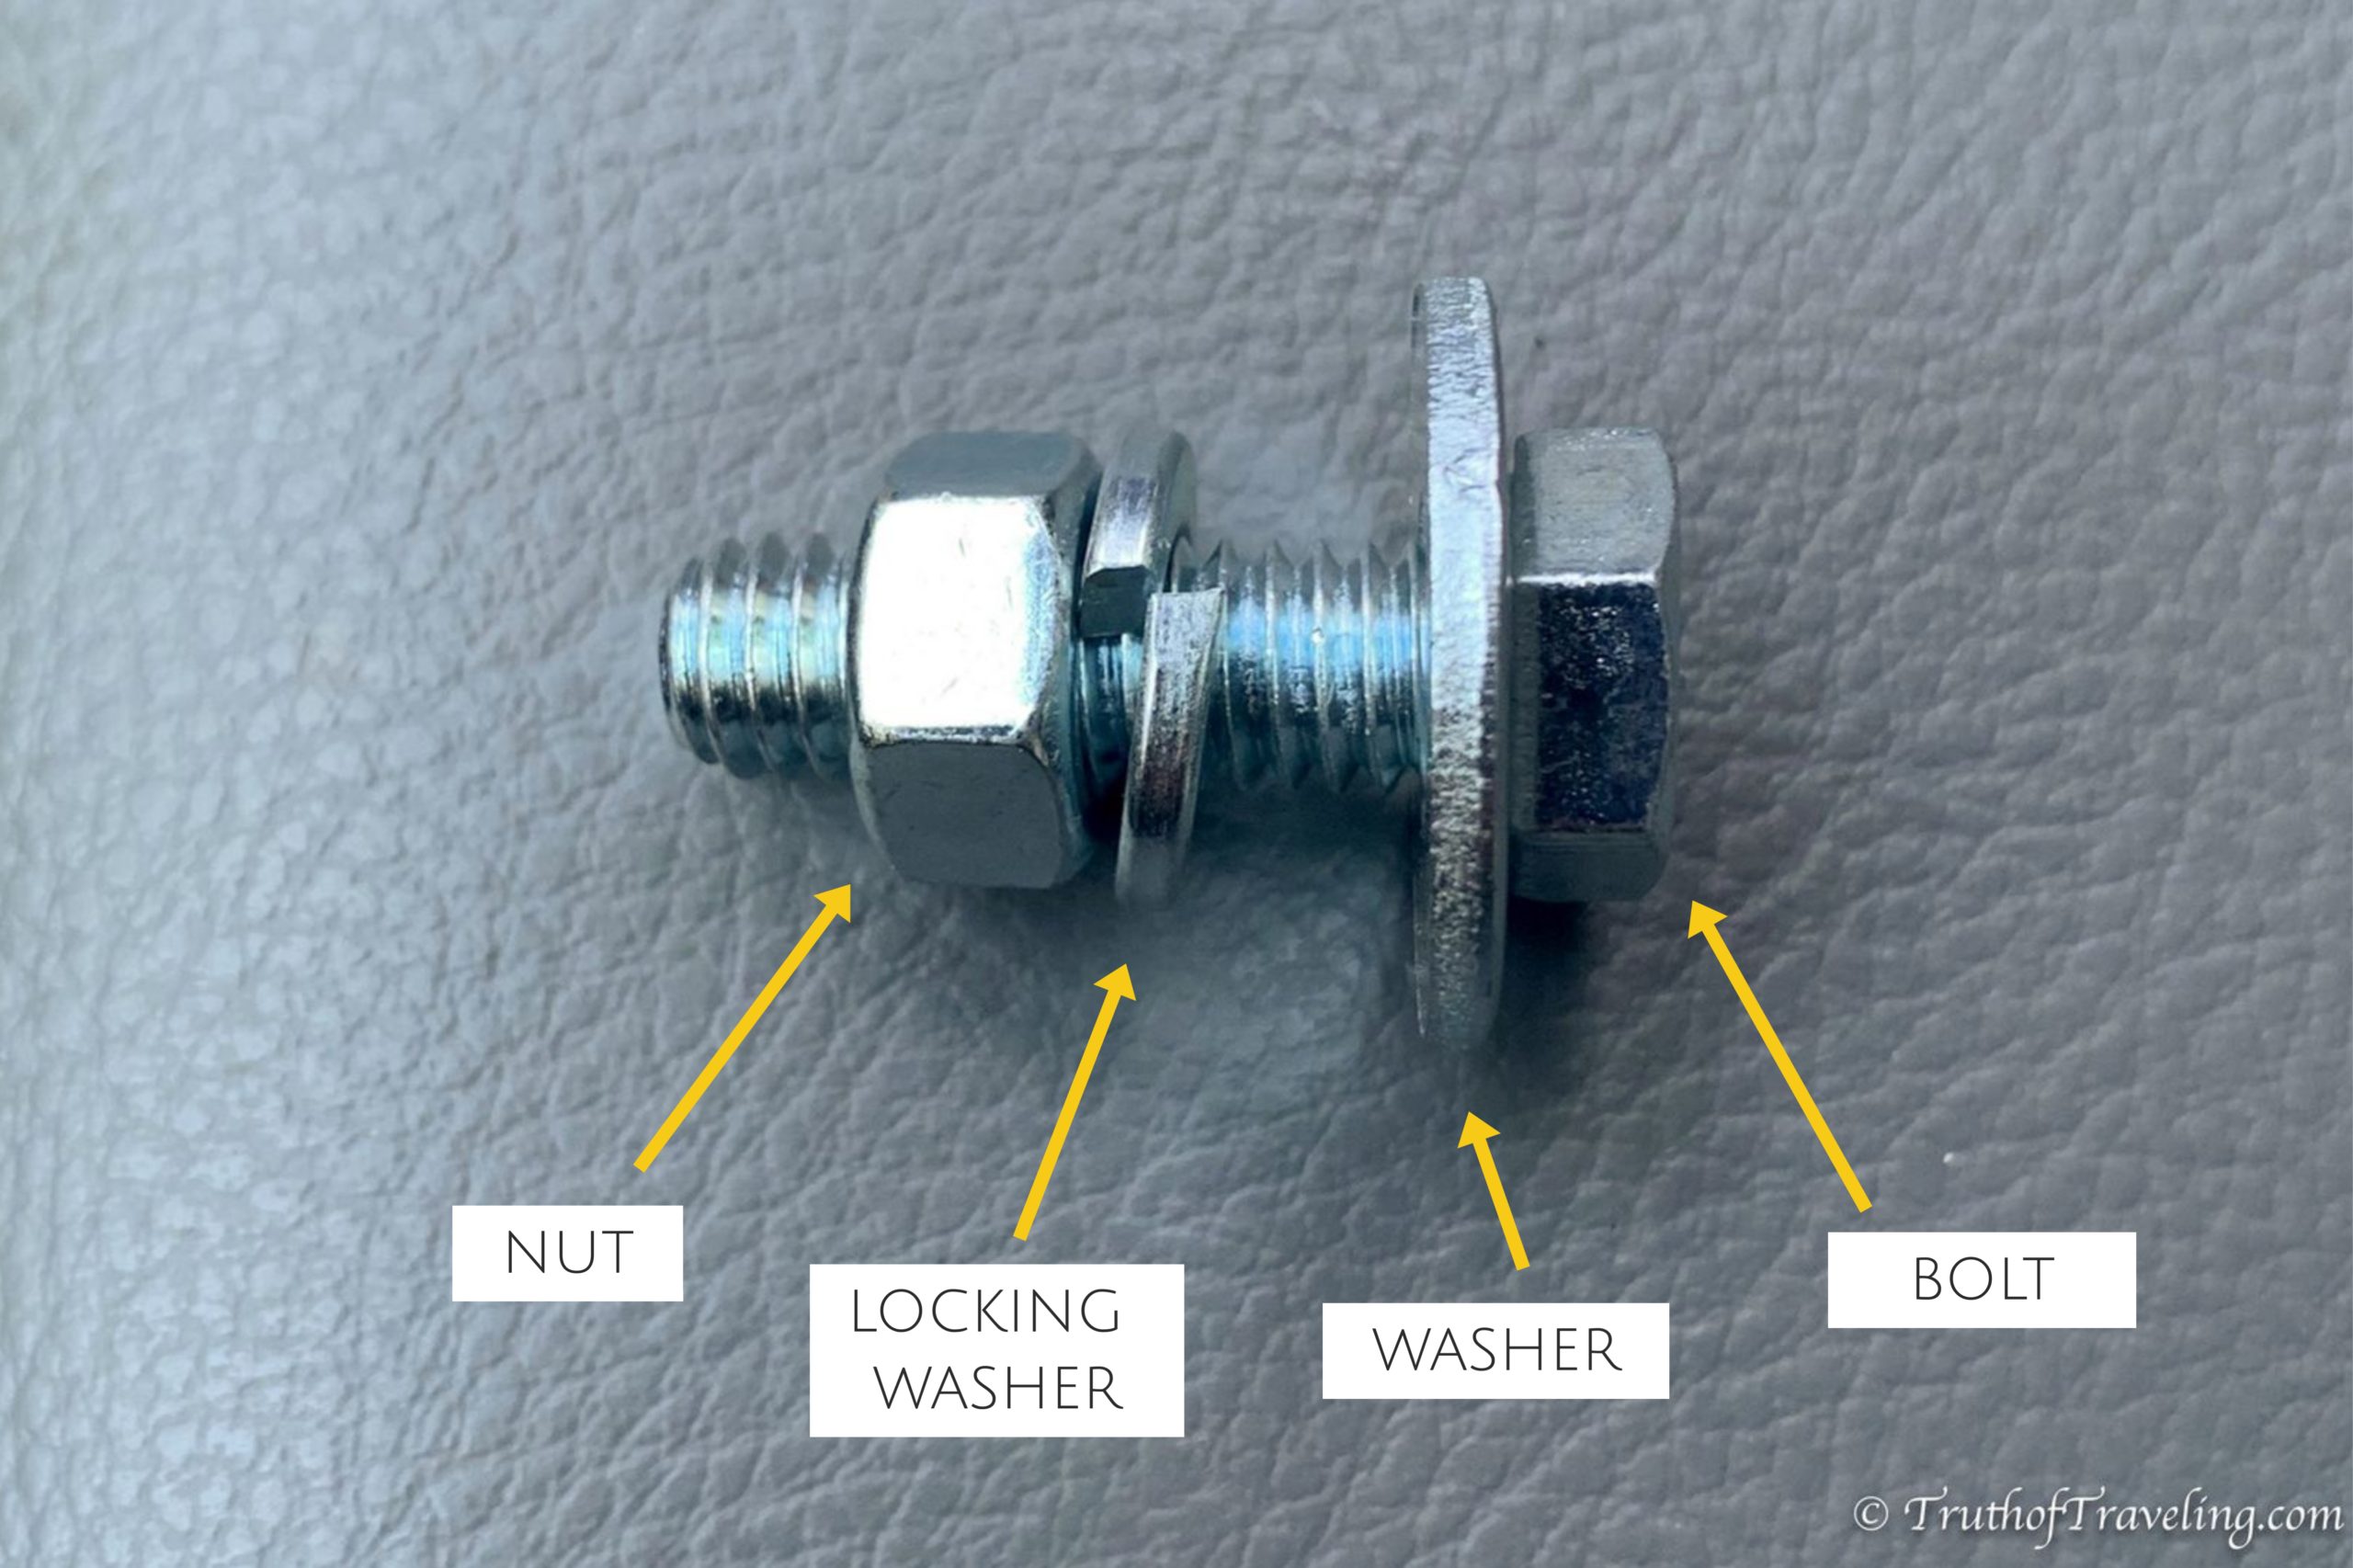
After your screw holes are lined up attach the swivel seat to the seat platform. Our swivel seat came with 4 bolts, 4 washers, 4 locking washers, and 4 nuts. Put the large washer on the bolt then put the screw through the screw hole from the bottom up. Put the locking washer on the end and tighten the nut to secure it. We attached ours with the screw facing up to the roof of the van so we could tighten the bolts from the top of the track instead of trying to tighten them from underneath.
Step 8: Screw Seat Back on
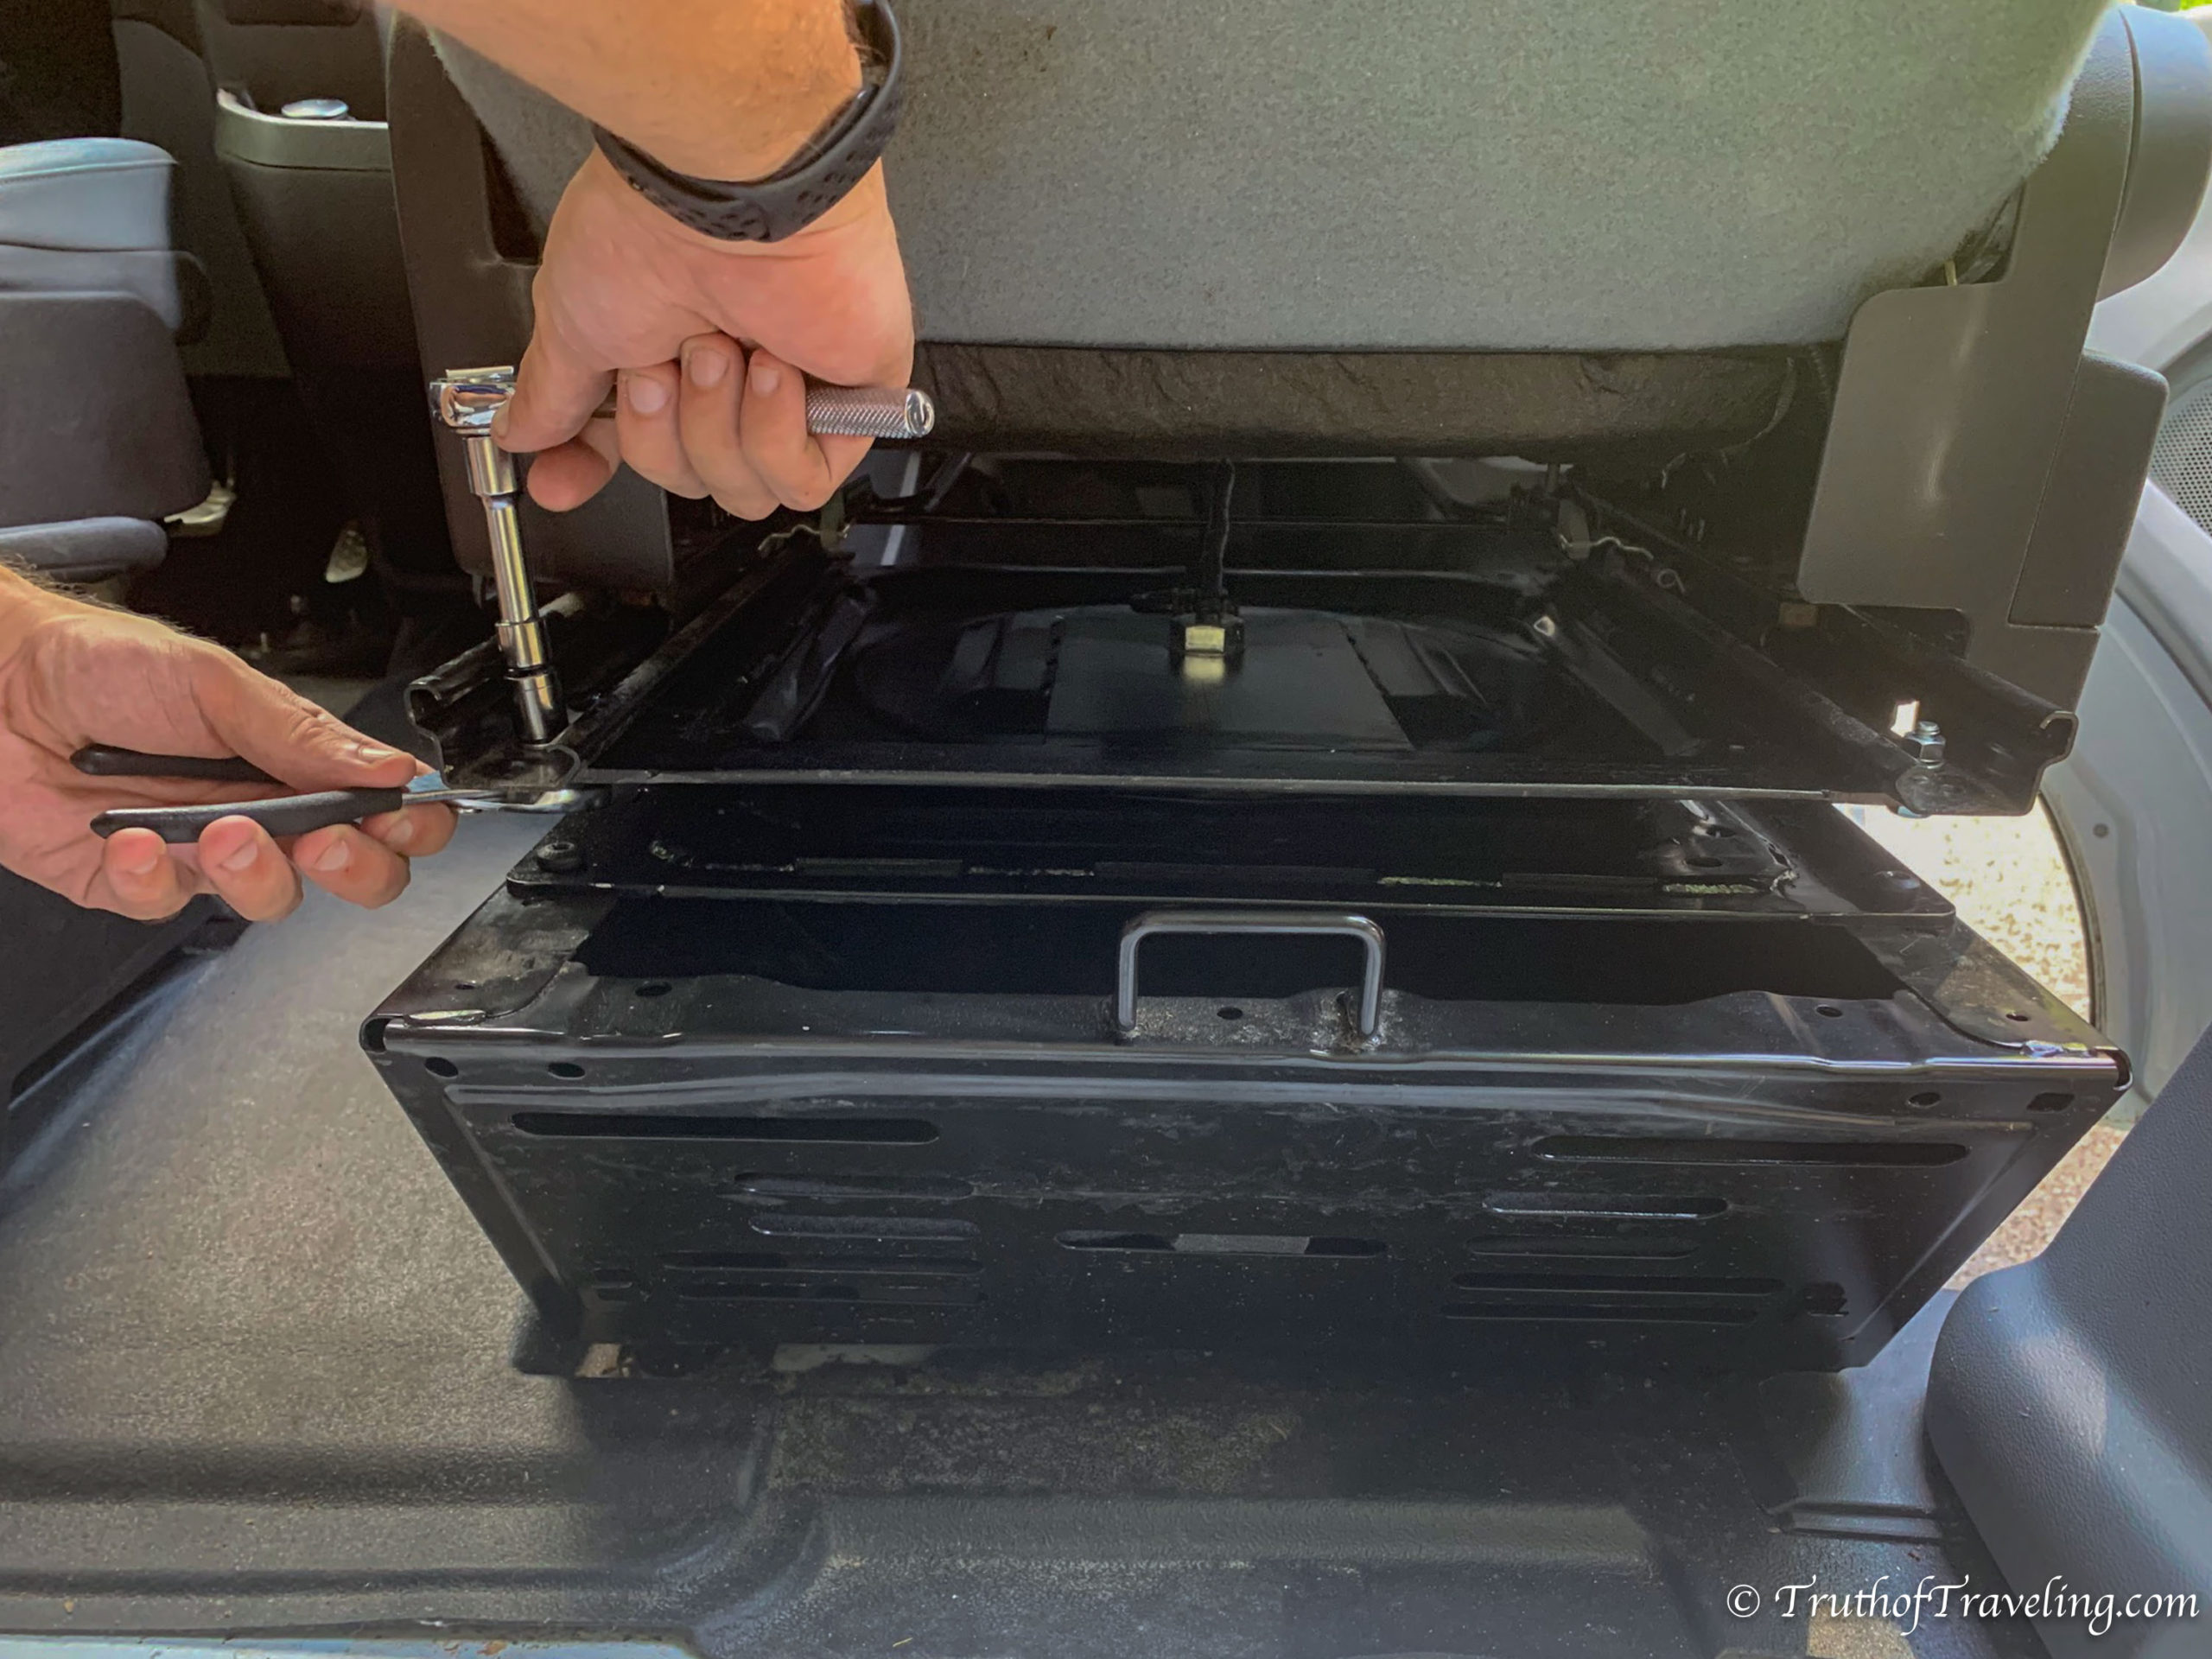
Put the seat back on the platform once the swivel seat is screwed in. Our seat lined up with the second hole in the front. We used the original screws to reattach the seat. Make sure that the seatbelt isn’t twisted before you spend time putting in all the screws. If you take the seat out of the van the seatbelt might twist and then you’ll have to unscrew all the screws to fix it.
Step 9: Plug Wires into Black Box (*DiscountVanTruck Only*) & Reattach Plastic Box to Bottom of Seat
If you’re installing the DiscountVanTruck swivel seat plug the wires back into the black plastic box. Clip the top back onto the box so it’s closed. This part is very easy because the wires are designed to go in easily and lock once they are attached.
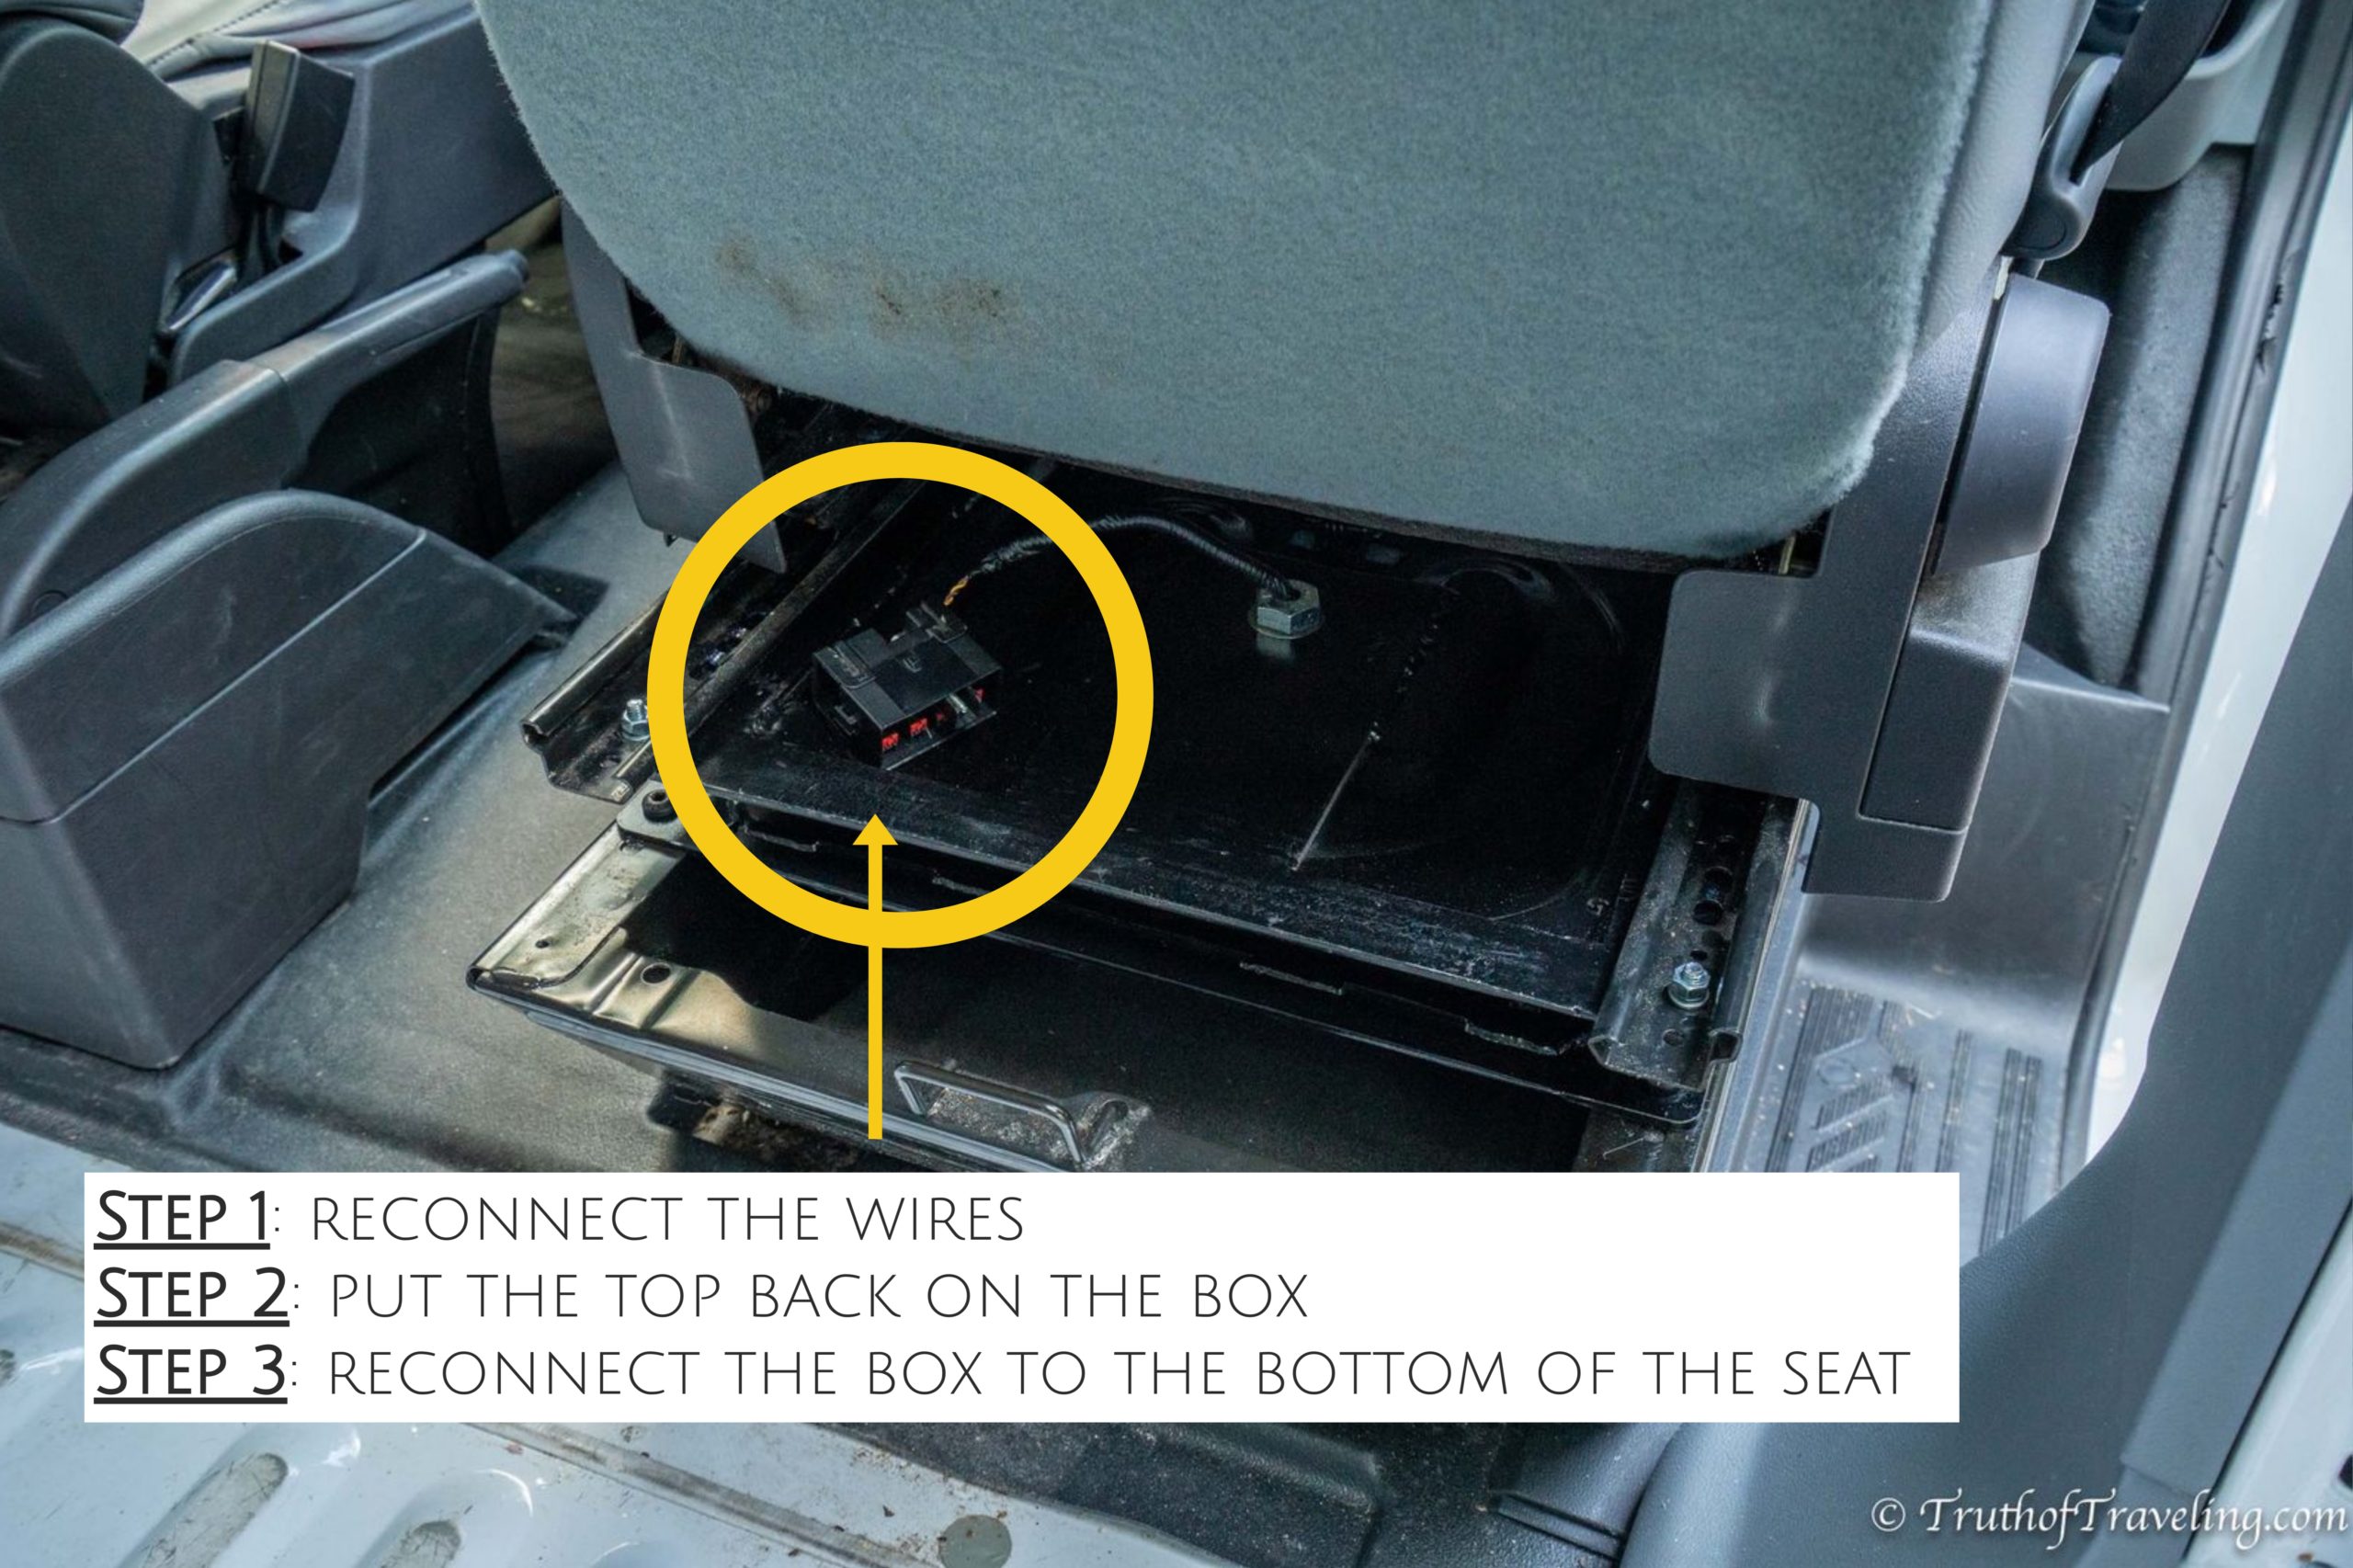
Once both the swivel seat plate and seat are screwed on, you need to reattach the black plastic box to the bottom of the seat. It clips in just like it was when you first started. You will know when it’s clipped in and then it should be reattached!
Step 10: Reconnect Battery (*DiscountVanTruck Only) & Swivel Away!
The last step is to reconnect the battery. You will only have to do this step if you disconnected the battery to install the DiscountVanTruck swivel seat. If you didn’t touch the battery then you are officially done!
Test it out and swivel to your hearts content! You are the proud new owner of a swivel seat! We will be honest and say our DiscountVanTruck swivel seat definitely does not have the smoothest swivel. You need to turn it back and forth a few times to get the hang of it.
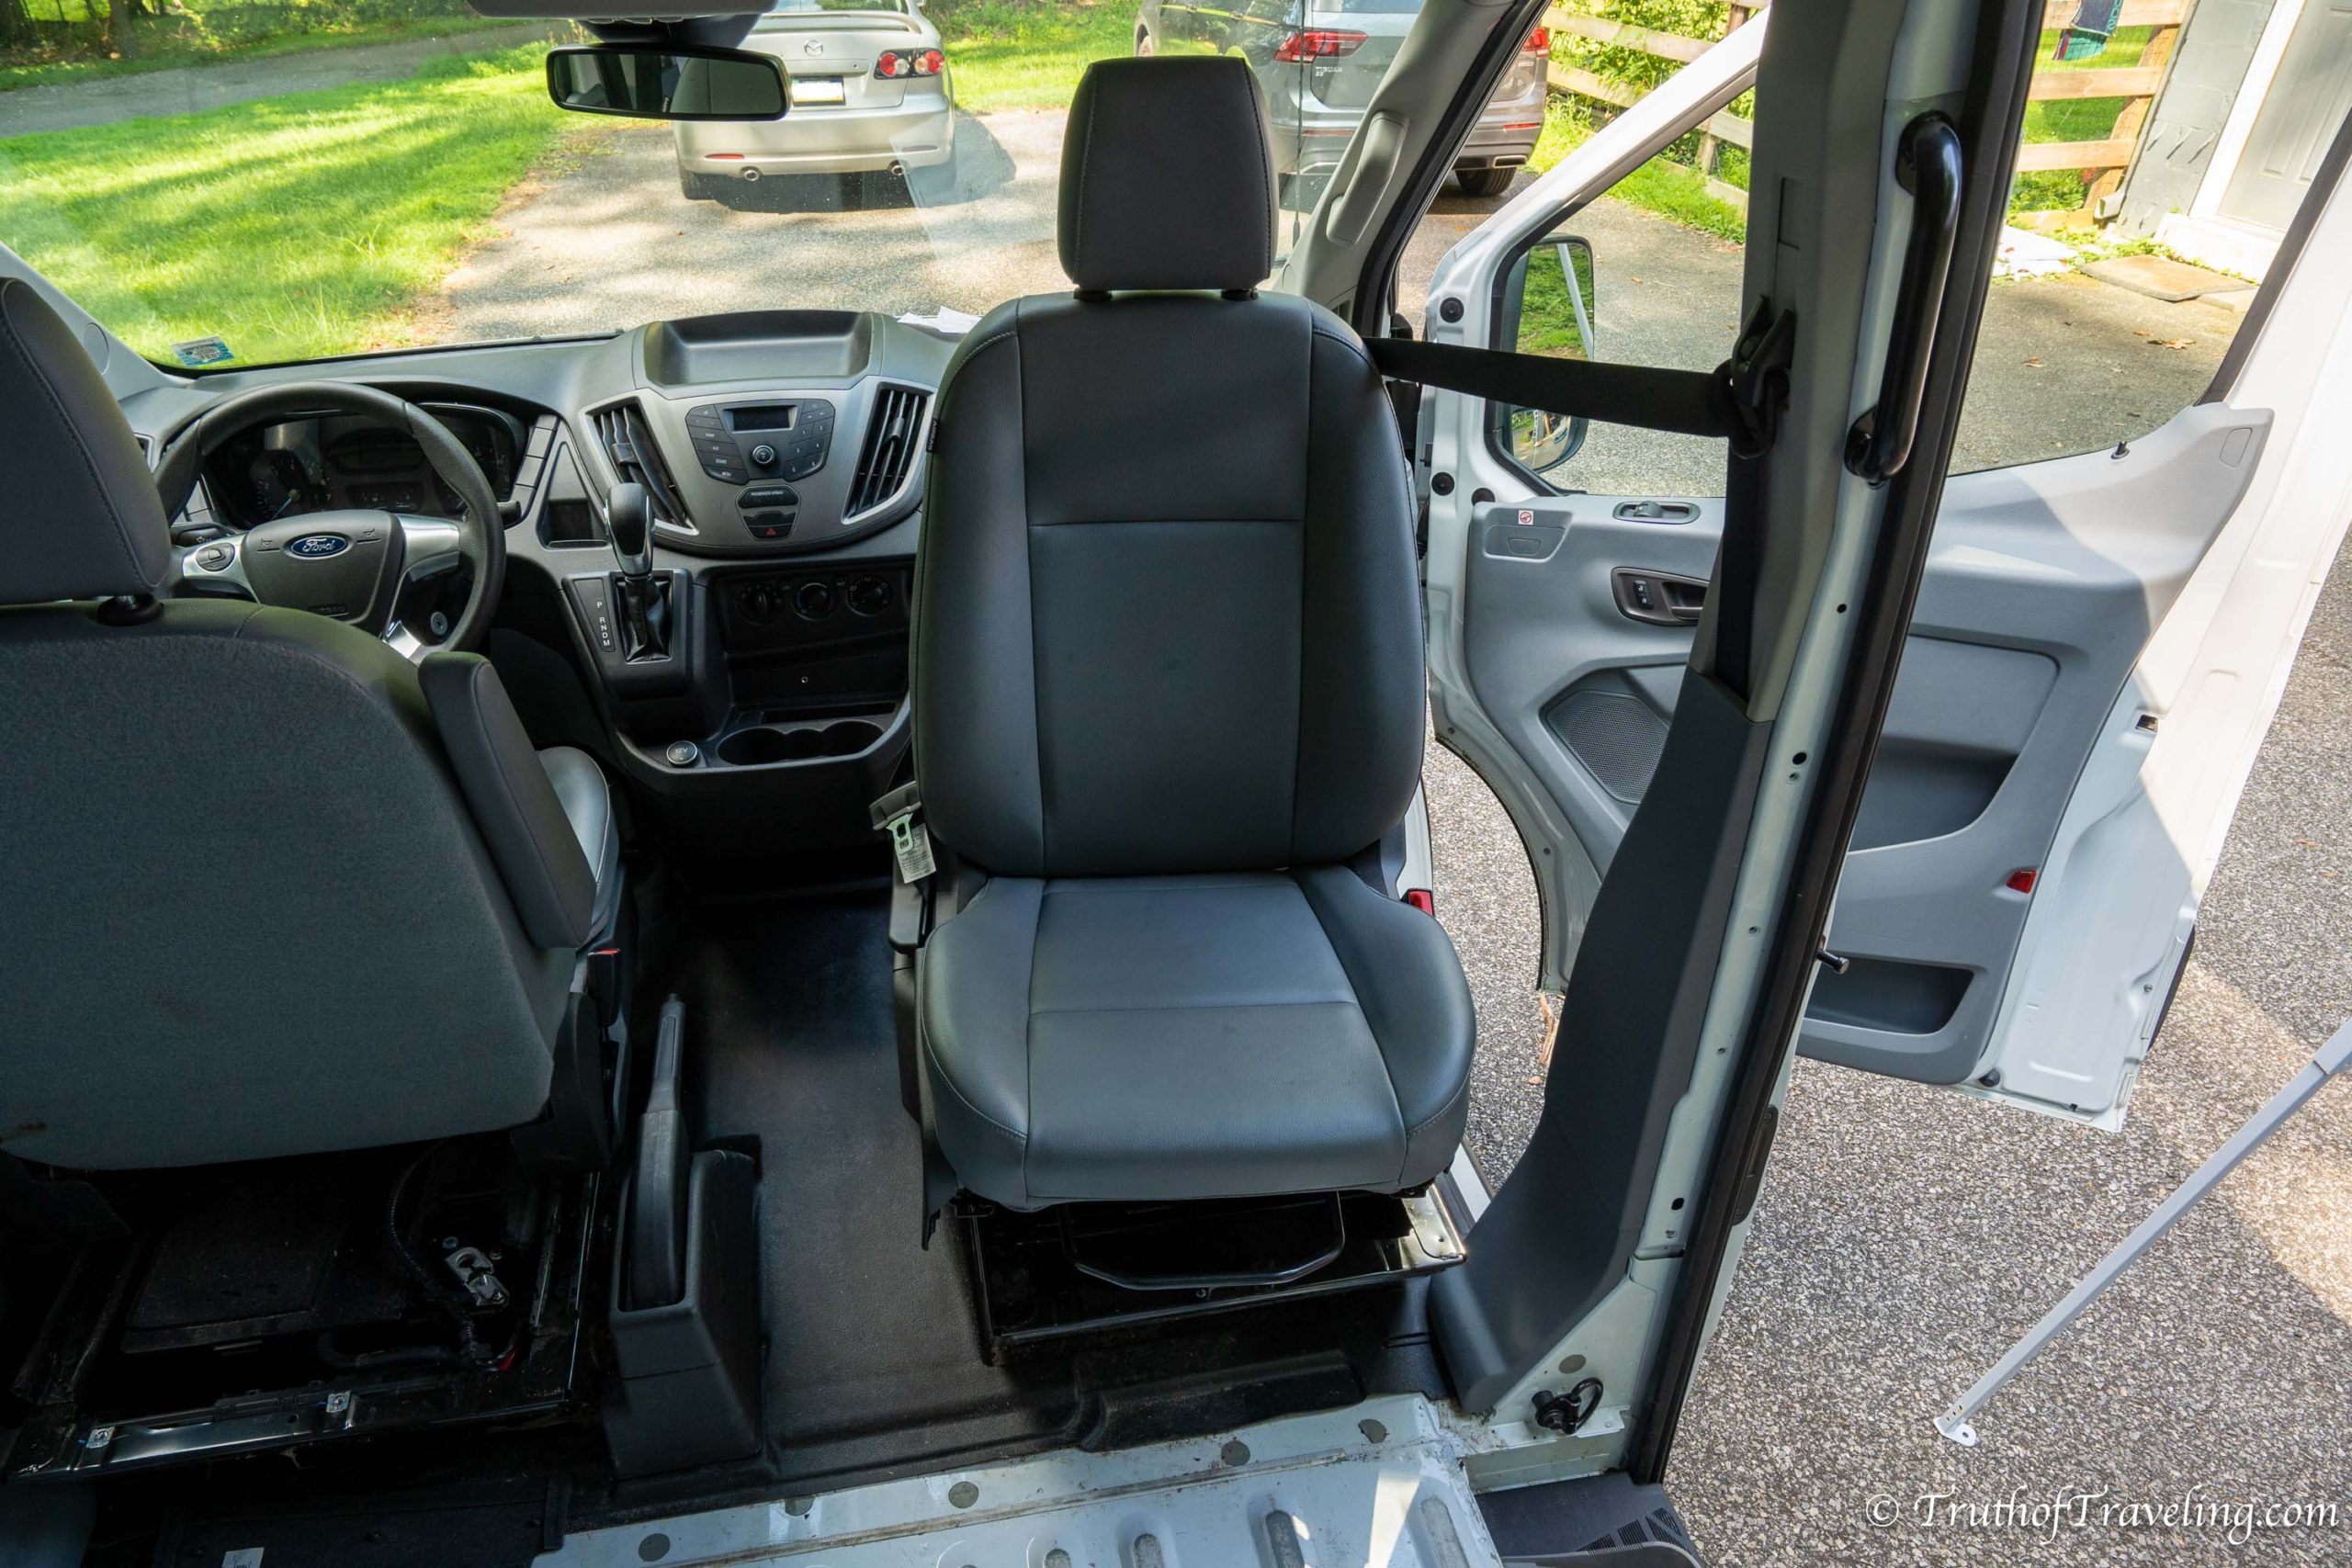
- We tried to put WD-40 on it thinking it would help loosen it a little but the plates are pretty tightly held together so we don’t think it actually did much.
We found the DiscountVanTruck swivel seat does swivel while you are sitting in the passenger seat with the door closed. You have to move the seat forward or backwards so it’s in the right spot for it to turn. Otherwise you will hit the side of the door.
There is the black bar that slides the seat forward or backwards on the seat tracks. That bar is from the factory seat and only moves the seat. Then there is the small level for the swivel seat that extends a few inches in front of the seat. These two might hit each other. You only need to lift the swivel seat lever at the beginning to unlock it and then you can release it and turn. If you continue to hold the lever you will inevitably also move the bar on the seat which will result in the seat moving forward or backwards. I did this a bunch of times before I figured out what was happening!

Read More: 7 Essential Items for Van life in Australia
Is It Hard to Install a Swivel Seat?
No, it’s not hard to install a swivel seat! In the grand scheme of the whole van conversion installing the swivel seat should be one of the easier projects. It will be even easier if the screw holes line up for your seat plate because that can be a big headache.
It took us about 3 hours to install the DiscountVanTruck swivel seat to the passenger seat of our Ford Transit van. We weren’t working especially fast either so it is probably possible to do it faster! The swivel seat was one of the first things we installed in our van during the conversion because we were then able to use the seat throughout the rest of the build!
Interested in More Van Life Posts? Read Here!
Pin it for later:
