Insulation is one of the first things we did during our van build in order to be able to control the inside temperature as much as possible. Ideally you want to be able to keep the warm in on a cold day and keep the hot air out on a warmer day. There are quite a few ways of doing it you can use depending on how much time and money you want to put in. Here is our guide to insulating your van including options for products, what we used and how much it all cost!
Disclosure: This post contains Amazon affiliate links. As an Amazon Associate we earn from qualifying purchases. This means at no additional cost to you, we will earn a commission if you click through a link and make a purchase. This post may also contain other affiliate links and non-affiliate links to products and websites.
There are a lot of different ways to go about insulating a van. A lot of people have differing options on whether it’s worth it and what the best option is. We are not experts but are going to share some different products and what we chose for our van. At the end of the day it is a moving vehicle after all so some warm and cold air is always going to come in and there will always be some condensation. So our strategy was to try to make it as climate controlled as we could!
What Should I Use to Insulate My Van?
There are quite a few different products you can use to insulate your van. The r-value is the measurement of how well insulation combats heat. The higher the r-value the better a product is at insulating. Here are a few different options which of course all have their advantages and disadvantages:
Thinsulate
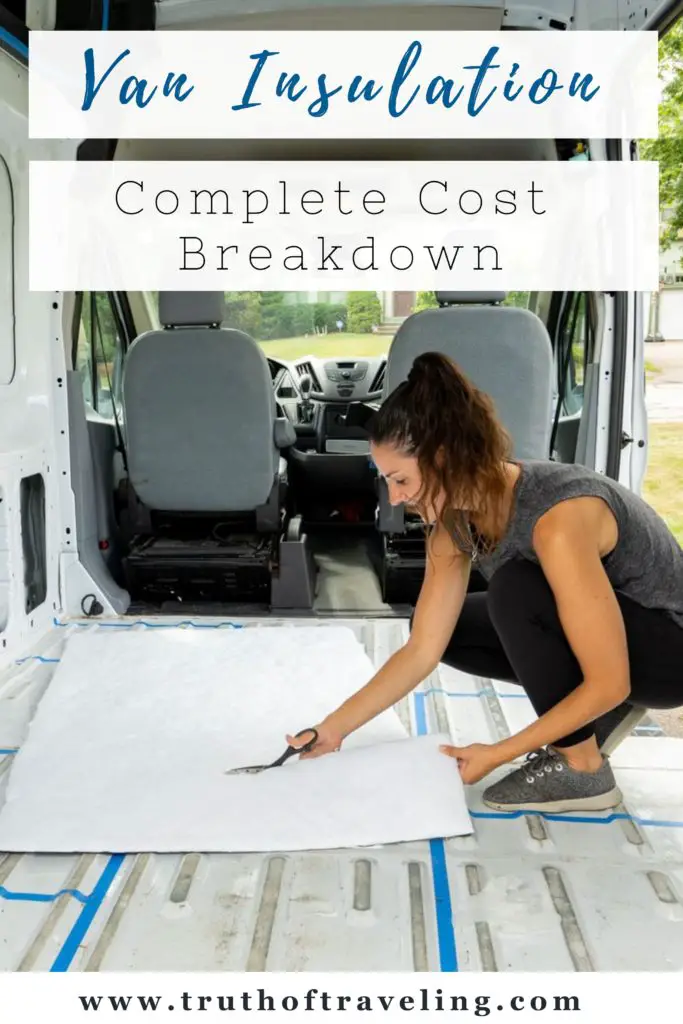
Thinsulate is a really good option because it is so easy to install! It’s actually intended for vehicle insulation which is just nice to know. You can cut it with scissors to whatever size piece you need. You can install Thinsulate using adhesive such as 3M-90 or 3M-77 spray.
- Thinsulate can be hard to find sometimes depending on where you are so make sure to look around if you’re starting a build soon.
- The r-value of Thinsulate is 5.2 (when expanded to 1 3/4 inch) so it is a really good insulator!
Thinsulate is what we chose because of the high R-value as well as the ease of installation. We ordered ours off Amazon. We purchased a 40’ x 60” roll and had a bit left over to use for our back window covers which was perfect!
Spray Foam
Spray foam insulation has a high r-value but also is significantly more expensive than other options. Closed cell spray foam has an r-value of 6.5 which is extremely high! If you’re willing to spend the money spray foam gives you a high r-value and seals up your van a lot better than products like Thinsulate or foam board.
- However, spray foam installation is harder. It usually is done by a professional or if you really know what you’re doing you can rent equipment. But it’s permanent so once it’s on and dried it’s very hard to remove. It’s also a lot messier to install so you definitely want to make sure to prep the rest of your van before installation!
Great Stuff Gaps and Cracks is a very easy to use foam insulator. It would take forever (and require a lot of cans) to use to insulate your whole van but it is a really good product to use to seal up gaps and cracks. It is so easy to spray and once dried you can easily cut off extra with a box cutter.
Wool
Wool insulation such as Havelock wool provides good insulation while also being a sustainable product. It has an r-value of 3.6 per inch and expands to about 2 inches so it’s actually a bit better of an insulator compared to Thinsulate.
- It can require a bit of lead time to order due to it’s increasing popularity right now so definitely take that into account!
Rigid Foam XPS Board
Foam board such as XPS board is rigid foam board insulation that you have likely seen in house construction. It has a relatively high r-value of 5 and actually increases in r-value to 5.6 in colder temperatures. It’s a good option if you think you will be in cold weather often.
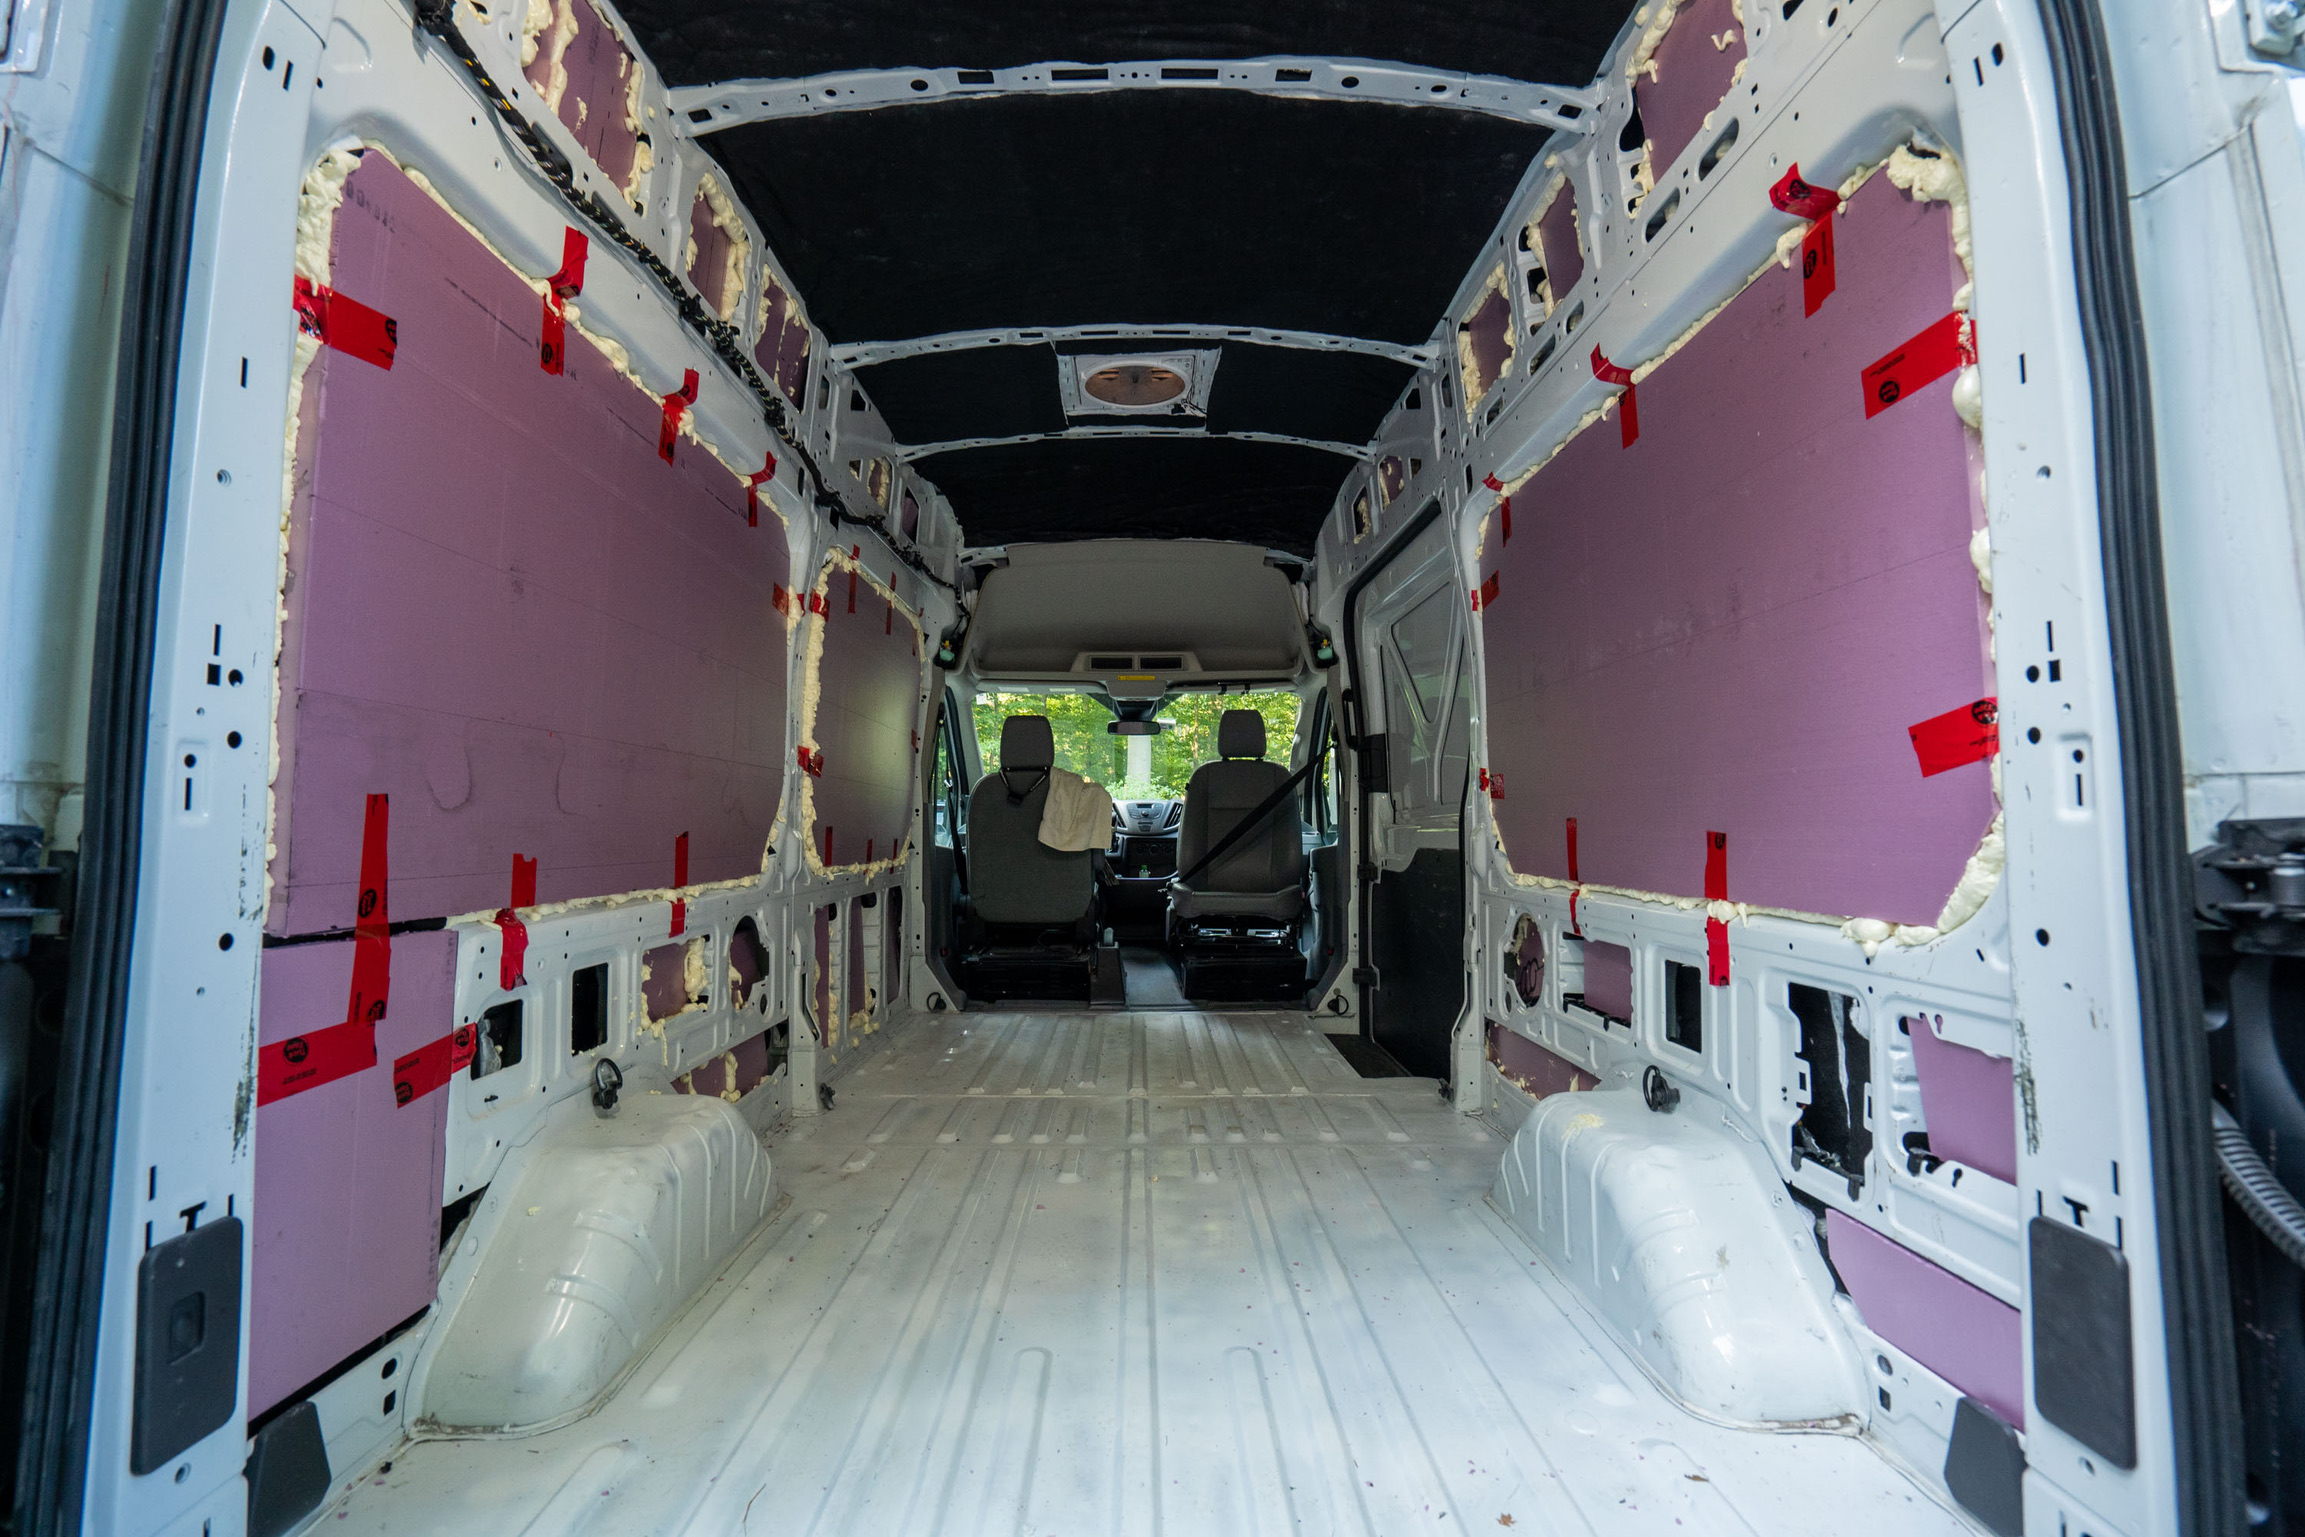
- Almost nothing in a van is perfectly straight so fitting rigid foam board in a curved van can be a bit tricky. It’s not impossible but it does require cutting it into smaller pieces to make it work better.
- It’s easy to cut with a box cutter, however, be careful with adhesives reacting to the XPS board. We used Great Stuff Gaps and Cracks to hold the foam board in place.
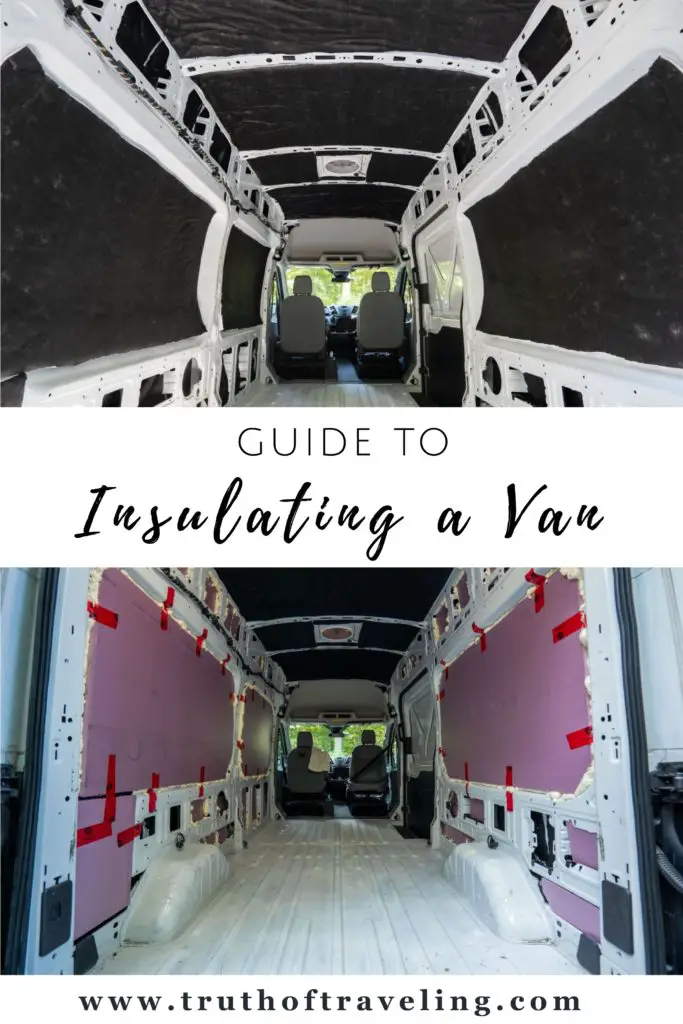
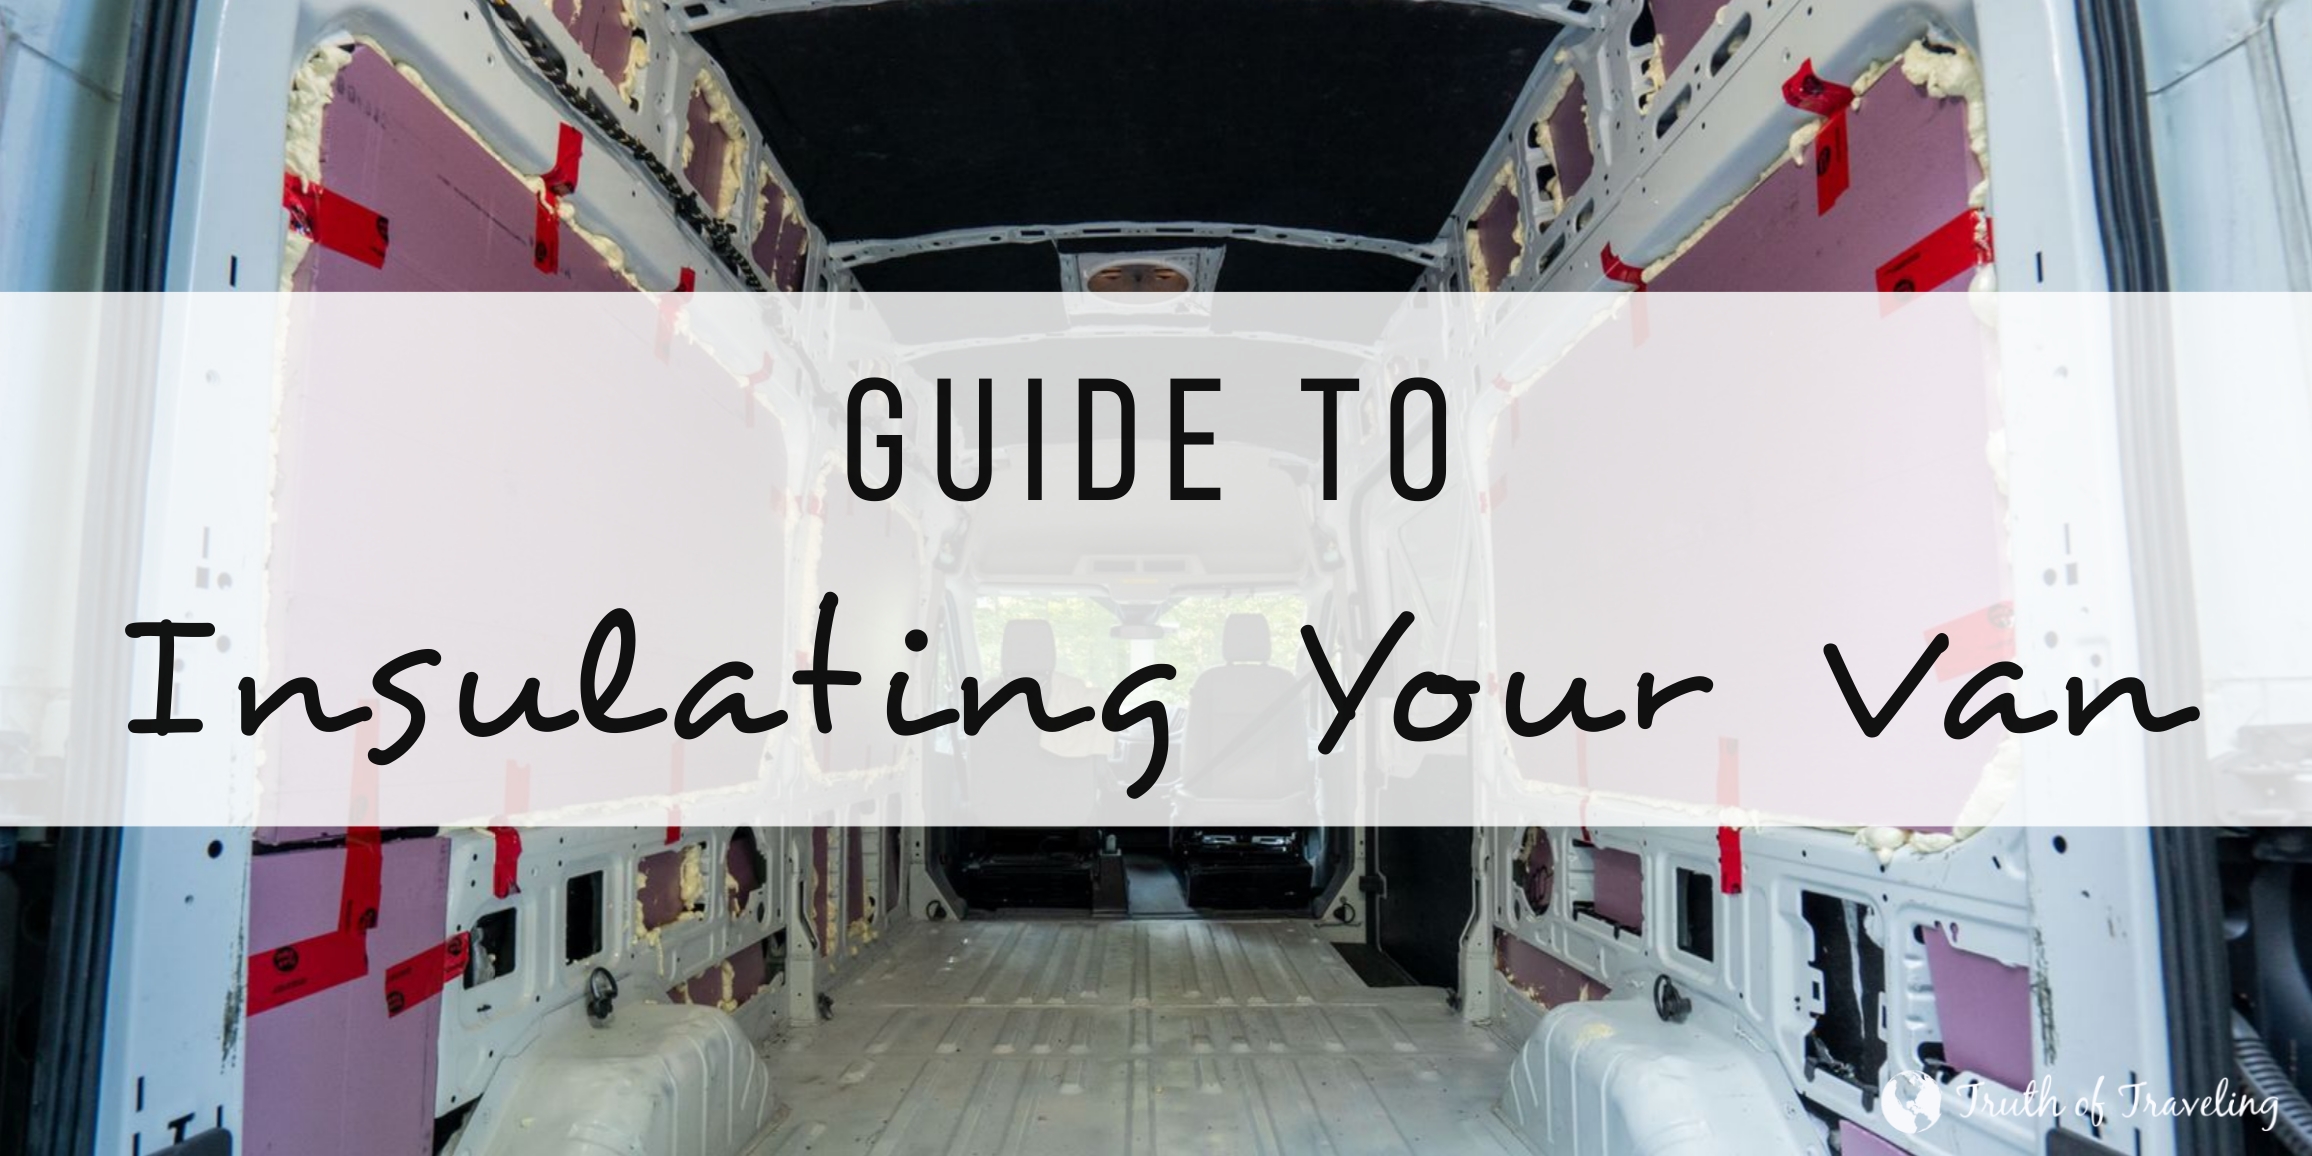
We chose to put XPS board on top of the Thinsulate to better insulate our van. With the 2 combined we have an r-value of about 10 which is really good! Of course it’s not perfect and there are areas where we used more of one material than the other just due to the curves of the van but together it’s a really good combination!
Reflectix / Ez-Cool
Reflectix blew up in popularity with van life but actually is not that good of an insulator. It is the silver bubbly stuff you may have seen on van windows. It has an r-value of about 1 which is very low. It’s not really intended as an insulator but instead as a reflective barrier. A lot of people have mixed opinions on whether radiant Barries such as Reflectix or Ez-Cool actually do anything.
- It’s important to note, however, that radiant barriers work best against radiant heat when they are not directly touching the heat source. So that means for them to work correctly there needs to be a gap between the Reflectix or EZ-Cool.
Our Van Insulation
Layer 1: Thinsulate
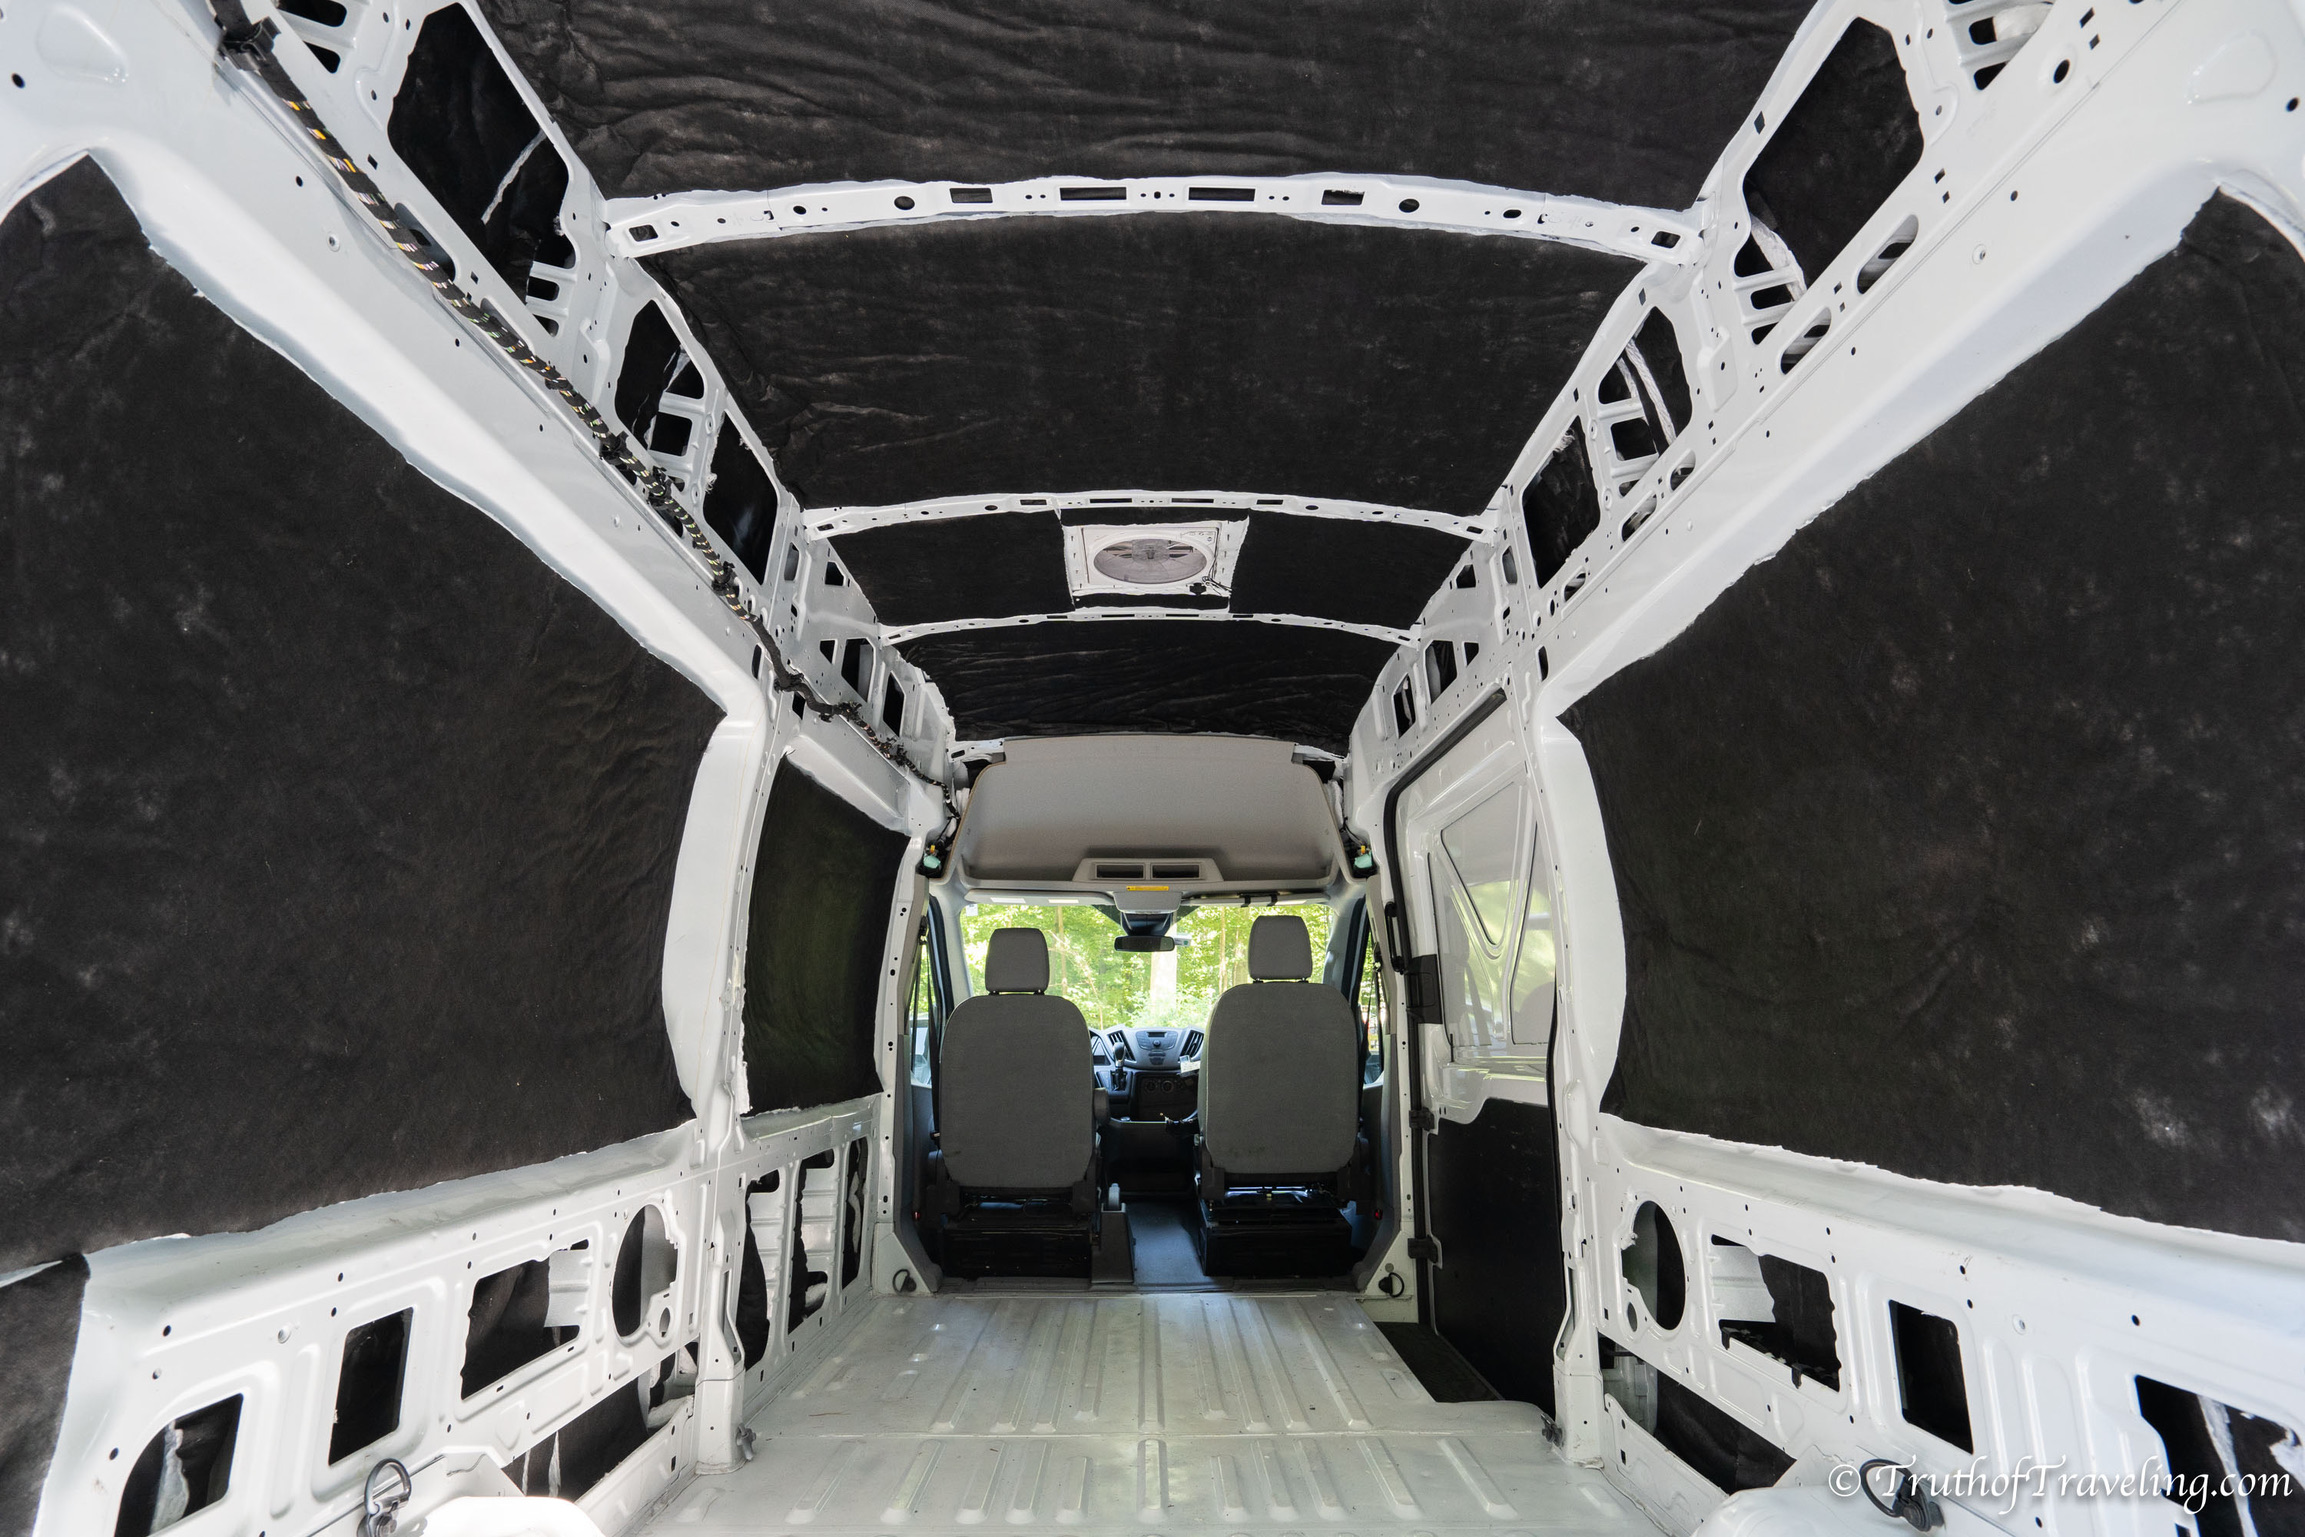
Our first layer of insulation is Thinsulate. We used 3M-77 adhesive spray on the white side of the Thinsulate and pressed it onto the metal of the van. It stayed for almost 4 months before we put up our walls and ceiling so the adhesive spray definitely works!
You can cut it with scissors, however, it is pretty tough so you need a sharp pair of scissors so you don’t end up destroying your hands.
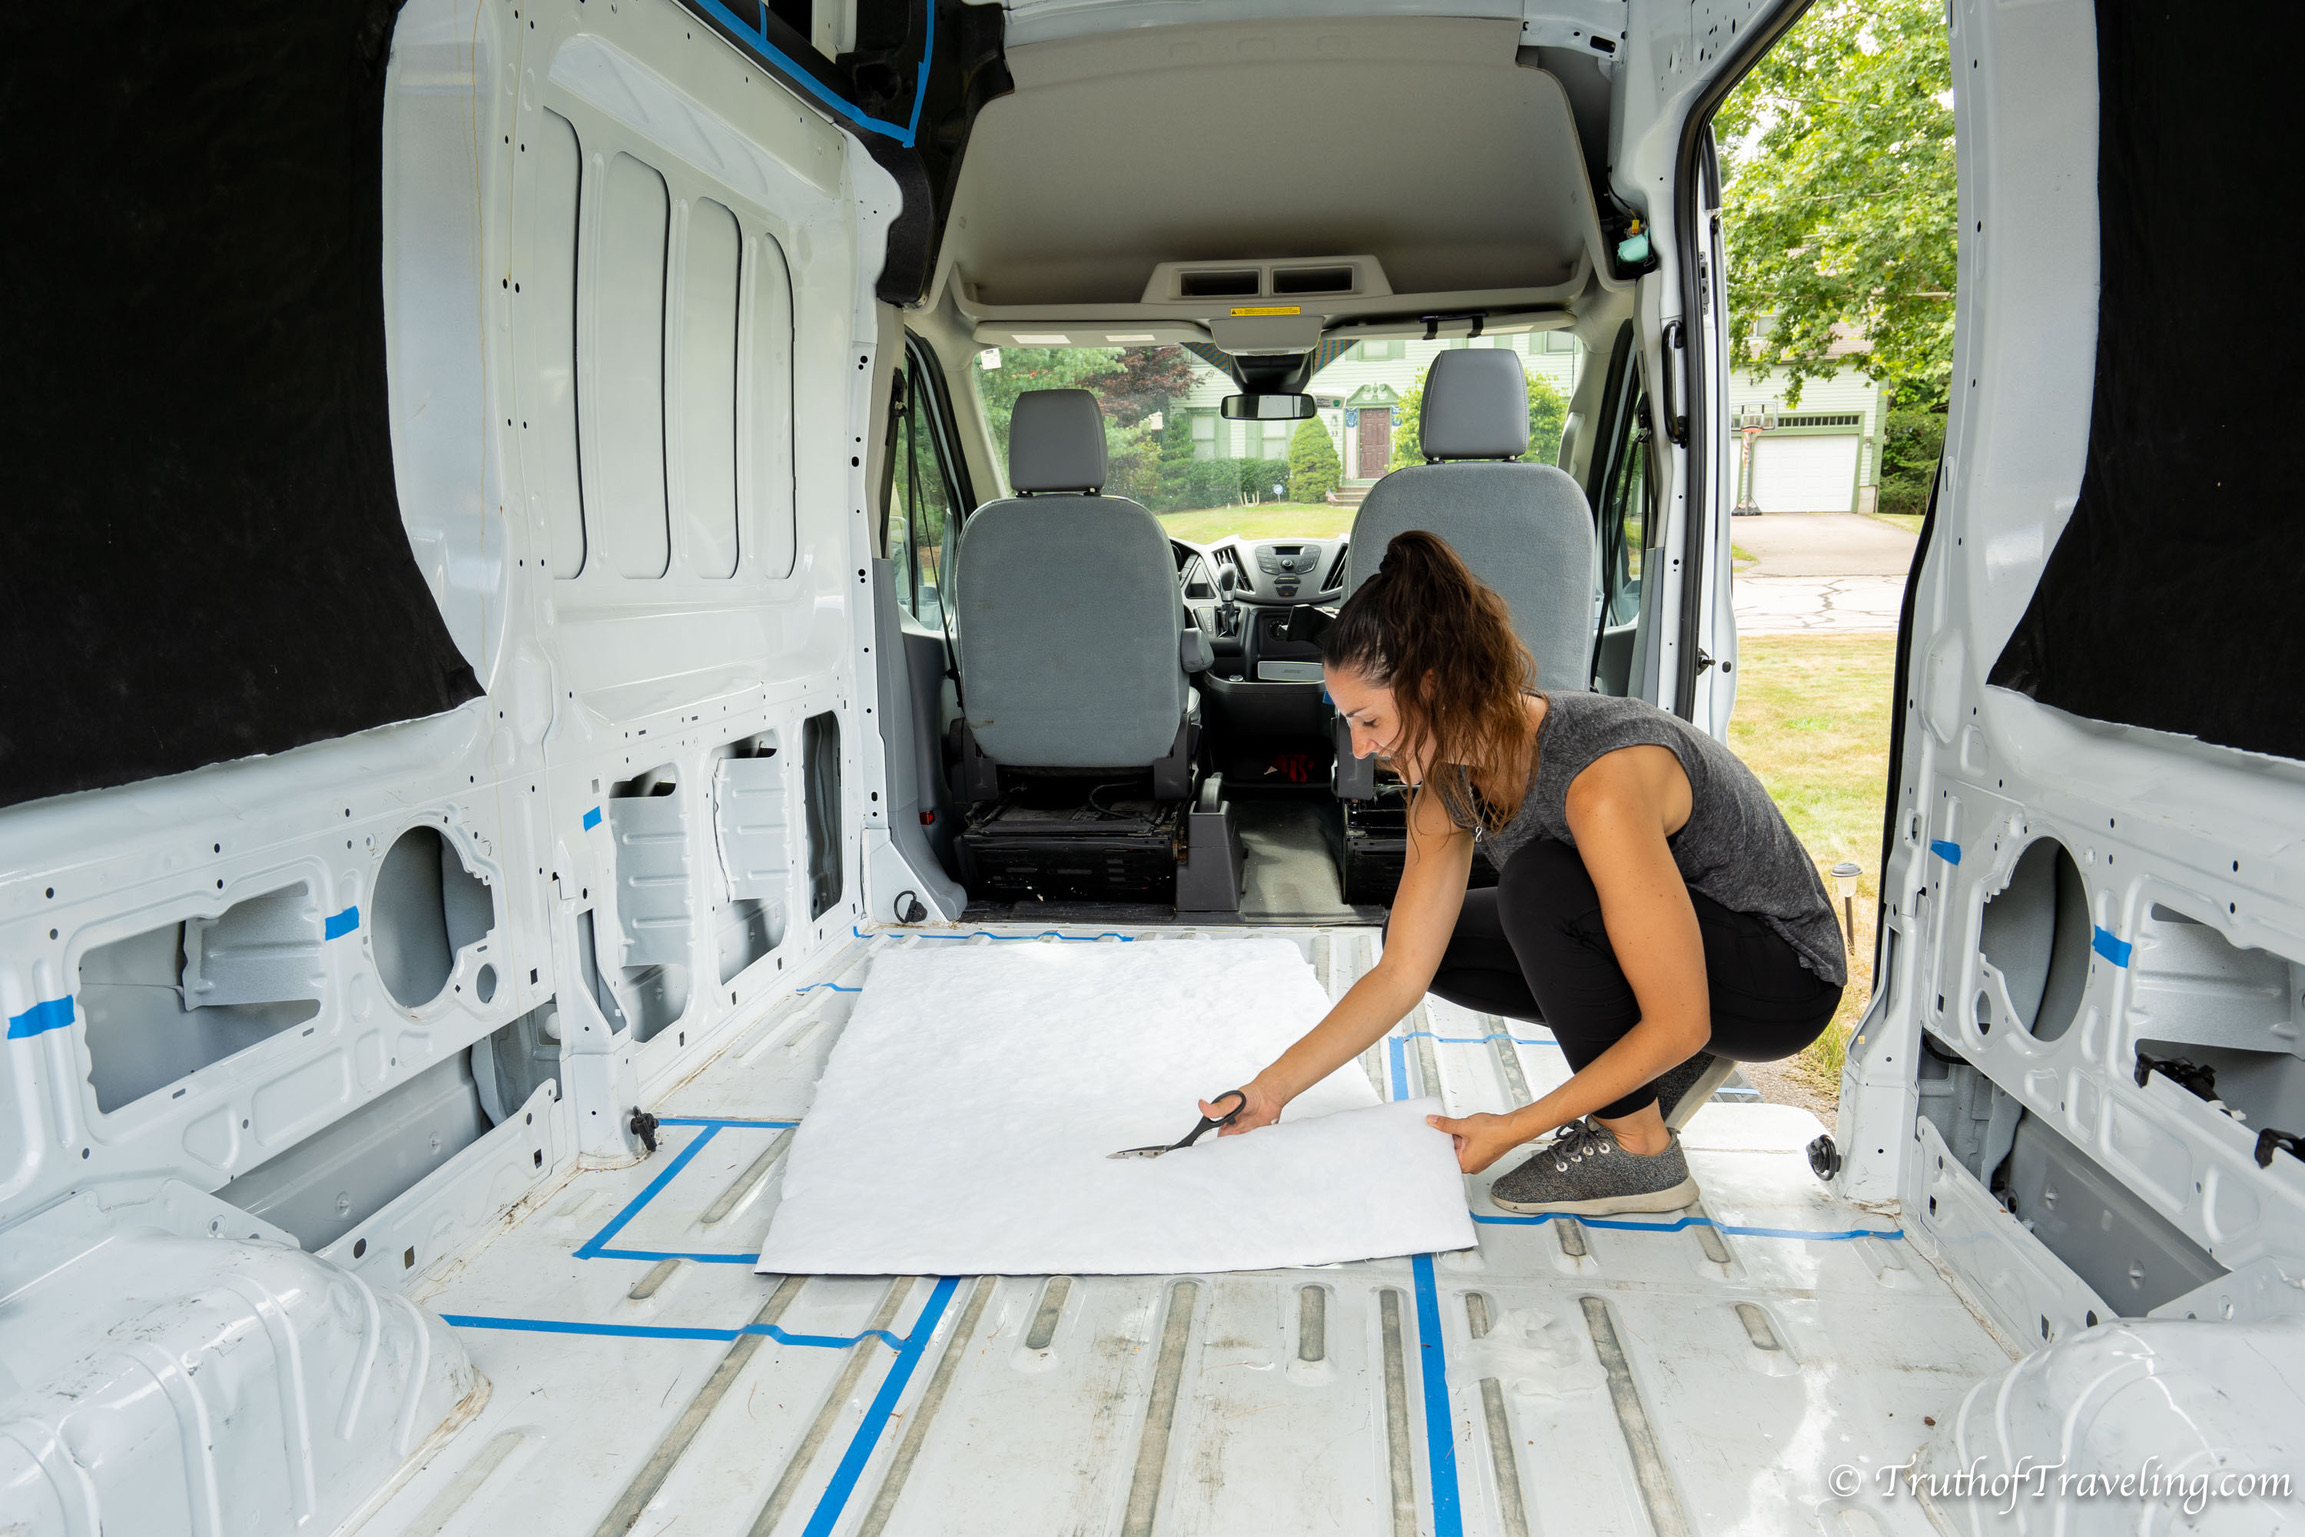
We ordered a 40’ x 60” roll of Thinsulate. For our 148” wheelbase Ford Transit it was enough and even gave us a little extra to use for our back window covers.
Here are the approximate sizes of Thinsulate pieces that we used for our 148” Ford Transit:
- Headliner: 53” x 29”
- Side Panels (3): 61” x 34”
- Top Side Panels: 12” rectangles
- Roof Channels: 3 1/2” strips
We also used Thinsulate to insulate the roof of our van. We simply cut pieces into rectangles to fit between the roof channels.
Layer 2: XPS Board
Next we used 1-inch XPS board on both sides of the van as well for the floor insulation. We used 1/2-inch XPS board for ceiling insulation because we didn’t want to loose too much height inside the van.
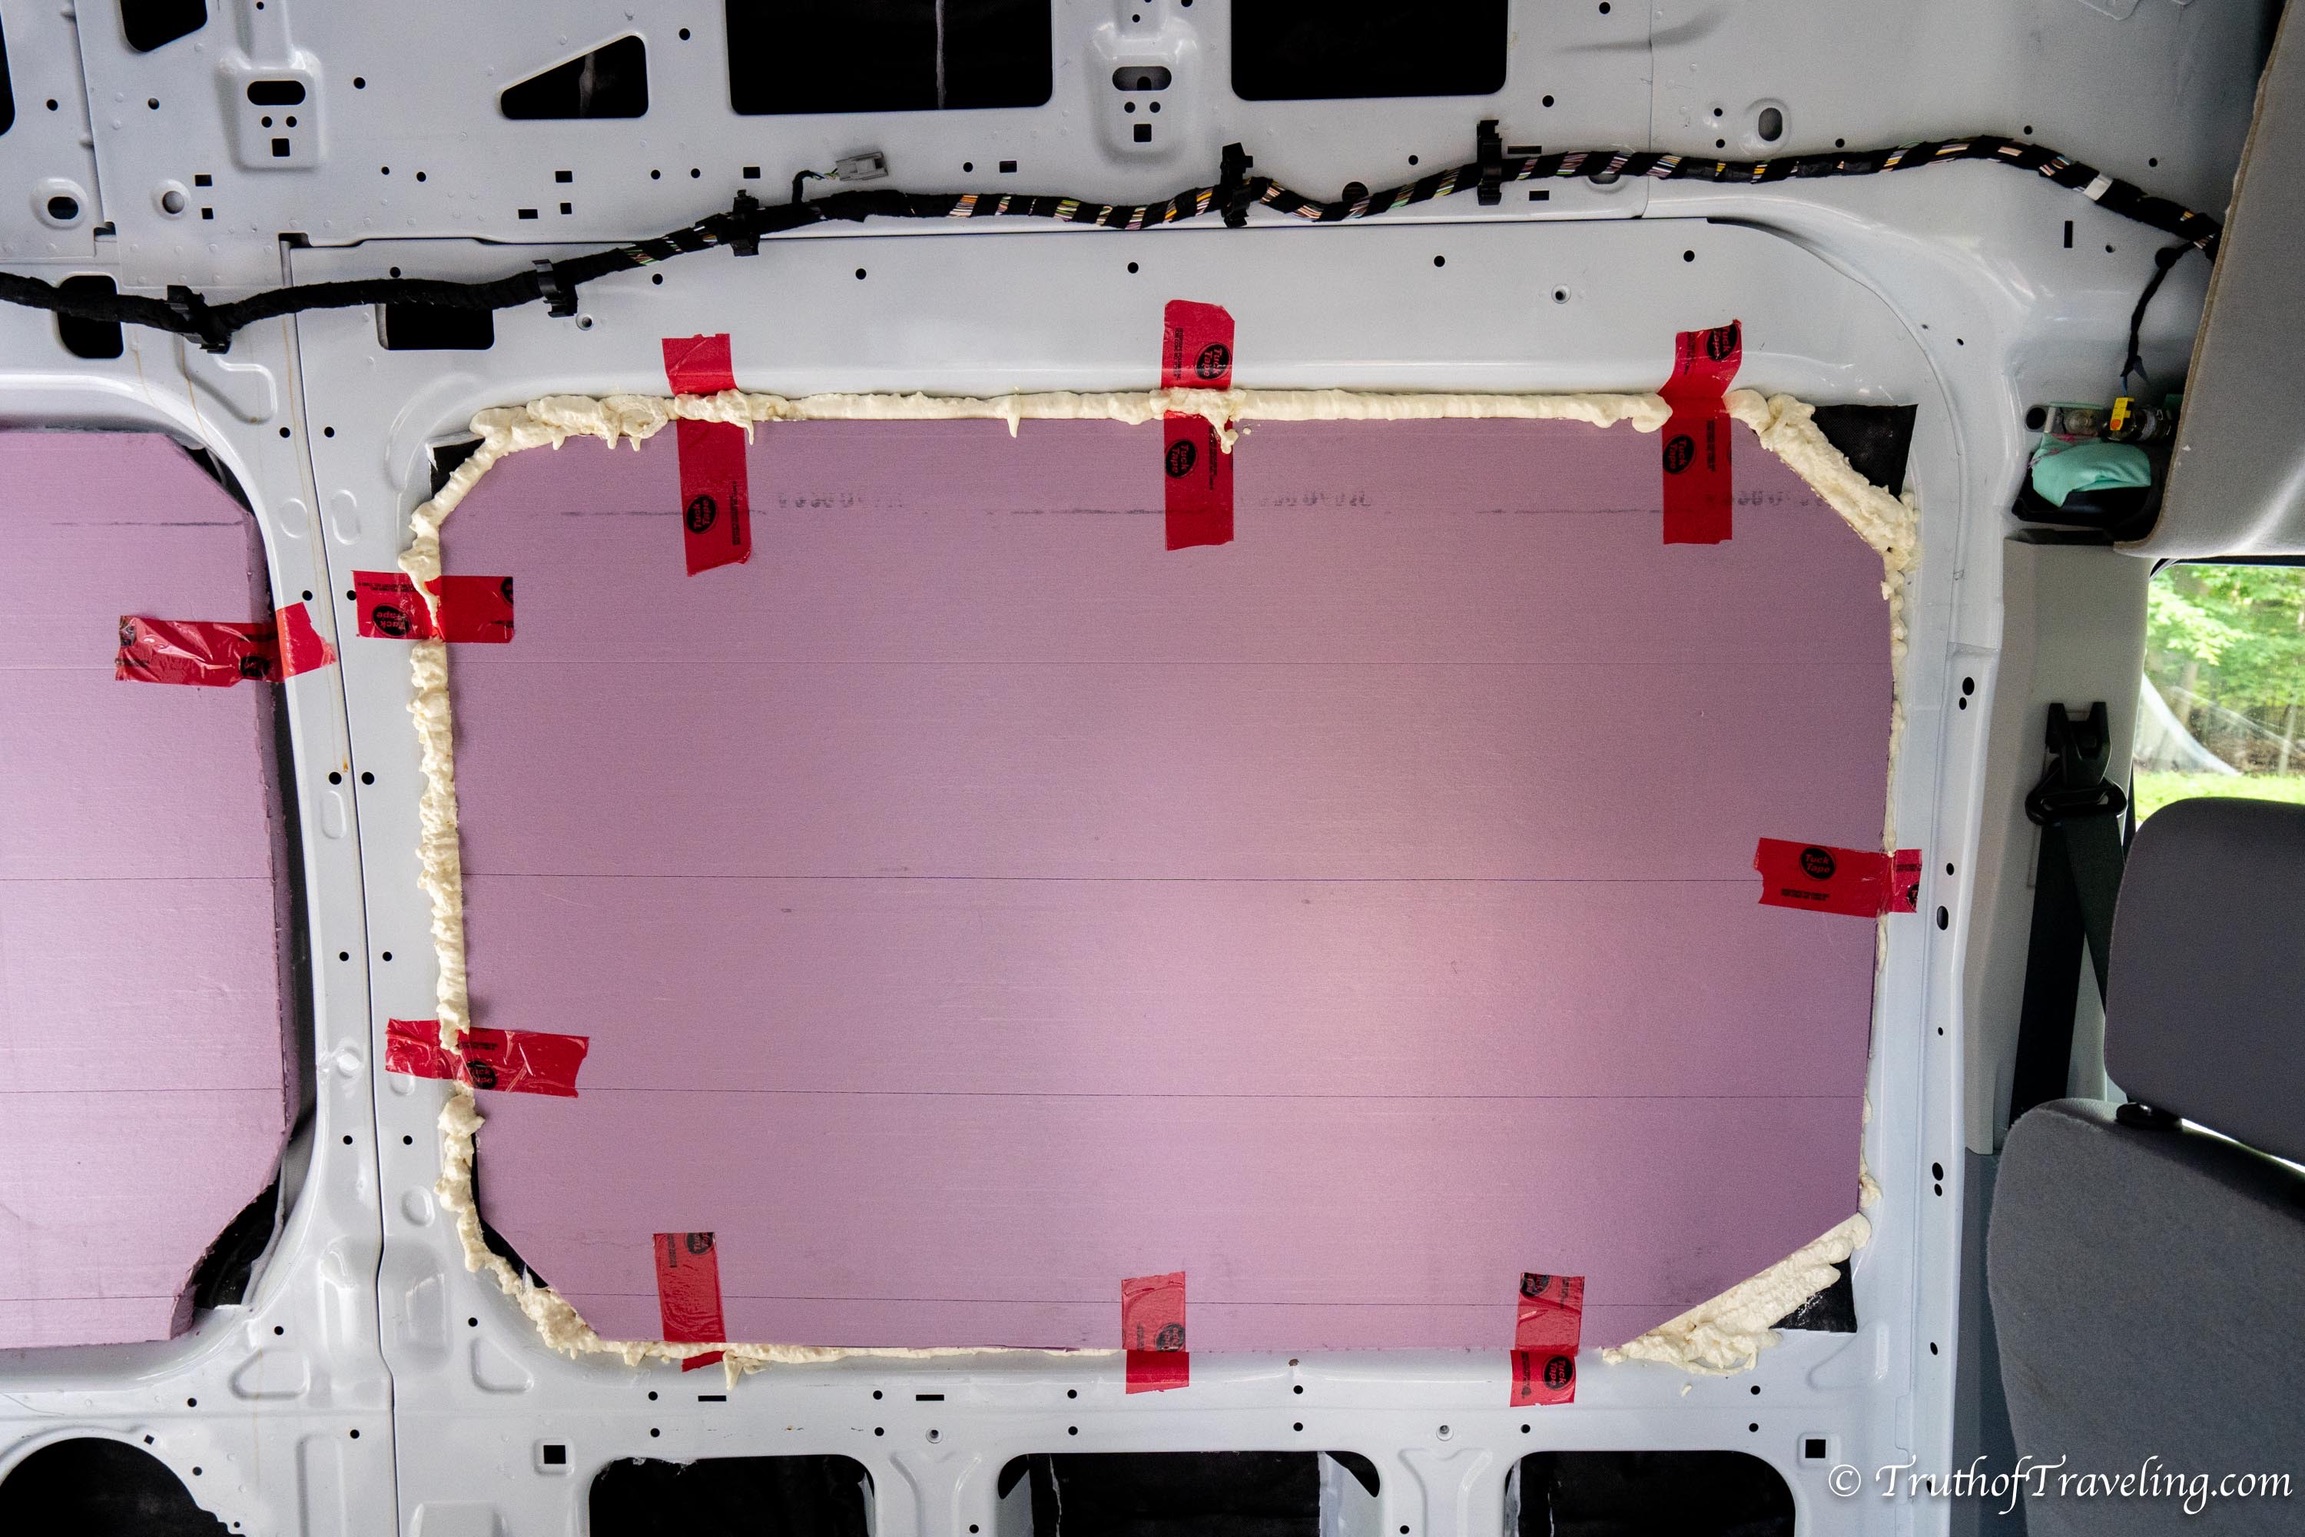
The biggest disadvantage to using the XPS board is that it was a little tricky to fit rigid foam board pieces in a curved van.
- You can cut it with a box cutter but you definitely want to lay down a painters tarp or something because when you cut it a million little pieces will get everywhere.
Here are the approximate sizes of XPS board pieces that we used for our 148” Ford Transit:
- Drivers panel: 62” x 34”
- Drivers back panel: 51” x 34”
- Drivers bottom panels: 9” x “24, 12” x 24”, 9” x 24”, 12” x 18”
- Passengers back panel: 62” x 34”
- Passengers bottom panels: 12” x 18”
We used pieces of Tuck Tape Sheathing Tape to hold up the large pieces of XPS board. However, it’s expensive for it literally being tape and honestly it is hardly sticky. It’s sheathing tape so it’s supposed to be really durable, however, we found it came off almost immediately after using it so we wouldn’t recommend it.
We applied Great Stuff Gaps and Cracks along the edges of the XPS board pieces. It both held the board in place as well as sealed up gaps around the edges.
- One thing to note about using XPS board is that it can squeak really bad if it rubs so we wanted to make sure it was secured especially since we’ll be doing lots of driving!
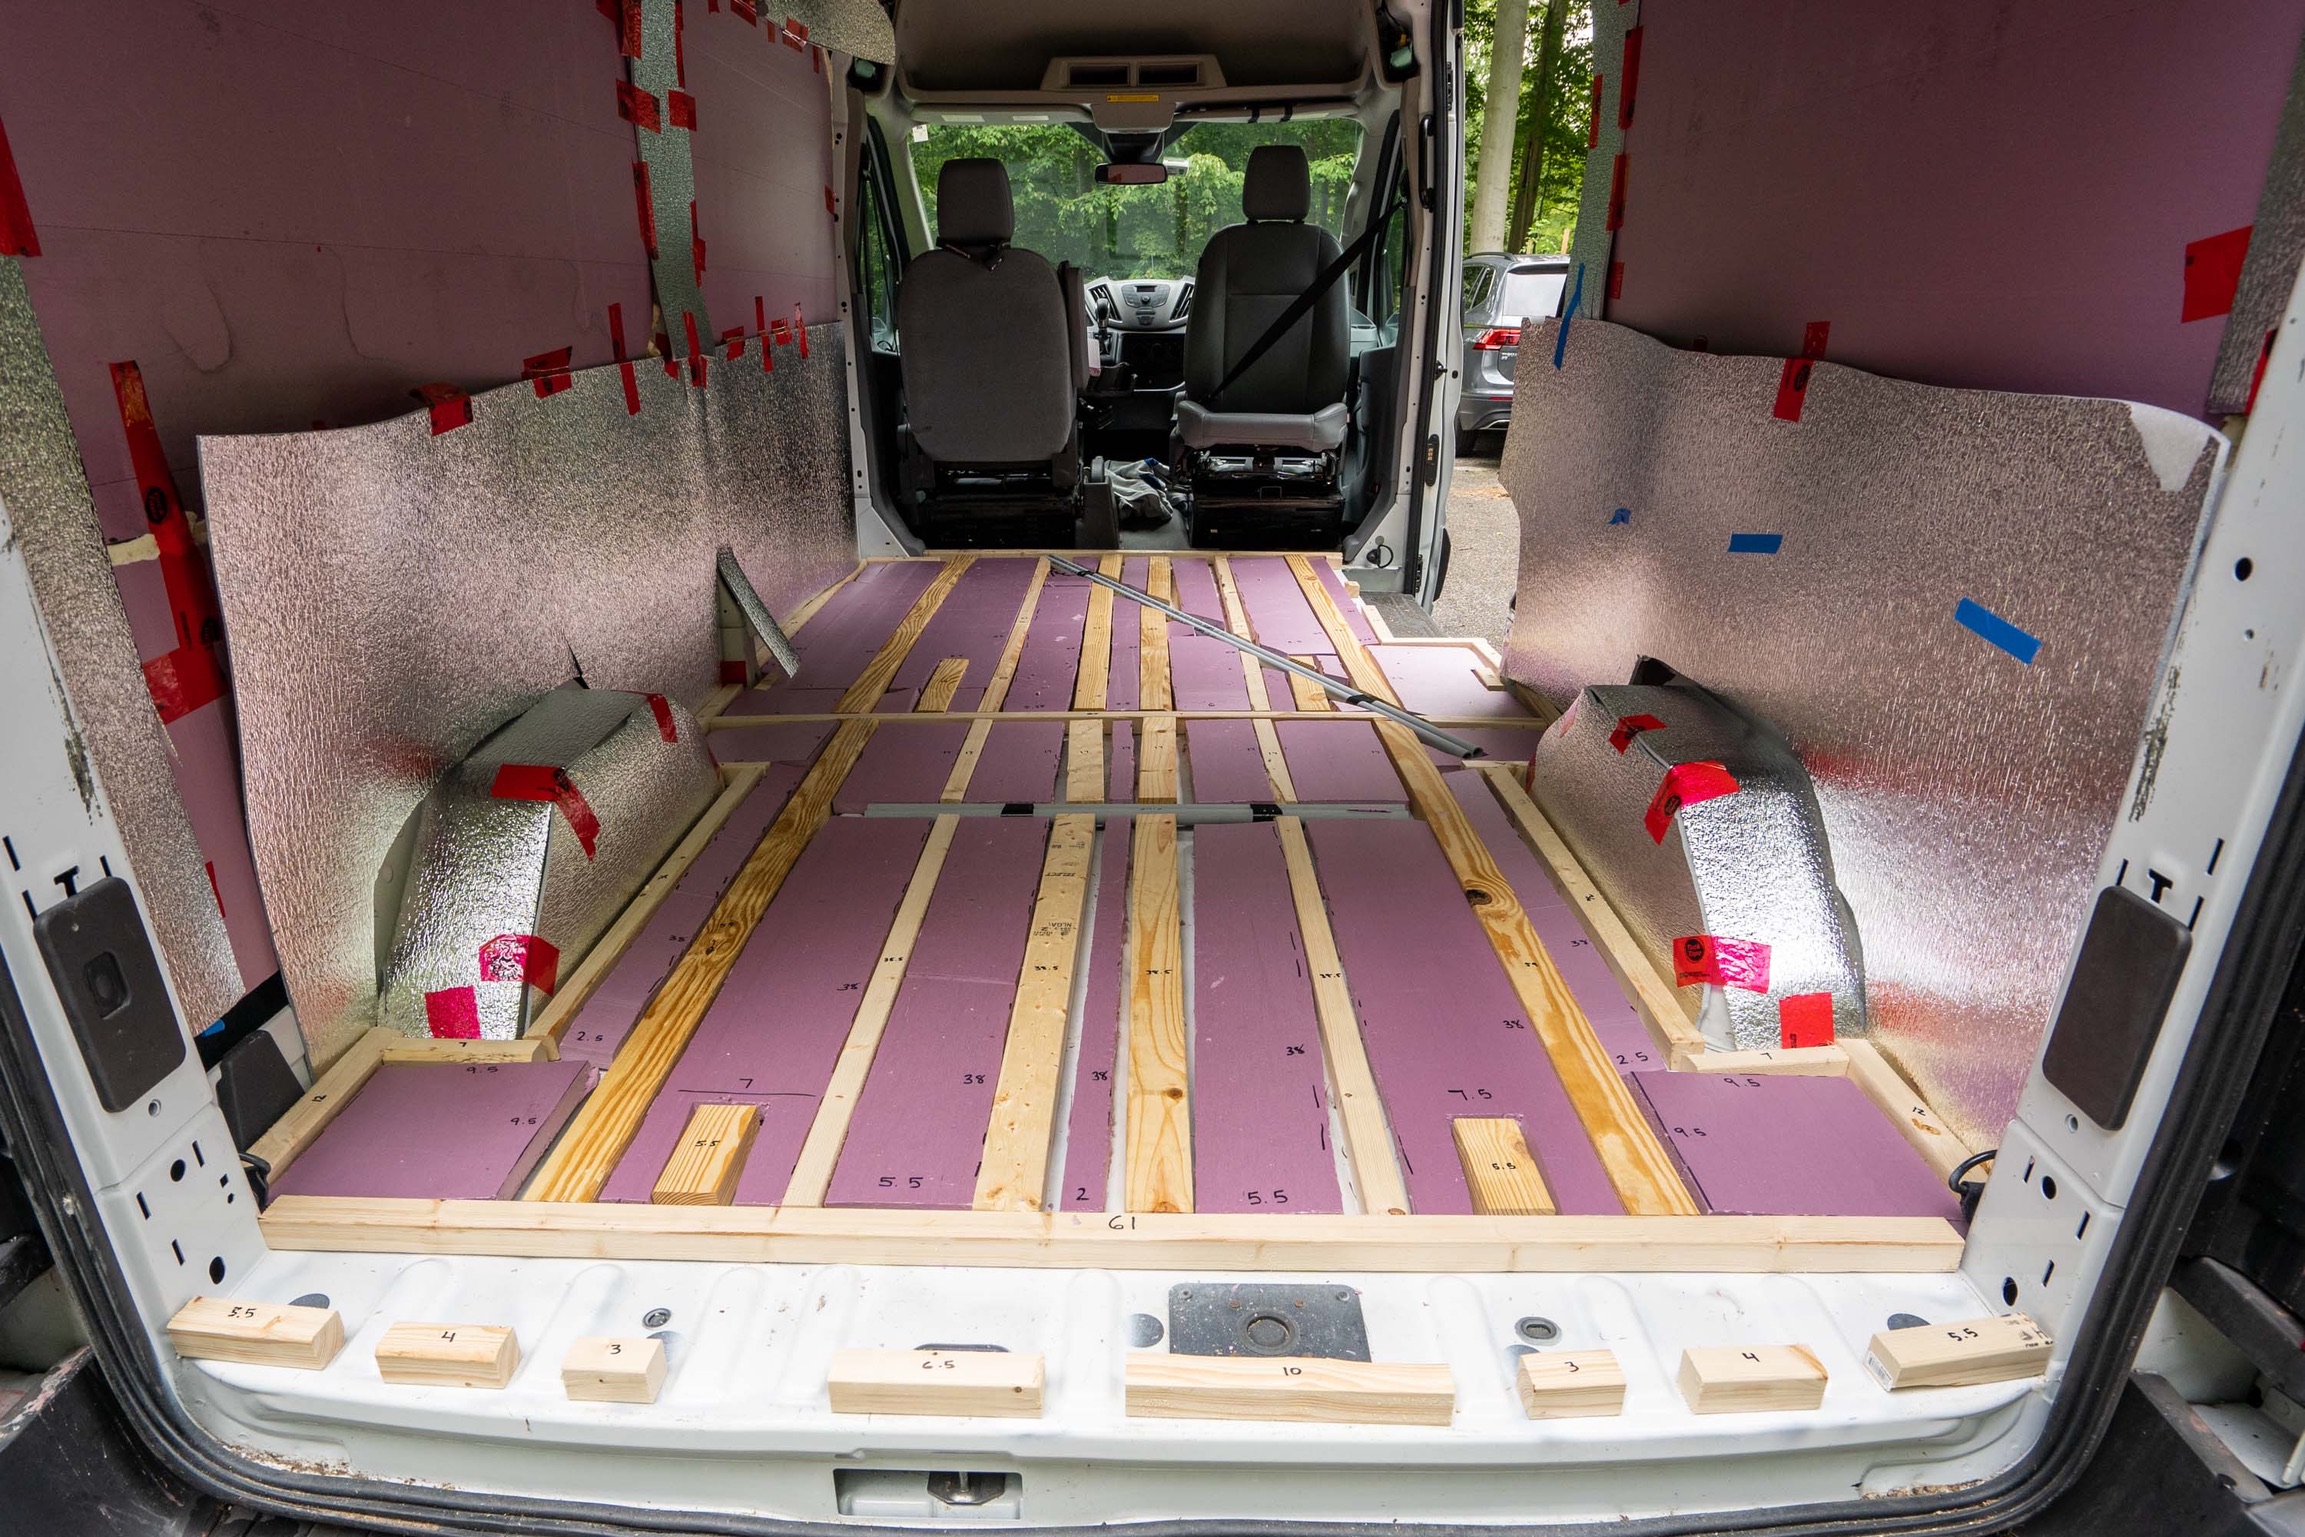
We also used XPS board to insulate our floor. We ran 2×2’s and 2×4’s as floor supports and then fit pieces of XPS board in between the wood for insulation. The XPS board pieces ranged from 2-7 inches depending on the gap between supports.
Cutting the XPS board into pieces for the floor was really time consuming because they all had to fit perfectly. It took a long time and had to be precise in order for our plywood subfloor to sit flush on top. But in all honesty when we’re in cold temperatures the floor is pretty cold even after all the floor insulation we put in. Who knows if it would be a lot worse without it but it definitely is not as warm as we thought it would be!
Layer 3: EZ-Cool
The last layer of insulation in our van is EZ-Cool. This is the part in the insulation process when the inside of your van starts to look like a spaceship. We ordered a 4’ x 25’ roll of EZ-Cool that also came with 25’ of insulation tape to install the EZ-Cool.
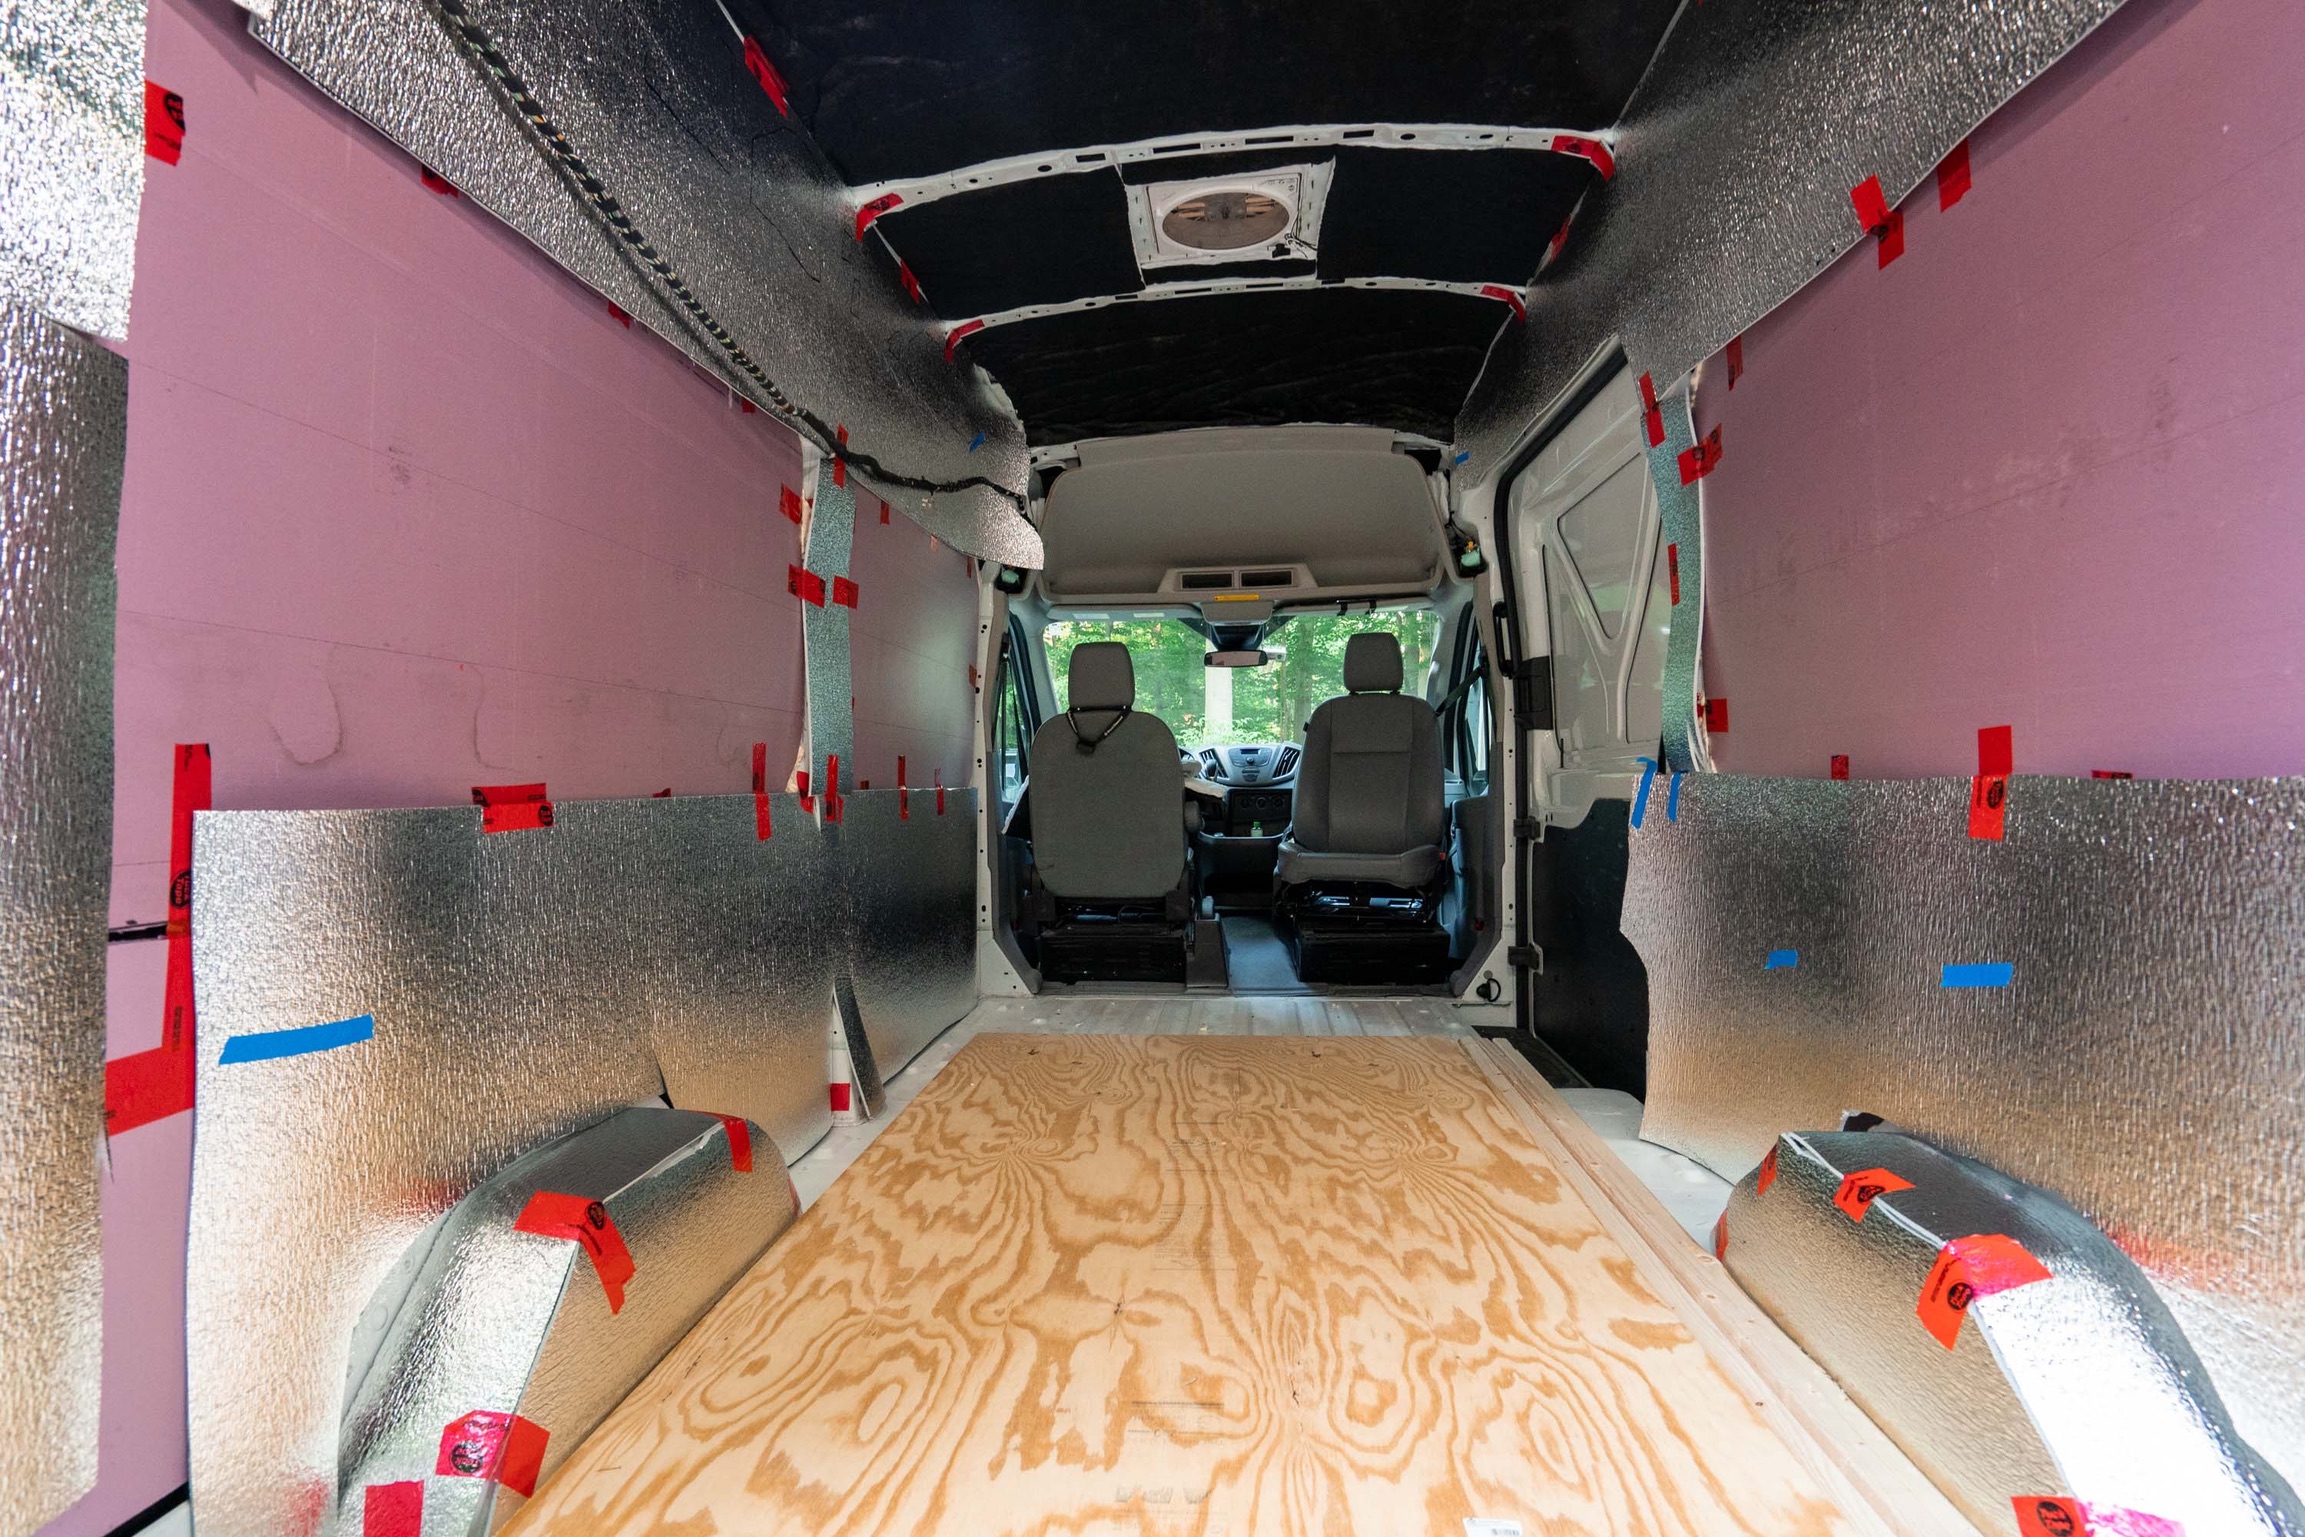
We basically put EZ-Cool along any of the exposed metal such as the side channels that we couldn’t insulate with Thinsulate or XPS Board.
- Remember you ideally want a gap between the EZ-Cool for it to work correctly as a radiant heat barrier.
Here are the approximate sizes of EZ-Cool pieces that we used for our 148” Ford Transit:
- Drivers top: 125” x 22”
- Drivers bottom: 125” x 28”
- Vertical Channels (2): 28” x 9”
- Passenger top: 72” x 21”, 53” x 13 1/2”
- Passenger bottom: 72” x 28”
We used the 48′ x 25″ roll of Reflectix to make all of our window covers for our back windows as well as for the front cab of the van. They absolutely make a difference in keeping the cold air out on chilly nights and keeping the hot air out on really hot days.
How Much Does Van Insulation Cost?
Here is a breakdown of how much our van insulation materials cost. Keep in mind you can choose to insulate less or more which will of course change the total cost. We are really happy with how insulated the walls feel in the van! The floor definitely does get cold but if we hadn’t put any we do think it would be a lot worse!
| Insulation Material | Quantity | Total Cost |
| Thinsulate | 1 40’ x 60” roll | $415 |
| 3M-77 Spray | 3 bottles x $9.99 | $29.97 |
| XPS Board | 4 1-inch boards x $19.55 1 1/2-inch board x $14.90 | $93.1 |
| Great Stuff Gaps and Cracks | 12 bottles x $3.78 | $45.36 |
| Tuck Tape Sheathing Tape | 1 roll | $14 |
| EZ-Cool | 1 4’ x 25’ roll | $85 |
| Reflectix | 1 48’ x 25” roll | $43.25 |
| TOTAL COST: $725.68 |
